Long Bob Hairstyle For Black Women Tutorial
- Posted on 15 February, 2017
- Ponytail Hairstyles
- By Anonymous
For all the products I used in this video click here --- http://goo.gl/3m2ggQ
WEBSITE --- http://www.MrsRutters.com
FACEBOOK --- http://www.facebook.com/MrsRutters
INSTAGRAM --- http://www.instagram.com/MrsRutters
SUBSCRIBE TO OUR EMAIL LIST FOR NEW VIDEOS & EXCLUSIVE OFFERS!
http://www.MrsRutters.com/Subscribe
Buy My Books, DVDs, and T-Shirts Visit
Website http://www.howtoblackhair.com
Personal Instagram: http://www.instagram.com/breannarutter...
Thanks For Watching!
DISCLAIMER: All suggestions, tips, prizes, techniques and advice given are for informational purposes only and should be used at your discretion and best judgment. I highly recommend conducting strand tests when trying or using new products, hair appliances and product mixes. I am not responsible or liable for adverse or undesirable effects including hair loss, hair breakage or other hair/scalp/skin/body damage as a direct or indirect result of the suggestions, tips, prizes, techniques and/or advice given.
FTC: I am not representing, being paid by, or endorsing any of the product brands in this video & I purchased everything with my own money - UNLESS OTHERWISE STATED in video/blog content. There are links to products that might be helpful based on the content of this video/blog. Each of your purchases via our Amazon affiliate links supports our cause at no additional cost to you.
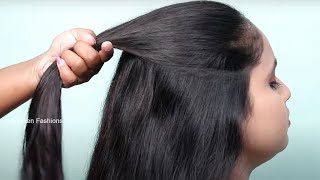
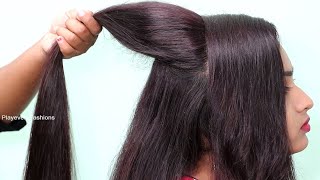
Hello, ladies, this is Brianna from Miss British comm and for this style I wanted to show you how I achieved this soft wavy elegant. Look using mrs. rutter's, hair extensions from Miss lettuce, calm. You are going to need three bundles of 22 inches of the mist, runners and luxury body wave hair extensions, the supplies you are going to need to color your hair will be 20 volume cream developer, as well as quick, blue, lightning powder. You will need a mixing bowl for your bleach and developer as well as haircutting scissors and two coloring brushes. You will need Revlon color number 20 for your roots and also color, safe, shampoo and conditioners. You will also need hair coloring, gloves now begin by adding one scoop of bleach powder to your bowl as well as 20 volume. Cream developer now use your brush to continue to stir until you reach a creamy consistency and, along the way, keep adding developer until you get a very loose consistency that you see here now, after laying out your hair extensions begin by bleaching the ends of the hair, We are only going to do this about a third of the way at this point and then you're going to do the feathering technique to break up that harsh line. So you don't see a harsh line from the bleach to your hair. At this point, you're going to do the striping technique by bringing more color up against the length of the hair, so we're going to have about half of the length of hair bleach. Now, after mixing your black hair, colors you're, going to add it to the roots of your hair, and this is optional. If you want the roots, darker, now continue to bring more color down where the hair meets the bleach. So you don't miss any spots after washing and air drying our hair. This is how the hair color looks with only two bundles now at this point. This is how your braid pattern should look when you're creating your? U part wig, all the braids are braided to the back, and then you have loose braids. As you see in the front where your leave out will be, you want to roll your braids up, and then you want to use a bobby pin to pin it down to your braid pattern. This is one of the easiest ways to secure your braid pattern base when you're wearing a. U part, wig. This is how your braid pattern should look so far before you install or create your wig now to create the wig. You want to measure your leave out. Width and length, as well as measuring a round to know how wide the actual you part section, needs to be now use an actual eye pencil or lip liner pencil to put marks on your dome cap. This determines how wide to leave out is as well as how long to leave out it and then connect those areas to form your. U parts now you're going to secure the needle on the extensions with your nylon thread and then you're going to secure it to the dome cap always start sewing on a very edge of your wig. Don'T cap now, as you loop it through you're, going to continue doing this looping technique, as you see here throughout the entire process, bring the needle through wrap it around the thread twice and then pull it up to create a knot, keep repeating the same technique! All the way, along the length of your extension now after sewing down that first bundle of hair, I went ahead and stone to down, and this is how full it looks with literally two bundles. On the last bumble, I want to show you the fold-over technique to prevent you from having to cut through your extensions. So you fold it back in the opposite direction and begin stitching it down so now begin removing that excess cap, because the area that you're cutting off from the cap is the area where your Levi's will actually be, and, as you can see, this is how it Looks so far always secure two nuts on every loop of the column, and this is how your wig should look once you have finished, creating it so now. This is how the you part looks after I've, worn it for a little while, and I've also added some layers throughout the length of the hair. As you can see, we still have so much color here and when you're wearing these hair extensions, it will blend beautifully with your leave out now at this point, you're going to go ahead and begin brushing all of your hair to the very back of your head To create a ponytail, now after you create your ponytail you're, going to slide the ponytail holder down the length of your hair, because this determines how short you want your link to be. You pin your you part to your mannequin head and begin cutting off the very bottom of that ponytail. We want to create a blunt with shoulder-length hair style, so as you're cutting you don't have to be perfect. You just want to clean it up as much as you can, so you don't have to do much cleaning up with your clippers now comb with your fine toothed comb down into small sections and then you're going to use your clippers to actually cut off the ends Of the hair, this is to give you that salon sharp appearance to your look, not when you comb again add some hair from the previous sections so that it serves as a guide for how much hair you need to be cutting off when you using clippers to Clean up the ends is literally so easy number one, because you just got ta form a straight line and number two, because the hair is so soft. It literally cuts like butter, it's so easy to cut this hair. This is how the you part looks once I finish, cutting it and, as you can see, this hair is bouncy and fibrous. Now, after installing it. This is how it looks so far, and this is the exact length I wanted to achieve. I wanted to a blunt but sharp appearance to the ends, and I wanted it to be shoulder length for this. Look now. I'Ve already curled most of my hair, and I literally have three sections left, because I want to show you how easy it is to achieve these waves, they're so simple to do and, as you can see as well, most of our color has to preserve. So this is going to look so beautiful once it's done in style, we're styling you're going to need your favorite hairspray, your favorite edge control, as well as some heat protectant to put on your hair, now go ahead and release that section and begin detangling or combing Through with your comb and then when you add heat protectant, you want to mostly focus on the ends of your hair. So this is the oldest part of your hair, and remember, he protected is to protect your hair and extensions from heat damage. Now, after grabbing a medium sized section, you are going to open up your curlers and add the hair between the blades of the kermis and then as you're rotating it. You want to make sure that the hair is sliding down the barrel so that, when you roll it up against your hair, you're able to reach the top of your section release the curl into your hands and use a clip to hold that curl in place. As it cools so now, I'm going to show you on another section, really quick in the back, because it's the same process we're just going to slide the hair, so the rule the barrel and then you're going to make sure that you're sliding it down the length Of the barrel so that you can roll it up against your hair. So now, after you begin releasing your curls, you first want to come to the section and then spray hairspray along the length of your curl to achieve this is wavy. Sexy, look and while our ladies here are waiting, hair style has been achieved from start to finish. Using mrs. rutter's hair extensions from Miss brother Scott
Comments
Don_ Veinte: Wonderful tutorial!!
gt3wells: Gorgeous!!
Esther I. A.: I luv your tutorials, you are really blessed. I have a request, could you do a tutorial on how to cut weave to a short style (pixie hair cut) with an 8" weave. I saw a women showing it but it's just 1 minute. Could you do a detailed one please. Thx very much.
LeSha baby: Can u do a tutorial on clip in extensions please
Camirra Williamson: this style is too cute!!!
miss peach: your videos are so helpful u are so talented
bricbrac28: Very pretty
LeSha baby: VERY CUTE
flordelSOUL: Couldn't we purchase shorter lengths instead of cutting beautifully long bundles?
Keyanna Lee: I love you bre!
Aaliyah Anthony: what did you do to your hair?
the top best 11: hi
Rynne Carnivora: r you crazy?!?!?!! does noone realiaze she uses 22 INCH bundles for a 14 inch style?!?!?! wtf was the point of that .....such a waste. -__-