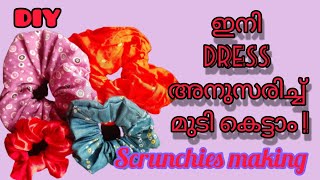
Spike Hair Bow On A Ponytail Holder
- Posted on 26 December, 2013
- Ponytail Hairstyles
- By Anonymous
Spiked hair bow on a ponytail holder. Very easy and fun.
Hello hi: this is Cassandra from little mama hair bows today we're just going to make this perky hair hair tie. Oh isn't that cute! This is really cute this one here that I made I made it. I cut my spikes four inches and this one like you. I cut that one five inches. Okay, let's get started the things you're gon na need, like I said, we're gon na, do the five inch one. So I have strips of ribbon. These are seven. Eight seven eight inches wide they're five inches long. Okay and I just did a variety you know matching. You can do it if you want. If you like a lot of colors, you can make a lot of colors. I actually - and I have eight strips eight strips - that are five inches long. I have a hair tie. Okay, I have a zip tie. Okay, and this is um. This is like a micro mini, zip tie, and I cannot tell you where to find them, because I happen to pick them up at an estate sale and there was like gross of them. So I thought when I saw them, I thought well. I could use those in my hair bows, so that's where I got these and I'm sure you can purchase them somewhere. So now that you've seen I needed to look out for them. Okay, and then I have you need needle with the red which are not at the end. Okay, I have two inches 3/8 inch. This is black ribbon you're gon na need that, naturally, you need your scissors and you need your handy dandy, glue, gun, okay, okay. Well now, let's get started: okay, let's just organize this okay. The first thing I want to do we can do. Is we're gon na and you're a need? Your heats it. You need something to heat seal the ends of your ribbons, I'm using a lighter. You can use fray check. You can use whatever you so choose to what I'm gon na heat fill at the end of this. This three-inch, I'm gon na just heat, sell it okay and we're gon na set that to the side. Okay and now what we're going to do we're going to begin our making our or ends like this? You can do them any way. You want. I just kind of like that. Look, the way that is and how I do that is, I fold the ribbon. Not. I don't crease it, you know, I just fold it and then I fold it again try to get it as even as you can. You know it does have to be perfect and then I take my scissors and then I just cut to a point and there you see, I have the point in it, so I'm gon na do that. To all of these, you do the same to yours. Remember you have eight of them you're just going to fold them and you're just going to give him a little snip here and I just love making here both bye. I had a hairball show December the six. When I tell you a solid hairballs at three and four dollars a pop, well, you don't make you know. You sell a lot of hair balls, but I mean like four hundred and fifty dollars and that's just making hair blows in my spare time and I enjoy doing this and I enjoy doing tutorials to show you how I do how what I do. Okay, last one here, my television is pretty loud in the back. Okay, I've got those all cut clean up this little this little pile of corners that I have here get them out of the way. Now I take two at a time I kind of hold up my fist get my lighter ready and I just hate syllables ends, there's what I do and you do the same. Does he still and just take two at a time, doesn't matter what to you take you can take more. You know if you may be more advanced than me. I just take two to make sure that I'm getting a good seal on my ribbons. So that means, if you're doing two at a time, and you have eight ribbons - that means you're going to do this four times. This is a very quick and fast hairball that we're gon na make here. These are the last two and I just selected some ribbons that I think this is the perfect project for teaching your little girls or you naturally have the supervisor efficient using some fire. Okay. Now now what we're going to do now, you can establish whatever pattern that you like for your for your, so I have like two Pink's to my ship run and cutting in the center. I think I'm gon na do pink, polka dot. Welcome to my snazzy. Just plain black, and then I'm gon na give it that color. So that's the one that I'm going to choose on on how to lay mine out. No, my guess it doesn't matter how you laid them out. You laid them out. However, you want yours to be laid out to make yours. Okay, now I'll start at this end doesn't matter what in because you're just gon na be it's gon na work out to be the same, no matter what and you start at okay, just gon na pick them on that, and this is the pattern hair ribbon. So I'm gon na followed the pattern inside in I'm just phoning it in and not necessarily creasing it or anything like that, and then take your needle and red and just ran bot in the center, push it through okay and then just kind of set it down. Pick up your next one pattern: side in okay and then just go ahead and put poke it. Stick it make sure the ends are the same, go on the same way. What I mean by that is, when you look at that, both of my backs are like that or on the like this and then my friends are like that. Okay, so that's what I mean make sure when you put them on you're, not put them on. Okay, number: three, as this is pretty fast, it's pretty simple. It'S pretty! It'S very simple to do! Just just keep. I know it's plain when it's applying a ribbon, it doesn't matter which way you fold it. I just want to make sure you keep all your patterns. Just the same - and you know just got ta - put them right in the center of your ribbon: okay, just just keep poking them right on there last one - and I said this is fairly quick - pretty easy preparation is probably the most time and intensive thing here. So then you take it now and you're going to just pull your thread through. Remember you had it knotted at the end and now you're going to wrap it like one try to wrap right down the center to just. Do it one more time? Three. Now, on the backside of this, we're going to tie it off, I'm just going to put her knot in it. You know how to do that. Just pull your thread for the roof like I just did. Let'S get this moved off yeah. Let me get this off in here, real, quick cuz. I don't want it. I love to hang my ribbon up like that. There we go that's off of there. Okay, sorry about that, tell you not to then I do it and then we're gon na try it again tied again, one more time, one more time: okay yeah they did. We'Ve got that. Take your scissors and just we're just gon na cut it off. Let it drop to the table boom. Okay, you have enough put around there once you put another knot at the end, just in case you're gon na make another one, and you have enough thread there to do that. You know you throw it high over long. You put your thread on your needle. It'S truly up to you. You know, then just tie a knot on it and put it to the side for your next project. Okay, you can start moving these around if you like, just kind of fluff it out in that pretty look at that already and I named complete done yet. Okay, now we're going to take, we want to add our little head that little rubber band to the bag, so I'm gon na take a little bit of glue like that. Take a little bit of blue put it on there. I just stuck it right on the back here right there and then I want to take and put this little right there in the center of it and I'm going to take my losses at ty and I'm going to bring it around cuz. I also want that the back of it I want it to show up in the back and not in the front, but I know you then just pull your lives at tie please when I'm just secured it to make sure that it stays. This is just help. Keep them keep the band on. That'S all. I really like these little guys. Okay and then you just snap off the long piece trash it now we're gon na complete our Bowl. We'Re gon na take some hot glue, we're gon na. Stick it right about there above the little zip tie. Okay, we're going to take our piece or two inch piece of 3/8 inch ribbon, we're gon na put it right there and then we're going to bring it around pass it to the front and then we're gon na rip back at the back and we're gon na. Add a little bit more glue right here on top of the ribbon, some people like to wrap the ribbon three or four times around once it's good for me, and then you just add that put that right on there and hold it until it feels and pretty Much you're done. You can just kind of fluff these guys out any kind of what you want. Isn'T that the cutest and not you've made the cutest. Let me that it's a nice little hairball to make that you make it's very fast. It'S quick, economical! Really! If you want to a little girl for her her Girl's Day or whatever day that you want to do it, for you can make her these little cute little hair bows fast, very quick, okay, guys thanks a lot for watching bye,
Comments
Sherika Taylor: The tutorial was easy to follow, and we love the bow. I’m definitely making this bow for my daughter’s trip. Thank you!
Adolfo Gomez: Great easy to follow video. My first time making bows and the came out so great I wish I had started making bows sooner! Thank you so much for sharing!!!
Christine Alaníz Gutiérrez: Yes Cassandra, that is very cute ☺️. Thank you for sharing. I’m going to make some for my little granddaughter. Wishing you well from Texas.
cesar ordonez: Very cute, love the zip tie idea to attach pony tail securely.
Amanda Erickson: I use zip ties and they work GREAT! You can get them at Walmart. Awesome video, thanks for sharing :)
Shortiebop: Loved your video. I was looking for a bow that will stay on my little girls hair. She loves to rip them off. This should work.
Amy Tinsky: Cute and easy instructions. Does the zip tie poke the child's head or is it fairly smooth after covering with the last thin ribbon? I ask bc I am making some for a girl who has sensory problems and feels bumps and itchy things more than most. Thanks for the tutorial!
Cassandra Jackson: So happy that you were able to complete your project successfully and you are happy with it. Thanks for watching.
holly perry: i love them, so easy. thanks
Vicki S young: Thank you. I am going to make some for the Give Away Table at a friend's church. I know these will be a hit!
Cassandra Jackson: I hope that it works. Thanks for viewing.
Michelle Sarvela: This is the best video I have seen on how to make these. Thank you!
claudia petty: I found those small ones at O'Reilly's Auto parts of all places!
Harmony ShelyseB: Can this work with 6 ribbons and this is very helpful by the way
Cassandra Jackson: Yes it sure can.
wildstyle951 enlightened: Zip ties at dollar tree