The Best Curly Wig For The Summer | Ft. Modern Show Hair
- Posted on 21 July, 2022
- Ponytail Hairstyles
- By Anonymous
---------------【Modern Show Hair】---------------
Use code‘Cennedy10’on Modern Show Hair mall for 10% off
[Official IG]►https://www.instagram.com/modernshowha...
[Modern Show Hair Mall]►https://www.mshair.com/?utm_source=ZM0...
[The Same Hair]►https://www.mshair.com/collections/cur...
[Best Selling]►https://www.mshair.com/collections/bes...
[13*6 Lace Front Wigs]►https://www.mshair.com/collections/13x...
[Hair Weave]►https://www.mshair.com/collections/hai...
[Bundles with Closure/Frontal]►https://www.mshair.com/collections/bun...
[Ponytails]►https://www.mshair.com/collections/pon...
Wholesale&WhatsApp:+86 176 3086 0016
------------------ Original ------------------
let’s start connect!!!!
⬇️
IG - Cennedy Elexis
•
Thank you so much for watching
•
FQA
age-25
Camera- cannon EOS M200
Instagram - cennedy Elexis
located - Chicago
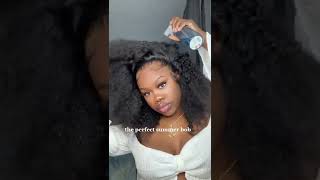
Welcome back to my channel, my name is kennedy and for today's video we're going to be doing a detailed, step-by-step wig install using this beautiful wig from show modern. So thank you so much show modern for partnering with me in today's video. I actually ended up cutting it down a little bit, but it turned out perfect. I feel like something like this is literally like perfect for the summer. It'S messy enough to where you don't have to like think about it too much, and you can literally just like throw it on, and it's just giving like straight vibes. You can dress it up. You can dress it down literally perfect before we get started in this video make sure to subscribe to my channel and then also give this video a like. But let's just go ahead and get started. We are back with another video, so i'm just starting this video off by sleeking my hair into a low bun, so i'm just spraying it with water just so that it's easier to comb through and now i'm just going in and sleeking it into a low bun. Just using edge control and eco styler gel okay, so moving on to the second part of the video i'm just going in with my wig cap and recently i've been using the light brown wig caps. I used to use the light tan ones, but i find that those are just like too much work. You literally have to put foundation all over it and it's just a lot it's time consuming. So i find that this one is better because it's already closer to my skin tones. So as you can see, i've just created two inserts. So i'm just gon na be pulling my ears through here, and this is just gon na help. My install be super flat and then i'm also going in with this olive oil wig grip spray around the entire perimeter of this wig cap, and now i'm just gon na be blow drying it in place just making sure that it has a really strong hole. Okay, so moving on, i feel like the ear part in like installing wigs is always so tricky because it's always the first part of the cap to lift so i always go in with extra glue. So all i did was just add extra glue like right. Next to my ears, just to have a stronger hole, and now i'm going in with my scissors and i'm cutting this off and, as you can see, i am obsessed with this wig spray like the hole is so freaking good. As you can see, it really did just like keep my cap in place and i'm just going in and just cutting off any of the excess lace. I mean any of the excess wig cap, i'm sorry and i'm just applying a little bit more glue by the ear because, like i said that always lifts first, so i just like to make sure that it's down and super secure. So i'm just going in and i'm just tying the remainder in like a bun and i just tuck it underneath and now i'm just taking a thin layer of glue and i'm placing it across the front. And this is just going to ensure that the wig cap is nice and secure, and now i'm just blow drying that into place and, as you can see just like super super like melted and seamless after that, i'm just taking my lace, tint and i'm spraying. This all across my wig cap - and this is just going to basically make everything - look like scalp, okay, so moving on, i'm going in with my bolt hole, glue and i'm just applying a thin layer of this from ear to ear and i'm just going to be Blasting this with the blow dryer until everything dries clear and after that, i'm going in with my second layer of glue and i'm just basically going to be repeating those same exact steps just applying that from ear to ear. Just making sure that i cover all those areas and i'm just blow drying that one more time and now we're going in with our third and final layer of glue and i'm just going to be repeating the same. Exact steps. Applying the glue from ear to ear and just blow drying it, and, as you can see, this just gives us such a clean foundation, and this is just basically going to prep us for our wig install everything basically looks like scalp, and now we are ready to Install our wig so moving on now i'm going to be installing this beautiful wig from show modern hair and before i install it, i'm just going in with more of that lace, tint just to tint the lace so that it matches my skin tone a little bit Better and i love this wig - i love the texture of it and i love the curl pattern and i really appreciate the density that this wig has so i feel, like typically with curly wigs. The hair is usually more on the thin side. So i really appreciate the fact that this wig actually has that thickness to it. Now, i'm just going in with more of this olive oil spray just to ensure that we have a really good hold when it comes to my wigs i like them to be down like i don't want them to be lifting at all. So i'm just going in with more of that spray and just blow drying it. Now, i'm just going in and applying more glue right next to the ear, because i told y'all the ear part is the part that lifts the most. So i just always like to make sure that i'm adding extra glue so that my lace doesn't lift throughout the day. Okay. So moving on to the next portion of the video i'm just going in with my elastic band and i'm tying that down and i'm not tying it too tight, but i'm tying it tight enough to where the band is actually going to like press down on the Lace and now i'm untying that i left it tight on there for like 10 minutes or so, and now i'm going in i'm cutting off these excess ear tabs. So, as you can see, this extra hair on the side is not needed, so i'm going in right. Next to the ear, and i'm just cutting that off and getting rid of those okay. So now i'm just going in and i'm creating small slits of my lace, and this is just going to help us get more of a precise cut when it comes to cutting off the excess lace. So i would definitely recommend doing this method rather than trying to cut your lace all the way across you'll just get more of a precise cut and it's just easier to work in sections and, as you can see, i'm kind of like cutting in like a zigzag Motion, you don't want to cut straight across you kind of want to like wiggle the scissors through to get more of like a like rigid cut and after that, i'm just going in with my tweezers and i'm just plucking, some of the hair out of the front. Just to give it more of a realistic look, and now i'm just going in with my comb and creating soft baby hairs after that, i'm taking my powder foundation and i'm blending this in my lace just to help it further blend in with my skin tone. So now i'm going in and i'm hitting my roots with a hot comb just to make it look even more flat and then i'm going in with my spray bottle and i'm just activating the curls just using water and as you can see, these curls are already Coming to life now, i'm just going in with my mayo curl cream and i'm just putting this all throughout my hair and i'm also going in with my camellia rose leave-in conditioner and i'm just applying this all throughout my hair in scrunching motions. So i'm just taking a little bit more of that powder foundation and i'm just applying this in my lace and i'm just going back in with the olive oil spray and i'm spraying it so that it kind of like it melts together and now, i'm going in With my blow dryer and i'm putting the diffuser on here and all this does is just give my hair more volume and it just allows the curls to look more full and bouncy, and now i'm going in and i'm cutting my hair. You all know me: i literally cut my hair all the time. One thing about me: i'm gon na cut my hair. I just felt like this style would look way more cute if it was short and like shoulder length. So just going in with my scissors and i'm not being too precise, but i'm just kind of going like back and forth, so i'm just going in and making sure that all the pieces are. Even i don't want this to be a super blunt haircut, but i do want everything to be like around the same length and i still want it to be choppy at the same time. So i'm just going in and hitting this with the diffuser one. Last time - and this is honestly one of my favorite steps just because it makes my curls look so just fluffy and big - and it gives me that, like voluminous lioness, look that i'm going for okay, so here's the thing one thing about me is i'm indecisive. So i started like playing around with the side part and i feel, like the side part, is cute right, but i feel, like i kind of want to see what this would look like in the middle part, so i already started playing around with it a little Bit, thank god i didn't put like too much product on it, though, because then it would have been like super molded down, but i definitely feel like a middle part would be a vibe for this wig okay. So this is cute yeah. This is a cute little little vibe. Let me just do the other side, i'm just taking a little bit of concealer and i'm going to put this all along the part i'm just going back in with my hot comb and i'm just kind of like pressing the top of it just so that it Lays flat this is so cute yeah. I don't know it's just something about me in a middle part like if you know me, you know that i love middle part. So anytime, i don't have a middle part. I just feel like a little bit like what is this, but i think that this turned out really cute. What do y'all think comment down below? Would you have kept the middle part or created a side part? That'S all i have for this video. I hope it was informative. Thank you so much for watching if you did enjoy it, make sure to subscribe to my channel and then also give this video a like. But that's all i have for this one, and i will see you in the next one.


Comments
Samuel Yeboah: Wow really sumptuous woman Your hairstyle is extremely looking so gorgeous and mesmerizing That was splendid Keep on beautiful woman
Александр Соловьев: Alles sehr schön. Aber zuerst zusammen die Nummern 10 und 1. Eine verwohntt.online Brünette und eine andered Blondine. Es wäre unfair, wenn ich 4 wählen würde
sjah syst: ❤Only for fans over 18 year⤵️ Alles sehr schön. Aber zuerst zusammen die Nummern 10 und 1. Eine verwohntt.online Brünette und eine andere Blondine. Es wäre unfair, wennk ich 4 wählen würde