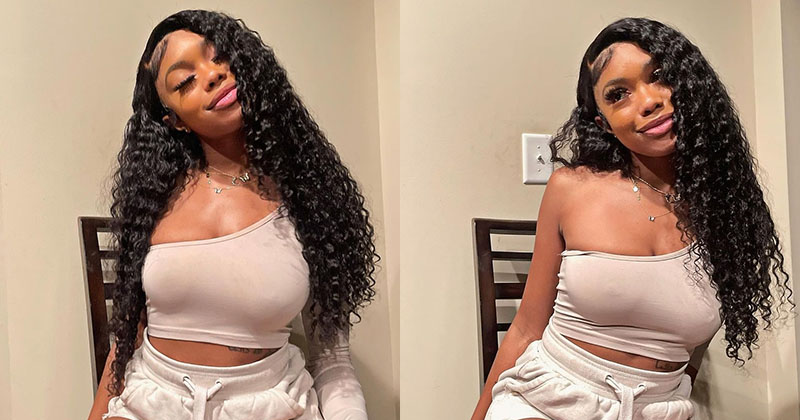
Installing Amazon Wig | Beginner Friendly |Yes 100$!!! | 22Inch Lace Front Wig
- Posted on 08 September, 2022
- Short Hair
- By Anonymous
Link for this wig
https://www.amazon.com/gp/aw/d/B0B45JJ...
thanks for watching
Hey y'all welcome to my channel if you're new to my channel hit that subscribe button if you're not new. Thank you for coming back to another one of my videos. Today, i'm going to be coming to y'all with the wig install with this wig from amazon. The link will be in the bio if you want to purchase this wig. So first thing i'm going to do is bleach. My knots with this quick, blue bleach yo. This is how it should look. It shouldn't be runny, but it shouldn't be too thick. Then i just put the bleach on my knot and i let it sit for 15 minutes next y'all. I take some purple shampoo and i just wash off the bleach, and this is how my lace was looking afterwards. That'S how i wanted it not too dark, not too light, and then i start to pluck y'all. I really don't have a method to pluck it. I just pluck around the headline until i like what i see, but you don't want to plug too much and then you're looking bald at the top, so just make sure you plug to your liking. So y'all. Now it's time to put on my bald cap and first i use got to be freeze spray and i just let that dry and then i use the got to be gel as well. And then i just let that dry as well. Oh yeah yo and don't forget to cut your ears out and cut your eyes off. I only cut out one eye because i was scared. So then i use spritz just to make sure that everything is holding down and then all that white little stuff. That y'all see it's going to start to blend in more now, i'm using the morphe powder to make my cap the right, color and y'all can use any powder. Really you don't have to use like a name brand powder. Just use any powder. That'S going to make your bald cap, look like your skin and then you're just going to start to cut off the ball cap, and i leave that little piece at the bottom hanging. So at the end i just put it on top of my head and then i spray spritz just to make sure that everything is laying down correctly and you have no little lace, sticking up or anything like. I said at least i mean you, don't have no parts of the cap sticking up, then you want to take some alcohol and just clean around your forehead before you about to apply your wig next you're, going to use the powder again you're going. To put it all over your lace, the front and the back, then i put it on my head and i fit it to my liking and i think the next part i'm about to do is cut off the excess lace and i make it like fit around. My ears and y'all at first i was going to like sew up the back, because this wig was too big. But then i seen these little clamps on the back of the wig and i just took one clamp and i put it over to the other side and it was tighter. So that's what i did and i showed y'all doing that next, i'm just going to make my middle part and then i'm going to pluck the part out y'all, sometimes to get like a more showing part. I just plucked the hair out with my fingers, like i just pulled the hair out with my fingers and that's how the part was looking after i did both plucking and i pulled it out with my fingers. Next, i use the walker tape. Y'All quick story. This lady put me onto this walker tape. I was going to get my regular ghost bond, but she said this worked better and it holds underwater and it was cheaper. I was only 13, so y'all can go get it only thing. I have to say about it: it's a little messy like it got all over my hands because it's a really sticky consistency. So i don't know if y'all like to work with that type of consistency. Y'All can get it and yeah it helped. It held really good, though so yeah next you're, going to cut your lace into three parts and you're going to begin to lay your lace down on the glue, don't mind that my glue is still kind of white y'all, i'm really impatient i'll, be waiting till it Turn clear: i'm not gon na lie, but i just blend over anything. That'S like a little white and sticky with some spritz, and i just yeah, i'm gon na show you how i do that and y'all use a comb to lay your lace down brush it back and lay it down there. You have my camera cut off, but you're going to spray spritz over top of what you just laid your lace down at and then you're gon na put your elastic band on then i take my wax stick and i begin to lay down my wig with my Hot comb, now i'm just taking off the elastic band and i'm going to take my wet stick again and begin to hot comb, the edges of the wig. Now it's time to cut the lacial and i recommend using a razor, not scissors. The raisin made is so much easier. Not gon na lie next you're going to take alcohol and you're just going to clean up where you just cut it next you're going to start to begin to part out your edges, and your this part was a little hard for me, because i hate doing edges And plus i never did edges on the frontal. I always said as edges on closures and not front tools. I cannot duck, but you just go and pluck out your part and make it more visible and yeah. Then i begin to hot comb, my edges down just to make them flat and hot comb the edges one more time then you're going to take some makeup and put it on that lace. Just to make your lace blend with your skin, then i spray some spritz around one more time and i put on my elastic band now, i'm just about to take my elastic band off and, as you can see, it's given skin, it's getting melted now, it's time To do my edges and i use olive oil mousse for my edges, i thought i showed it, but i guess i didn't show it. I used the olive oil red mousse for my edges and y'all might just be staying like that. Stuff really help your edges stay. So don't walk, run and go get yourself and that's one side of the edges and that's both side of the edges. Now i'm gon na conceal my part. I use a comb and just some foundation and concealer just to get my right, color and yeah, i'm just about to fix my part and that's it then y'all i went in with some mascara just to make the part a little narrow and yeah next, i'm just Going to conceal my hairline and just make it a little more to my liking, i don't have to do this step. Y'All could stop at fixing your part, but i just like to add my extra little steps and make it look better to me. Then i go in with one less hot comb, pressing it down pressing it all the way down and yeah y'all. That'S it stay tuned for the finished product and that's it. I hope you all learned something from this video. If you like this wig, the link will be in my bio and get. It was only a hundred dollars. Y'All so make sure y'all go tap and this wig was beautiful. I definitely found a gold mine on amazon and yeah. Make sure you like comment and subscribe and i'll see you in my next video bye


Comments
Riss & Twite 4 life: U did a nice job