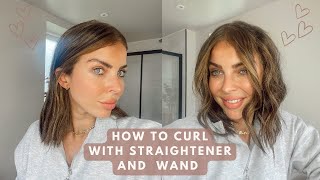
Diy Crown/Halo Braid For Short Hair | Milkmaid Braids Tutorial | Thin, Fine Hair
- Posted on 26 November, 2018
- Short Hair
- By Anonymous
Hey fam! Today I'm showing you (to the best of my ability) how I do my crown/halo braid on my short, just above the shoulders-length hair. This is a French/Dutch braided milkmaid braid, and I'm showing you on MYSELF instead of a model. Hope you enjoy!
IGK Beach Club Dry Texture Spray: https://go.magik.ly/ml/htfu/
Morris Flamingo Bob Pins (1Lb): https://amzn.to/2Al5g9Q
Donate to my channel!: https://www.paypal.me/kackiereviewsbea...
I use MagicLinks for all my ready-to-shop product links. Check it out here: https://bit.ly/34uCpjz
Other Discount Links:
Other Discount Links:
10% off at Glossier: https://www.glossier.com/reps/kackie
10% off at Thrive Causemetics: https://prf.hn/l/K9NlQaL
10% off at Luscious Cosmetics: Use Code KACKIE10LC
20% off at Venics Lashes: https://www.venicsorganic.com Use Code HEYKACKIE
$5 off at Function of Beauty: kevynco.functionofbeauty.com
https://www.talkable.com/x/3I6wPX
$2,500 off your complete smile makeover at The Cosmetic Dentists of Austin: Mention my name on your first call!
FTC disclosure: This post or video contains affiliate links, which means I may receive a commission for purchases made through my links. This video is NOT sponsored.
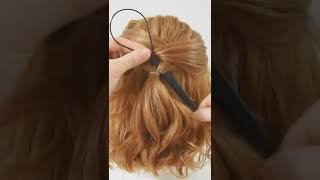
What'S up guys welcome back, I know what you're thinking you're thinking candy you need to wash your hair okay Trevor. No, today in lieu of such silliness we're going to be braiding, my hair, I'm going to be sharing with you guys, my milkmaid braids for short hair. So I posted on Instagram last week. Another makeup look and I was like hey - get excited guys. It'S my five-minute face to feel more confident and you guys were like yeah. But let's talk about your hair cuz. I want to know how to do that. My hair is only two about right here, you'll see it in a minute, and this is kind of like it comes out like a braided crown kind of, and it basically hinges something I did at like mock, make braids you know, or usually like for people with Really long hair and their pigtails start here, and then they kind of fold it over the top of their head done this, because my hair is so short involves me like French braiding, and I will show you guys how that works and then sort of how I Style it after I get the braids done, because it's not fully finished when you do that it doesn't look all that cute until you kind of play with it, so there will be no zooming in because I need you guys to be able to see yeah. Oh, this sweater is doing I'm I take this sweater off. I need you guys to be able to kind of see what I'm doing, and I have that a hair tutorial of tutorial in a really really long time and so like. If things fall out of focus and the back of my head looks crazy, then just please forgive me, but I'm gon na do my best, I'm gon na be with me my monitor a lot to make sure I'm in frame. So sorry, if that bothers you, let's go ahead and jump in to milkmaid braids, slash, hair, braids creme for short hair. So yeah this sweater is done. She'S done uh. My hair is about a day dirty, so it's got a little bit like dry shampoo and probably some like texture spray in it. If my hair is completely clean, when I go to do this, I will use the igk beach club spray. That stuff is like a it's a matte texturizer, and it adds a lot of like grip and volume and, like tooth to my hair. A couple things I want to mention here is that I have really really fine hair. So if you got really thick coarse hair, that's like straight uh. This might be challenging for you because it will fight you on you're gon na have to put a lot of texturizer and itsu dirt by just kinda getting one side out of the way. I just kind of parted it. I think I think a semi straight part in the back, but you know you guys will know before I do so. This is not an exact science, but you really want to make sure that you know you start with the little pieces back here, and this is gon na be a Dutch braid. Dutch braid goes away from you, you're, always kind of wrapping the hair underneath the braid. Instead of doing like a normal towards you braid, what that does is it makes an exposed braid on the outside, instead of kind of hiding the weaving pattern within the hair. If that makes sense, you'll see in a second, it makes like a reverse braid and it's on top of the hair. So I take a section, that's kind of I don't know it's like what would that be like a 45 degree angle or something actually don't know what it looks like, but the geometry makes sense in my head and I divide that into three slices like that. We are going to keep the braid kind of along the hairline. You don't want it to go like too high and get lost, because then you lose that, like crown effect, so I'm just kind of taking sections and I like to keep a brush handy, it's easier than kind of getting angry at the hair and trying to rake It smooth with your fingers the whole time so, if your hair's like mine and it's just very prone to kind of sticking together, not necessarily been tangling, just sticking together, then keep it brush handy, so really locking these guys tight. This is where everything is kind of gon na you know be grounded in the beginning, because we're gon na kind of pull everything loose towards the front. So you want to make sure everything is really good and secure back here. Do kind of a pivot so that everything keeps going around my face and kind of leaves a little bit of room around the hairline, because you don't want it like right up on your hairline, because you are gon na kind of move it back a little bit. You want it to look like a headband come back here. Lipgloss is a bad choice and I say you know part your hair. However, you you like in the front like it's gon na kind of get obscured anyway. So if I did a center part, you know it wouldn't look that bad, but I just did it the way that I don't really part my hair, like on the side kind of pulling it off my hairline right here trying to even though we're gon na loosen Everything up and you'll be able to kind of place it where you want. It ultimately come on babe. My hair doesn't have layers, but I guess I'm kind of losing hold of some of these. But again you can fix that with a bobby pin all right and just like that, you have one nice. Oh, what are you doing? Oh man, okay, all right, and then you just finish the braid and I'm just gon na secure it with a bobby pin because we're gon na go in and kind of fatten this braid up in a second. Does it look? Okay in the back go ahead and braid all the way to the end, though cuz you kind of want it as much room to pull well. Maybe not, I know to the end of what you feel like is all gon na actually stay put in a braid. All right, you're gon na go ahead and do that to the other side here I will sort of fast-forward through this unless I did a bad job of staying in frame, in which case I will do this in real time. That'S a bobby pins are for all right and I'm kinda still bringing it around like this gon na try and get a little bit of a headband effect here. I'M gon na steal some hair from this one because well no there we go all right. Yeah never mind this nonsense; it will. It will improve all right. So this is what it looks like in the back. I really don't know you're you're seeing it before. I am so. I hope that that looks cool. I hope it looks as cool as it does from the front right now. So next step is loosening up these braids. So I kind of take the bobby pin out hold the end and just start kind of pulling gently on pieces to kind of fatten. This braid up and it'll look weird at the bottom, because there's not a lot of hair there. Well, I don't know your life, but for me, there's not a lot of hair there and and then, as you move up, it gets like fuller and thicker looking and it's okay for this to not be perfect, like you kind of want it to be a little Bit organic and lived-in looking, I think that that's kind of what gives it that effortless look, because this is not effortless. This is a lot of effort, but but in order to make it look effortless, I think that it being a little bit rough and a little bit like linden looking is, is the key. So you want to be careful not to kind of like go too far with the loosening. If you loosen all that stuff over there, it will, the braid will start to fall out. So the next thing I do is kind of you know: Risa cure this guy. Don'T worry about all these ends and the the thing that makes this look really planned is actually like this part of your hair being in a position that looks like you meant to so you don't. I mean it like looks like a headband instead of adding like dragged over into a braid or really tight against your face. So I'm going to before we do that, I'm going to just go ahead and loosen this guy up and can't pin her out of the way first, because she is not really like she's pretty and everything but she's, not the thing. That'S gon na be across to the front of my face. You kind of want to leave this good and fat right. There learn that the hard way or you end up just pinning all day and then I'm gon na kind of pin this where the headband is gon na be, but not necessarily right, underneath because I'm actually going to pull this up and over. So you can see. That'S just pinned down just pin it down and we'll hide the ends later. The next kind order of business is, you know, grab you some bobby pins and if you want to, you can go ahead and kind of hairspray this. So it has a little bit more grip if you feel like it's like gon na fall out, but I think mine's pretty secure. So I'm gon na start by kind of moving that braid over on top and when I pin I just kind of take the pin and I push it against the hair. Well, that was a terrible example, but it kind of worked and if you start to feel like you're pinning something to your like sole undo it you know, take it down because you don't need to be like you know, uncomfortable all day, so I'm kind of pulling This back a little over over over yon braid. You can always move these later and you see how that created kind of this prettier shape around my face right there. You can kind of pull these pieces a little bit too, but um gon na pin her kind of where you would think you know and sort of a milkmaid braid shape, and I pull this bobby pin out. While I hold the ends and again, you see how right here, it's kind of like we have the exposed braid and then the original braid gon na take this and kind of pull her back. If that makes sense like that and have her kind of cover the original one and you can see - we've got these big puffy pieces. Don'T worry, don't worry, everything's, actually very secure, I'm going to kind of pull little pieces up and hide them underneath the braid, because in the end, at the end of the day like you want it to look like a headband and so it's okay to have these Kind of pull back and be under the braid. That makes any sense, so I'm gon na do that kind of over here to see how I can push this up and lift the braid up like that, these kind of get hidden a little bit and then the breed comes back down over it, and this breed Still wants to fall out a little bit, even though I didn't even loosen it that much so you can just add some pins for safety, not safety, pins but bobby pins for safety. I even like to kind of anchor this a little bit with some bobby pins, because again, if this falls out, all your work is for nothing. And so I do like to take some bobby pins and, like I said, just kind of push them against the hair and it really locks it into place, and then you are kind of on your own sort of like shaping this stuff. You know pinning back the pieces that annoy you, this spot always loves to just kind of cluster up and get annoying like this right. Here I don't like how it's kind of sticking out, so I will pin her down this way little. This little puffy piece back here has, I don't know it looks. She looks like she's thinking about kind of like falling out of the braid, so there's that and again kind of addressing this spot in the front. We kind of pull on her a little bit here and there and you can even like stick a pin up here to make this look exactly how you want it, but I kind of like what she's doing right now there, I'm kind of into that you're gon Na pin this down cuz it got kind of like lost of the confusion of it all there. This is still really puffy, so I might bobby pins by like the pound. I think you can get them like this at Sally's and it just you know, they're the best Bobby's. This is the Morris. Flamingo bobby pins and you'll pay a lot less for them. This way, then, you wouldn't like Target buying them on a little sheet of cardboard and their way. Grippier they're, like you, know, actually updo pins that have you know they like you, could actually hold your hair up with one of these. They had a ton of grip. So I don't like that at all and if you need to get one out, you can either pull on it, which I don't totally recommend because it does have a lot of grip. But you can also find the other end of it and push. And then I personally like to pull a couple of pieces down here and there to make it look like I said, just like a little less effortful, because this is a lot of effort, and so you know you kind of want to make it look a little Bit loose and a little more chill, you know, kind of like losing that there we go and like yeah, it's a mess. You know it's it's chaos, but it's organized chaos and I also don't yeah. I want to get rid of that. That was that big puffy piece that when I was originally braiding and it kind of puffed up, because I pivoted too hard - and so we just kind of take that and pin her down really easily like that, and this breed does a great job of just hiding. Most of your pins and if the pins kind of stick out, it's okay, I don't know, I don't care pretty much anything that bothers. You can be addressed with a pin, and I know that that's probably more work than you were hoping for, but that is how this situation comes together. On my head, our kind of braid crown, and it's just a combination of those two braids. We have the organized chaos of kind of loosening those braids up and being able to kind of play with like where this hair goes, and as this wears over the course of my day, it doesn't really like fall out. I have 800 pins in there. You probably wouldn't expect to fall out, but it will like kind of loosen a little bit and get a little bit. My nerves, kind of curly, like I said so any level of humidity, will cause this sort of halo of curly hair to kind of come out of the braid, and I really did it. I think it looks awesome. So a big fan of lived-in everything I love lived in clothes. I love lived in makeup and I love lived in hair. It makes it so that you can really ignore what you look like over the course of the day because you're like I know it looks fine, you know what I mean. It'S not perfect. Perfect is really hard to maintain and I I know I personally don't like aspiring to perfection when it comes to my appearance, and so I love just some really cool. You know you front-load it with some effort and then that's it and I don't have to worry about it for the rest of the day and, like I said, be really careful. We'Re not careful, even just mindful, where you're putting bobby pins in, if you feel like you're like chaining it to your brain. Take that bobby pin out girl, it's not worth it. So this is the look guys. I hope that this was helpful. You know feel free to ask me anything in the comments. It'S like this made. No sense that you guys are like tacky. I can't do that or or if there's any other kind of stuff that you want me to try. Let me know this actually is an area that I have training in is actually you know, hair supposed to makeup, which I don't. I hope you guys liked it if you did give it a thumbs up. If you wan na, keep hanging out with me on this channel, hit the button down below and subscribe upload, if you guys did, thank you for watching this. You know off-the-beaten-path video today I love you guys. Anyone, okay,
Comments
Alaina-Maria Beaucage: I never knew a reverse French braid was called a Dutch braid. Thanks for being my "learn something new every day" person today.
EJ Haqqi: I LOVE this look! Thanks for the tutorial ❤ I am learning to french braid my daughter's hair but just can't seem to get my fingers to cooperate to do it on my own head ♀️
Vanessa Diaz: You know I actually enjoyed this tutorial just because it was like a friend showing me how to do it and talking about how the hair can actually act. With other tutorials they don’t talk about how loose your hair can get or how not easy it can be. It looked so good too
Aspen & Emery: Definitely takes talent to French braid your own hair but now I’m throughly convinced I never will be able to do that because my hair is a million times more tangly then yours. Dang curly hair..
Susan Stetson: So cute. My hair is very long so I don’t do French/Dutch braids because it’s to frustrating and my hair is longer than my reach lol. This would work for my sister though. The texture of my hair changed after I had my son from frizzy curly to frizzy straight with two prices that are still corkscrew curls at the base of my skull which makes short hair on me look crazy. The king hair hides them.
AmazingMavis: Would LOVE more hair tips! I also have fine hair on the shorter side
Michele Salter: What a great job and so adorable on you! I always laugh when I hear the word pivot, the Friends episode were they are moving a couch up a flight of stairs with a landing. Pivot pivot pivot, I am pivoting! Fast forward had appliances delivered and the guys kept saying pivot. Now braids pivot! I love it....all from one word! Do a shopping trip video to Sally’s.
Oranaiche: Yay! I’m so glad you made this video! I’ve been waiting for it since your Instagram post! Sorry I was one of those people commenting about your hair, but it’s fire.
marisa wagner: What a sweetie thx for this tutorial cutie
Hallie Henry: We have a similar skin tone so makeup recommendations are very relatable. My totally different hair (fine but plentiful and straight) is envious of your crown! I might try it anyway and show you the shit show that results.
LittleBROWNGIRL #IM A LIZA FAN: I love your video's so much I really do. Keep on the good work. My cousin said that she has a big nose but Then I told her that it doesn't matter because everybody is beautiful just the way they are.
TravellinJack: O I envy you talented people who can do things with the back of your head. Love this look, though!
Laurie: Really cute !
kim Ledford Burley: Amazing look, esp on you but never in a million years could I do this!
Corrie- Onagoodday: I love the coral lip. So pretty. Awesome job on the hair. But I must say this as a retired dental hygienist. Never use your teeth to open a bobby pin!!!! Especially you doll. Love u I wanna come over and play makeup and hair haha.
Hannah Shotwell: I am HORRIBLE at doing hair I can do a regular braid and a fishtail and it comes out pretty nice (on other people) but anything else I just cannot do . I keep my hair down everyday and sometimes pull it to the sides with a scrunchie in the back (idk how to explain it) but that’s as good as it gets for me. Great tutorial though!
Nene G.: you look super cute... that braid takes some skills, which I don't have anymore... I used to do a pretty good job styling my hair, even when it was longer, now I struggle just to make it look somewhat presentable
Harry potter glee starwars disney fan: Nice job
Jessica K.: Cute!!
Rosa Barragan-Trejo: I looked out my window because I thought the earth movers were outside, jajaja . How would you modify this for thick longish hair? No, the beeping does not bother me at all. I don't know what's with my excessive use of emojis.
Narjis Azam: Nice