3 Quick Tips For Texturizing Short Hair
- Posted on 24 November, 2020
- Short Hair
- By Anonymous
Sam Villa Education Director Andrew Carruthers jumps in to deliver 3 quick tips on texturizing short hair.
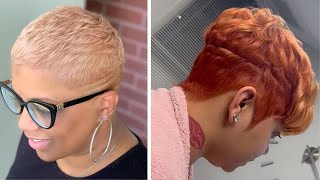
Well, hello, friends: it's your friend andrew brothers, education, director for samvia um, i'm just here in my studio today. Working and you know we didn't schedule any education. This week i was just kind of feeling lonely because i'm so used to having live education with you guys. Every single week so just wanted to jump on and do a quick tutorial on something that really, i think, comes in handy on a lot of different fabrics. So we're going to talk today about just three quick tips on how to texturize short hair. So we have our beautiful little lydia mannequin head here and they are, you know, rocking the kind of 70s inspired shaggy mullety kind of 90s brit pop style, hey jorge. How are you my friend, ariel's? How you doing christina thanks for joining me, so hi, kiana and doreen nice to have you here so like i said today we're just going to talk about three quick tips on how to texturize short hair. So before we go specifically to the techniques, i think it's important too to talk about texturizing and hair in general, because really we see that there's kind of three different purposes for texturizing hi aunt marita hi, ariel hi, cindy, oh you're, in new zealand doreen. I actually was talking to a friend in uh, new zealand, just about an hour and a half ago, um hi shawana welcome thanks for being here, hi angie. So when we're texturizing hair, we feel that there's kind of three different things we should be looking for. One would be density because, when we're texturizing a lot of times, we're trying to adjust density within a shape, two would be to create visual texture and movement in the hair. So that's when we're actually trying to create that visual separation and then three would be to actually modify the overall weight balance to create shape. So there's density, there's creating actual movement and texture in the hair and then there's a third one which is actually trying to create shape within the haircut hey sheila from the uk. What'S up hi amelia amy from costa rica? How are you william, good evening to you hi, corinne uh, theresa, cold iowa here yeah, i heard you guys are getting like snow in the midwest. It'S pretty chilly here too. That'S what i've got my beanie on today out here in oregon. I think that's how you pronounce that maybe hi latisha awesome thanks for joining me, guys, um. So the first thing we want to kind of look at when we kind of try to look look at it in phases. We think that, just in our experience, it seems like adjusting density first seems to be a good first step, because once we get the density balanced out, then we can start to go in more for the visual aspect. So as we kind of look at our haircut here, what we want to start to look at is: where do we see that we could adjust density so we're looking for kind of thick areas and don't just look for the thick areas, but also look for the Thin areas now, that's curious, why would you say, look for the thin areas if we're talking about texturizing, because a lot of times? What makes this? Let'S say we look here and we're like. Oh that looks a little thin. What makes that look thin versus just airy is that it's too dense right above it. So it's sometimes the contrast of the density that makes something look thin or wispy didn't. Quite think of that did we. So if this is looking kind of thin and wispy, then we can look right above it and say well. Is it because this looks bulky and in comparison all this looks thin, makes sense, and i actually would say yes, there's kind of this area through here that it's kind of like it's got that dense. Look to it like there's, not that airiness to it, so that let's address that first we're going to use the invisablend shear and before i get too far, i would be doing you disservice. If i did not tell you, we do have black friday deals coming up. So let me throw a slide up there for you guys, so you can see it. We do have great black friday deals coming up. 30, 40, 30 to 40 off, depending on how you bundle your deals, that's from yesterday through the end of the week. So that is available to you guys just fyi so through here we're going to use the invisible end shear this one's kind of a weird texturizer, because this is actually not sharp yeah. Don'T worry, i'm not going to cut myself, it's just the teeth that are sharp. The reason that we created it that way is so that it minimizes how much hair it takes out and as you're cutting think about what happens when your shears are dull, when your shears are dull, what happens that you cut the hair pushes forward right? So does it cut that line evenly? No, so what happens as you're closing it's actually letting the hair purposely shift forward, so it makes the cutting where the teeth are very uneven on purpose, so it doesn't leave lines in your hair. Cut makes sense. So when we're addressing that density, what we want to look at is what hair is creating the density, because, if we just leave it kind of laying here this hair on top, this actually does not look heavy and dense. This actually looks quite soft. It'S this hair right here that looks dense. So if we just leave all this hanging down here - and we start to just work through with the blending shear, we might take too much weight out of the stuff that doesn't need addressed. So be really specific. You really mindful in how you address this so we'll take that hair away. That does not need a dress which leaves us just with the hair that does then we can place we're going to place the solid blade towards the head, so we can easily slip that blade in behind the hair. Now a lot of people ask us: why are your? Why are your blending shears uh not offset it's so that you can reverse them in your hand, because if i'm standing behind her - and i want to keep my elbow down - keep kind of nice body position if i try and place those teeth in it's not going To slide in there very well, so i can just simply turn the shear put the solid blade underneath drop in and we'll just take a little bit of hair out at a time. This is what's really important with reducing density is just being really gentle about it. At first and not taking too much away so we'll cut a little bit, then we'll just kind of play with the hair a little bit see if it's softened that density down enough to feel a little bit more imbalanced, which we're close, i still see sort of A heaviness right there you can also come in this way and look again. If i go, this way see how the teeth would be going into the hair right now. So we can just switch the shear instead of trying to put my body into sort of a weird position to get that one point on the bottom. So um just switch the shears to the blood voids on the bottom slide. That in we'll just address that, when you're reducing bulk when you're reducing density, you do have to get into the hair strand a little bit further. If you just keep your your blending sheer on the ends or the tips of the hair you're just going to soften the very ends, that's not necessarily going to address density it'll, give you a softer line. So if you just see, oh there's a line there and i just want to soften that line, then by all means you could just address the tips of the hair. But if you're trying to actually reduce density and weight in the hair, you need to get a little further into the hair yeah scott you're saying contrast is so important, yeah perfect and that's the thing. Sometimes we just look for the one aspect, but it's like before. We took that weight out this looked kind of wispy because the density was so different, but after we balanced that density out now this doesn't look so wispy and before maybe what i might have done is go in and kind of block off the ends a little Bit to make it look more dense, which i don't think would have necessarily been the right call for this particular shape. So again, when you're looking at reducing density in your texturizing, something that's very soft, like the invisible ends, a great shear, to just help you to softly, remove that if you don't have a soft blending shear like that, you have a couple other options. If you just have a standard blending shear or something a little more aggressive, like our signature series, blending sheer, which has a much tighter tooth pattern, it cuts the hair quite quite well, then what you could do is you could do that same process but keep the Shear very parallel to the hair, so that you're taking little smaller bits of hair away. If you go across, you you're, going to take quite a bit more hair away. Okay, um shannon! So this one that i just picked up. This is the signature series reversible blender. The one that i was using before that's very, very soft, that's called being is a blend invisible end which is fun to say, and if you don't have a blending sheer at all or you're, just not a fan of blending shears. You can also use a regular pair of shears what you're just going to want to do if you're trying to just only reduce density you're, not necessarily trying to create visual texture. You want to keep your shear sorry, i'm in kind of a tight spot here or something very awkward, so just keep your shear very, very parallel to the grain of the hair, see how the hair is falling. This way so look at the blade of the shear because as soon as we start to go this direction kind of more diagonal to that hair. It'S going to create more air space which we'll talk about in a minute, because that is important. But if we're just trying to reduce weight, keep that shear really parallel to the hair and that will just reduce and soften that weight out without creating so much separation chastity year, starting cosmo school december, 8th everyone type in congrats chastity, because she's going to start hair School december, 8th, so cool so happy to have you as part of the industry. Chastity looks like you've been enjoying the videos so awesome we'll we will be here for as a resource for a long time for you, okay. So that's how we address density. Let'S talk about, how do we start to create texture and movement now, so much of what we just talked about is the exact same, because contrast is really important because a lot of times it's like we, we see something and what's happening next to it, will affect It as well so this looks nice and separated, and it's really in this area looks kind of dense still because this has such a nice visual separation to it. So it's making this look more solid right, so it kind of works in the opposite direction. Yeah cool! Thanks guys, thanks for throwing her some congratulations, it's always good for us to stand together in the industry and just show some love right. So thank you for doing that. So if we are looking to create separation and texture now we need to go in with more of the more of an idea to create space and air between the pieces of hair, okay, so um! Sorry, let me step back over here. I don't have my fancy. Camera set up so i can't zoom in i have to move her. So let's take that same section, because that also is starting to now that the density is out. That'S great, but it's still looking kind of blocky to my eyes. So when we approach, if we, if we keep the shear very parallel to the hair, then it's just going to create lots of tiny little holes. So we need to start to adjust the shear to go a little bit more diagonal. By going more diagonal, you can see that that creates more of a separation to the hair. It creates more of a peak and then a valley. So if we approach more diagonally, then it creates that peak and valley, peak and valley. Let me put my hand under there for you, so you can see that separation that it creates now again how far you go into the hair makes a big difference here, because a lot of times what we see is people are like. Oh, i want to create that nice separated texture, but we only address that first, like quarter inch of the hair so be like. Okay, i'm going to point cut into that to give give some movement to it. So we'll pick up this section and then we'll just do like this little kind of micro point cut into the very tips of the hair, now nothing wrong with that. But what you're not going to get is a lot of visual separation within the hair. If you want that visual separation, you have to be willing to get a little further into the hair so that the air space can be created. That contrast needs to happen now again, if it's just really in that you're just looking to soften the line like um. Actually, this is a great example right here. Let'S see if you can see that um there so right here, you can see we've kind of got this like little blunt line happening here so that maybe it's not even that we necessarily want to um. Maybe we don't want to create a lot of texture in it, but we just want to soften that line. So we can pick up that line right where it lives gently, just drape, that into the comb, and then that is something that yeah. You could just kind of give it a little separation just there in the very tips of the hair, and that way it's just going to take that blockiness off the edge of it. So it doesn't appear as a line that you don't need to go as far into the hair, and that might be a place that maybe you don't want to, especially with the shorter hair and um, be careful in the crown. Because this is the place that you can see, she actually even has a little bit of a whirl when we created these with um with pivot point the lydia mannequin head. We wanted to actually have realistic as much as possible, so this does have a little um swirl in the crown. So what will happen? Sometimes, if we get too aggressive in the texturizing right here, it'll actually kind of show up almost looking like a bald spot, because the split is making that hair move away from um from the middle right and it can kind of show in the scalp. Then that that's where it looks kind of thinned out right so just be kind of careful. There too, shannon says she's teaching right now at school. Um, let's see just want to check in travis you're asking. Has anyone gone through a second lockdown? I think there's a few places. I know that in new york there were a couple of shutdowns but um. I think most of the from what we've been hearing most of the states are still still doing. Okay, so hopefully keeping fingers crossed, let's be safe during thanksgiving y'all, so we can stay in the salons. Okay stay safe out there. That'S all we have to say about that. Let'S keep going okay, one last thing, because we've talked about oh wait. I almost missed something when you are creating that visual separation. You also have two options of approach, because what we just showed you was from the outside in so addressing my ends. First, then, working in towards the interior by point cutting so that whenever you're working from the outside in so meaning pretty much point cutting, because that's mainly what you're going to see if you're addressing the ends first and then working inward, that's point cutting or notching or Whatever you like to call it, the other option is go from the inside out wherever your shears touch. First, that's what is going to affect the most in the hair. So if your shears touch the ends of the hair first, meaning point cutting. That means it's going to texture the ends of the hair, the most and then it's going to trail off as it goes into the hair. It'S the opposite! If you work from the inside out, so this is techniques like slicing slithering channel cutting, there's a billion different names for it, but it's the exact same principle. So let's say we're kind of doing some channel cutting on this and wherever we first contact the hair. Of course that's where it's going to remove the most. So if my shears first contact the hair in the mid strand of the hair, that's going to be where the most hair is taken away right, so just being conscious to where you start that cut and again, if we want to see actual visual separation, we need To be willing to get deeper into the hair strand to affect that separation, because if we kind of were just real soft out here on the ends, it's just like point cutting on the ends: it'll soften those ends. But it's not necessarily going to give us a lot of visual separation, and the angle of the blade is the same too. So if the hair is going like this straight down and we approach - and we are parallel with those pieces of hair - it's going to be very, very soft - we're mainly going to remove weight and soften the hair. If we go across the grain of the hair. At more of a diagonal with the shear, that's when we're going to create more that peak and valley sort of separation this year is our slide cutting shear. So this year was specifically designed for cutting inside out where we're cutting with movement sliding through the hair and the purpose of it is to not grab the hair. So you can see it's got an arc to the blade shape. It'S a super fun shear, it's great for people that like to do a lot of slide, cutting channel cutting and things like that. You can most definitely do it with a regular sheer. This is just our streamline series here. Our six and a quarter inch streamline series here. You can do the same techniques here, but you are going to cut quite a bit more hair and the sheer is going to have more bite into the hair. You have to be careful with that, because you can kind of shred up the cuticle right, so you have to really work on that movement and making that movement fluid. So you don't catching of the cuticle if you're, using a regular pair of shears, if you're using other com, other companies call them dry, cutting shears, sometimes dry, cutting sheer slide, cutting shears they're designed to kind of slip through the hair a little bit more. So last point, then: i'm going to turn you guys loose, because this is just a quick little impromptu, just felt lonely here in the office. I want to jump on and give you some quick tips. It'S actually affecting shape this one. This one sometimes surprises people. How much control over the actual silhouette and shape you have with placing texturizing within the hair, and this one we have to be kind of careful with, because you can actually damage the shape of the haircut without even knowing it. So if we look at the back of her head, we've got this kind of nice, roundness, nice, roundness and then right here, it's almost like we would just love to have that have maybe a little bit more shape right there right a little bit more diagonal to It so if we were cutting the haircut from wet from just from a basic haircut roseanne, you say sometimes i get nervous to do that. Well, that's what mannequin heads are for right. So if we were looking to have that tuck in, we would create probably a little bit of graduation, because that's going to give us that more diagonal line to tuck the shape into the head now, here's the thing is: if we do that to this particular haircut, We'Re going to lose some of the length and shape down here at the neckline that we really like. So we don't necessarily want to cut this in shorter here, but we want it to tuck in, and we know graduation would give us that tuck in. So you can do that through your texturizing. Oh cool right, so couple options here. First option would be that you can do it through just like a point: cutting technique um. This is the slide cutting shear again, i'm going to use that to point cut as well, because the slit action of it is going to keep things soft as well, so see how the finger angle here is on a diagonal so creating a shorter at the top Or sorry longer at the top to shorter at the bottom. That'S my graduation! So if we point cut within the shape that same diagonal line, we're basically kind of creating that shape inside the haircut, so we're creating graduation inside the haircut so that way, when that falls, that collapsing action that tucking action that graduation has is hiding inside the lengths. So we still have the lengths out here, so we have that texture and movement that we want, but inside it's creating kind of this invisible shape for us is that cool? So when i said you have to be careful with this, this is why you have to be careful because sometimes we're a bit unconscious with how we eat and texturize. So what we want to be careful of is, if we see this bulkiness sitting here, maybe our natural tendency would be to just kind of pick up this section and we all have different um kind of um. What'S the word, i'm looking for it's almost like muscle memory, where it's kind of embedded into our body and we just kind of pick up the hair and start cutting. We don't sometimes think about why we're doing exactly what we're doing come on admit it. You know that you've done this before and i'm admitting myself, because i i've definitely done it too. So you know you'll see people they'll just have the kind of their favorite texturizing technique, so we'll just kind of take the section and they'll just kind of start. On now, if you look at the finger angle and the cutting line, that's there it's more in a layered position, because it's shorter at the top so longer at the bottom shorter at the top. The longer at the bottom is actually going to leave weight towards the perimeter so shorter at the top. The longer the bottom is going to make the hair go this way. Not this way does that make sense think about if we just cut that line, if we cut, and actually it is cut this way, if it's cut shorter at the top or longer at the bottom, we can see that effect. It'S leaner here and it wants to create bulk down there. So what we want to do is we want to reverse that effect on the interior, so that would be graduation. Ffff is saying i especially like to do this texturizing type of graduation and then a berry with bob's as well. Yes, that is my one of my personal favorite things. We have those nice heavy bobs, i'm so right there with you bob ffffffff that this is a great technique for when you still want to have a nice, solid perimeter, but then interior. It reduces it. Yes, theresa more layers than density, good, lil and glad it's making sense for you, so just be conscious. Tiffany you do that yeah um just be conscious with how you're approaching the texturizing, because again think of it in in different stages, address density first, so go in and look for: okay! Well where's! Where is it looking a little thinner? Where is it looking heavier and remember if it looks a little thinner or finer somewhere, it could be that the thing next to it looks heavy. So don't always just think. Oh, it's fine! It'S thin and fine on the end, so i'm going to crop the ends up a little bit, look for where the contrast might be sitting and you could make more balance with it, and this is actually you know a lot of people say: well, you don't texturize. Fine hair right well, sometimes it actually helps because, if you think about doing this particular haircut on a fine, haired guest, of course, the ends down here even without texturizing, are going to look a little wispy and a lot of it's because right above it you're not Going to see scalp you're not going to see any of the skin showing through the hair. So if you take a little bit of weight of the hair just above it, it can actually make the ends, look thicker! No, that seems a little weird, but it's true. So address density first then start to look at separation and texture and movement, and also at that point you can start to look at. Can you start to shift and change the shape through how you're texturizing yeah exactly you're you're, hitting the nail on the head here? Bob fffffffffff i like saying that yeah and i actually did a video with my friend brandon, who he's gon na. You know he thinned down the crown and he allowed us to use him on one of the youtube videos which was super nice, and that was a big part of what we talked about. Is that the ring that happens kind of through here so did you guys know just as a side note that this area of the scalp is not supposed to thin just across the board? So if you have this kind of thick ring here and they have less density here, it makes it look even thinner. So if you go to the thickness, you debulk that which people are like. Oh, my gosh, why would you touch his hair with thinning shears when his hair is already thin? Well, if you use your blending shear to remove some density through that ring, it can actually make more balance with with those thinner areas, kind of cool right, um. So good question i'll i'll hit this one i'll hit this real, quick and then we'll kind of close up. But this is actually a great question. Yes, most definitely you can use um so thinning shears, texturizing, shears blending shears. Typically, it's just what brand you're buying from some will differentiate like specifically what kind of share it is, but for the most part like we call all of our shears that have teeth blending shears, just because we think it's a prettier name thinning shears. So we call them blending shears, but, yes, you can add visual texture with them and here's kind of two ways you can do that chaos one way would be to treat your thinning shear blending, shear or texturizing shear the same mentality that you used your blunt shear. So let's say i want to create some texture and separation here if we enter in it more of a diagonal and take a couple sweeps at it on each piece, that's going to gently take some length away, but it's not going to be as blunt or as As pronounced as doing that with a blonde shear, much softer right, so you have that option. You also can use your blending shear as a channel cutting shear. So you can work this way and you can definitely create some texture and separation in the same way. That way, the other one that we love to do is, and you've probably seen this if you watched much of our education, is the weave and blend. So what you do is you take your section, and this is just like creating a foiled highlight you would take that solid blade of the shear. You weave that solid blade through and if you create kind of a chunky weave like a 90s weave, then you can take those pieces out and then let me see if i can grab these come on stay with me, so you can see what's left in the Hand is almost like kind of like those big chunks, so that's going to create more visual separation versus just thinning, reducing density, cool teresa. I like bentons versus fringe, hey everyone's got their preferences right. We'Re totally like hey fringe sounds prettier, but people are like i'm gon na give her some bangs. So whatever you like man - and you know i'll just say this and you can look it up for yourself, but there's also something that if you i worked with tg and tony and guy, which is a british british based company, you're, not allowed to say bang on Stage because it's naughty in europe, so i'll, let you look that up all right, my friends! So thanks for joining me and hanging out just a little bit, it felt nice to just jump in here and talk to you for 20 or 30 minutes in chaos. It it won't necessarily make it chunky. You can always weave that out a little softer if you don't want it to feel so. Um like big pieces coming out. So that's fine, um, there's ice cream d. I love it you're. So welcome guys. Thank you so much. It was great to see you and just as a reminder, because i think it's pretty cool, that we've got these sales going and we do have our black friday sales going on through the end of the week. You bundle up for additional discount. So if you buy one it's 30 off by two, it's 35 by three, it's 40 off talk to your friends at the salon. Maybe a bunch of you want some shears and you can bundle up and order them together and get that 40 off discount, because that's huge so much love to you all grateful for all of you from everyone here at um sandia. We are grateful for you all, we'll see you next week for more education, lots more coming up and yeah, we'll see you next week take care. You
Comments
Lois Sawinski: I wouldn’t have called these “quick tips”.very good information though, thank you.
Linda Dillon: Which shear do you use for a spikey top pixie hair style? I really enjoy your tutorials and education. Linda from Texas.
Kathryn Bledsoe: Andrew is a stellar teacher. Stellar!
Trinity Yates: This was awesome, thanks Andrew!
LaRae Parry: Needed this. Thanks, Andrew
Diane Zeisler: Hi Andrew, nice surprise class! Have a Happy Thanksgiving!
Tara Duddy: Good to see you Andrew! Happy Thanksgiving!
Sharon La Tour: Congratulations Chastity!
Brenda Pipitone: Congratulations Chasity!
Carla Mclaughin: Hi it's Carla from England leeds you r all amazing hairdressers
Sally Williams: Congratulations
Mahum Noor: Assalamualaikum. Sir it's me Mahum Noor . Sir how are you .and u doing a nice job and may be it's a . heard job ...?
Claudia Gonzalez:
Barbara Ann Scarlet: Cool I think I eould have liked to be a Stylist