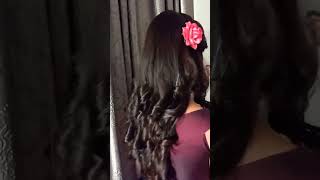
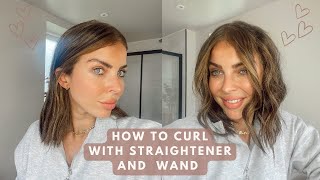
Flat Iron Beach Waves
- Posted on 31 October, 2018
- Short Hair
- By Anonymous
How to get voluminous beach waves with a flat iron! The products I used on my hair are:
-L'Ange Aplatir Flat Iron
- It's a 10 Miracle Leave-In
- L'Ange Rival Heat Shield
- L'Ange Grand Debut (root volumizer)
- Living Proof Full Dry Volume Blast
- Aveda Firmata Hairspray
- Pai Shau Imperial Hold Hairspray
Thank you for your likes and subscribes! You can also follow me on Instagram at www.instagram.com/givemethatglow.beaut...!
www.givemethatglow.maskcarabeauty.com
Hi guys, i am a new hair tutorial for you and it's how to do beach waves with a flat iron and short hair, something that i actually have not been able to do until i got this flat iron, so this is not sponsored. I have seen lunges as literally every other post in my facebook feed for like a year, and I checked it out here and there, but it wasn't until they just did a tutorial from a girl who had short hair like me and it caught my attention. So I checked it out and they were having a big sale and I ended up purchasing the flat iron one of their wands and the blow dryer, and I'm completely obsessed the first time I attempted to do the curls with this flat iron. I was blown away because they've never been able to do it before. So what I'll do to get started and I'll tell you, as I get prepped how I like to prep my hair the night before when I'm gon na do curls. So I like to wash it the night before and then put a I use. You can use a like a sea salt spray, but I like to use a sugar spray which is like the same thing. I just like the way it smells, and I do that in my roots and then a little bit around the rest of my hair to give it more grip. And then I do a heat protectant and I actually bought long as heat protectant. Just so I can use this as I go as well, and then I do a leave-in conditioning protectant by it's a miracle ten. They believe it's called and that's a multitude of thing. So it's a leave-in conditioning treatment. It'S a heat protectant! I just love the way that it makes my hair feel so I put that in then I do a roof spray and I bought lodges root spray as well, and I do like it. I'Ve used several different ones. I'Ve tried a Veda before I've tried. I don't know if you've ever seen this pie - shell brand, but I've tried theirs. So I'm not partial to one particular brand, but I do like the launch root spray that I've tried. So I just get all that in my hair and then I let it air dry, and so when I go to sleep, I kind of will push it up like this on my pillow. So it's off my neck and when it dries, it's not stuck to my neck, but then it also keeps it off of my scalp. So I get a little bit more volume up here as it dries too. But then I also like the texture. It makes it easier to curl and it makes the curl hold. So that's my trick the night before, if I know that I want to curl my hair the next day. So no I'm just sectioning right above my ears and I'm going to run my fingers back until they mean to section this piece off here and clip this and then each section I'll just do a few spritzes of the the lunge heat protectant. Here I'm just spraying that on and then running my fingers through it so that it dries. You don't want to put a hot tool on your hair when it's wet and then I'm just gon na grab a little piece here. Well, probably about like an inch. I would say, and I'm gon na start at the top and just twist this down and then barely pull the bottoms just at the bottom. The end is straight, but I want to keep I mean you: can you can pull it all the way down to curl? All the way down, if you want to, but I want to keep the end straight, so I don't want to curl that if I'm doing more of a beach way relaxed look and then I just twist it and kind of pull it down to help relax it. A little bit more, but that way also so the end points down rather than out then same thing. Here'S I'm going away from my face I'll hold it there for just a second and then I'm going to twirl it around my finger and pull the end. Just ever so slightly until the core cools just a little bit and then the back of the hair and basically just feeling my way through that and then same thing. Twisting pole. So same method is my other hair tutorial that I have with a curling iron. As far as the twisting pole aside, I like to curl away from my face: it oops it's kind of crazy, it's personal preference, but I just like I like I prefer my curls away, so I like to hold it there for just a second, but I love How this wand does not pull at all, so it's not like most sorry, not one, the Flatiron so most flat irons. I'Ve used pull on my hair. I'M gon na fix this one here and you know how it catches like little hairs and you feel it pulling on your hair. This one does not do that. It is so smooth, and then the nice thing about doing this with a flat iron as well, is if it gets kind of crazy like that, just relax it with the firon. So you can just pull it on down. So that's something nice that you can't necessarily do with the curling iron when you're curling your hair and I'm okay, if they're a little bit wild, because I'm gon na run my fingers through it all anyway to give it volume. But I just don't want it like horizontal, so I'll do the same thing for each section. Now I'm going to start right, we'll go right where my temples are and I'm gon na section that part off the same way and just do the same method, so cut about an inch piece and see I'm leaving that part out and then I'll just lightly run. The flat iron down it twirl and okay. So now, for this section, I'm gon na go maybe two inches above my temple. So right above, I guess I would say like halfway in between where your hairline with star receding and your temple so right about here, and this part two section is where I'm going to start back combing my hair, because I like volume, my hair. I have a lot of hair, but it's fine, so it gets really limp and I'm just gon na take this section here and then 1. 2. 3. 4. 5. 6. 7. I'M gon na just back home that and then I will take my living proof. Drive volume blast spray that, where I'm just back combed and then just do that for this whole section, if you like volume, okay and don't worry too much about smoothing it out or shaping it too much underneath right now, so I'm gon na let that dry and Then, while that's drying got some hair right here, those annoying ones, while that's drying, I'm just going to spritz the heat protectant on there and run my fingers through that it dries that dries pretty quick. So once that's dry, I'm going to do the same thing for this whole section. However, I'm going to start a little bit lower, so I'm going to start with the flat iron below, where I just backcombed - I'm not gon na go over in this part that I back home with the flat iron okay. So here I'm going to piece it just a little bit and ruffle up this part that I backcombed. So this is just creating a little bit more volume underneath and then I'm going to spray a little bit more of my volume blasts under there. You could even do like a flexible, hold spray hairspray, underneath here I like the dry volume blast cuz. It just gives it a little bit of grip and then, throughout the day I can just tousle it. If I need a little more volume now for this section, I'm going to start about halfway in between the last section and the top and the crown here section this part off and then here's the trick when you're, when you have the flat iron in your hair, Be protecting it same thing here, I'm going to section me or take little sections and backcomb these dry volume blasts at the root and up here I want to make this a little bit smoother, because I'm probably gon na see this when my hair lays on top Of it, when I'm done so, I don't want it to look like a rat's nest. So this needs to be smoothed out on the top a little bit more than that last section where we didn't need to care about that as much the trick when you're back combing is to hold your hair straight up the section that you're back combing so straight Up and then just go straight down with it and I like to use just a plain old, fine-tooth comb, but I get from Sally's or just a few. I don't know if it's a few bucks, like maybe a buck or something it's super cheap. But I like the real fine toothed ones. They have different kinds, so just get whatever your little heart desires and what works best for you. So now, I'm just smoothing the top out just a little bit and I'm barely running the comb over the top of it. I don't want to come out the back combing that I just did so I'm just running it over the top ever so lightly, just to calm that down a bit so up here same thing as the last section you're not gon na go over the part that I just backcombed, and now the trick here is not to hold the Flatiron super tight with the trick all over, not just right here. In this section I just mean when you're using the flat iron to curl. Is you don't want to hold it super tight? Like you, don't wan na clamp, it too tight. You want to be able to have it move three freely through your hair, while you're curling it so it doesn't get in stuck in one spot, and then you have creases or you fry that piece of your hair and then be real careful to at the top. So I struggle on this side with not burning my finger, so you might want to get if that's something that you continue to do they make gloves that you can use with flat irons so that you don't burn your fingers, so just be careful when you're twisting It that you're grabbing the outside and not the place and for this top section here, I'm focusing of the heat a little bit more at the top of the curl up here, so that it creates volume at the root. So, let's see how I started lowered here when you start your curl lower and I don't want a whole bunch of volume around my face. I want that to be a little bit more relaxed. So that's why I started lower here. But when you start your curls lower that it's you're gon na have a little less volume, which is why I like to start right at the base of where I back home, but also you can because you back home. Do you can work that up there and kind of play with it and manipulate it when it's when we get to that part? Okay? So now that this section is all curled same thing just going to piece, it manipulate it and then spray it with this traveling blast and closer to the top, just to add a little bit more staying power, I'm going to go in with my hairspray, so I Love this stuff, it smells so good. This whole line is so delicious. It'S called pie Chou, and this is their design ritual Imperial hold hairspray. This stuff is like super super strong, so I don't need to use very much of this at all. If you do a hard time, gon na comb through here at the end of the night, so this is just giving a little bit more volume hold and then check the back piece that out okay and then here. If you see these pieces that you want to team down a little, you can do that right now with the flat iron. Okay. Now, for this top section, I'm gon na bring it forward and then grab a small section to backcomb, because I want this part to go back. Possibly I don't know we'll see. I always end up playing it by ear. At this point, in kind of my hair is doing and then figure out how I want to style this part of it. This part I'm not going to because I don't know where I'm gon na part right now, I might go more in the middle, they might go more into the side again, it just depends on how my hair is acting after I get a curl, but I do Want to do a little bit of backcombing on this section, then I do need to smooth that out, because I don't want that showing right there, but I want that little bit of lift right there, okay and then, of course, heat protectant just run that through now, When I do these around my face, I'm gon na grab a little bit smaller pieces and I like these to be even more relaxed than the other curls, and I do take smaller pieces at the crown here, because it's easier to get the volume that I want Up top with the smaller pieces, because I can make it peace here, so I get that volume okay. So this thing I'm gon na go I'm not back coming this part right here, I'm just back coming towards the back. A little bit then again just depends what I'm doing with my part when we get done, but I can always live it out if I need to so now, I'm gon na piece it out manipulate it play with that see. If there's any pieces like this one right here, just one week released art a little bit higher with that one to get more of a playful curl with some volume in there and peace. These sides, you think I'm digging in the center part today. So I'm gon na keep it that doesn't happen often, but maybe, since these curls are a little bit more relaxed than with a wand or curling iron, that's why pspace manipulate play. If you need to on this part, you can add a little bit of no use here this I have this risk being rubber. That is great for piecing. If you need that, or even just to put just get a little bit in between your fingers and if you want to make the ends a little bit piece here and to take any frizz away, just manipulate the ends with that, you could do a little up. Top, if you have any flyaways here, that'll help tame them. So then I always finish with my that same pie: shell sprayed up top and to smooth everything out. If you've got any craziness going on from the backcombing, then you can just brush that out with your fingers and lay that down and then, if you want, you could use a texture spray for the bottom and with a texture, spray, you're gon na spray it up. I like to use this of a knife firmata. It has a really good hold, but it's not crunchy, and so it actually works really well as a texture spray and just helps piece out the ends even more so I'm spraying up like this into my hair. I'M not spraying like that finish it off just a little bit with that, so that is the curls with the launch flatiron. This is the applet ear flatiron for lunch. I absolutely love it and honestly it is the first time it's all in the products you guys. It'S just like makeup: it's all in the products, so I've tried. I can't tell you how many flat irons I've had over the years and they've never done what this one does so it's nice, and if I got that on, like 65 % off sale, so keep an eye out because with all this, as you see all the Time on Facebook from those sponsor posts, they usually run sales. If you guys have any questions, let me know leave a comment below or shoot me an email don't forget to hit that subscribe button so that you don't miss out on any more hair and makeup. Tutorials
Comments
Rhonda Robbins: Very nice! I still can’t manage to get that look, no matter how hard I try lol! Great tutorial ~ would love to see a tutorial on your eye look! Fantastic!
Teresa Underwood: Beautiful Christina! Thank you for sharing this easy to follow vid. I just got my L'ANGE Aplatir flat iron and I am so excited to try this!
Peyton S.: Your hair looks great!! About to order one of these straighteners
Denise Raley: loved this video. Trying to learn to curl my very straight, fine, shorter hair. Bought the L'Ange Flat Iron and going to get all the things you put in your hair at night. Wish me luck.
Dawna: Stunning hair!!!!! xo
Priscilla S: What temperature do you set your straightener?
Denise Raley: great!!!
Deena Lynk: Great video! I just subscribed. I live that shirt. Where did you purchase it?
Denise Raley: thank you so much for responding. Where would I get the "Sugar Spray"? All I find is Sea Salt Spray.
jacqi Grace: i have watched this vidro a thousand times. no mater how hard i try, i just can't get the techniqe right with the flat iron Grrrr. would it please be possible fot you to do a much slower video for beginners somerime?? About the sugar spery, You did put in one of your comments you got iy from Sally;s..? do you have a website for this store please?? i've looked in most of ore drug stores and can't seem to find it.. I love watching your stuff ;+))