How To Make An Elegant Autogele (Headband) Using Asooke | No Sewing Needed | Beginner Friendly
- Posted on 11 April, 2021
- Short Hair
- By Anonymous
Hello Family,
In today's video, I will be showing you all how I made this very easy head gear using a piece of asooke fabric that i had at home, this tutorial does not require any serious tool like a sewing machine and you can achieve the finished product in less than an hour. I hope you guys find it useful, also feel free to tag me in your recreations on social media. I would be more than happy to connect with you all on there.
Items used
1. Glue gun and Glue sticks
2. Asooke Fabric
3. Plastic Head band
4. Needle and thread
5. Satin Ribbon
#autogele #headgear #nigerianfashion #Statementheadband #beginnerfriendly
DON'T FORGET TO LIKE , COMMENT AND SUBSCRIBE {https://www.youtube.com/channel/UCHMPZ...} for more Videos
Love you guys, See you soon in another video
***********************************************************************************
MY FILMING EQUIPMENT / TOOLS
MUSIC: https://www.epidemicsound.com/referral...
CAMERA: https://amzn.to/3vDC0pS
TRIPOD: https://amzn.to/2RQ5Etp
REFLECTORS: https://amzn.to/3frj0FO
SPARE BATTERIES: https://amzn.to/3bWxY4u
MICROPHONE: https://amzn.to/2TPu3QG
RING LIGHTS: https://amzn.to/2SmHxTr
SD CARDS: https://amzn.to/3gguQ4J
***************************************************************************************
WHEN I AM NOT HERE, I AM HERE
----- (●'◡'●) ----- Connect with me -----
* My Instagram ▶ https://instagram.com/funmibiolawore/
* My Facebook ▶ http://facebook.com/funmibiolawore
*My Facebook Page ▶ https://web.facebook.com/FunmibiOlawor...
* My Email ▶ [email protected]
▬ CHECK OUT MY OTHER VIDEOS ▬ :
THE POWER OF MOISTURIZATION | HOW TO MOISTURIZE YOUR NATURAL HAIR TO RETAIN MOISTURE FOR DAYS
DETANGLE, PREPOO, WASH AND STYLE MY 4C NATURAL HAIR WITH ME || HAIR ROUTINE FOR MASSIVE HAIR GROWTH
3 WAYS TO USE ALOE VERA FOR FAST HAIR GROWTH | ALOE VERA AS A PREPOO, DETANGLER AND HAIR GROWTH OIL
HOW TO REGROW YOUR EDGES/HAIRLINE BACK FAST | 3 PRODUCTS YOU NEED + BEFORE AND AFTER PICS
NO MORE DRY HAIR: HOW TO MOISTURIZE DRY HAIR | USING JUST 3 ITEMS | 4C NATURAL HAIR
HOMEMADE PROTEIN TREATMENT FOR HAIR GROWTH AND STRENGTH USING ONLY 3 INGREDIENTS || FT. MY 4C HAIR
WASH YOUR HAIR LIKE THIS TO REDUCE BREAKAGE / HAIR LOSS ||WASH DAY ROUTINE FOR 4C NATURAL HAIR
NATURAL HAIR PRODUCTS HAUL 2020 | THESE PRODUCTS ARE SAID TO BE GAME CHANGERS
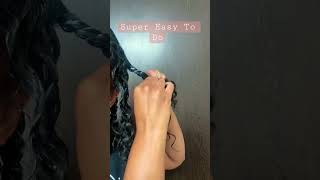
Hello, my lovelies after you guys showed this particular headgear a whole lot of love. I decided to bring you guys another version of this easy to wear headgear that can replace your daily irregular glue that you'd normally wear this stunning head gear. Right here is a shoe. Stopper, if you wear this for any one of your occasions, same wedding party, your own wedding, reception or any occasion like that, be sure that you're going to turn heads and in today's tutorial i'm going to show you guys how you can easily make this in less Than an hour you can achieve this particular headgear in like 30 minutes and you'll be good to go. So if you're interested in knowing all about this process make sure everybody's ready to the end and yeah, let's get right into it all right guys. So, as usual i'll start off by showing you everything, you need so make sure you're watching everything, i'm showing you it's just your first time of stopping on my channel hi there. My name is phoebe. I make diy tutorials, i make videos about hair styling. I also do a bit of vlogging here on my channel. Basically, i just share things that i'm very passionate about on here on my channel, so if you're here to subscribe, please do also hit the subscribe button before we get right into this tutorial. Also, like the video at the end of the video, if you enjoy i'm sure, you'll enjoy the tutorial so be sure to hit the like button anyway. What i'm doing now is on my actual key, i'm measuring 17 and a half inches after making this. I realized that the 17.5 was a bit too much, so if you measure like 16 inches, be sure that you'll be good with your regular headband. So what i'm cutting now is the piece of ashoka that i'll be wrapping. My headband with feel free to use any type of headband you like, but i would advise you use one of these wide ones like the type i showed you at the beginning of the video that one is going to create. A lot of you know stability on your head and give you the security that you need when wearing a headband. So i'm dividing this my actual key into two, because i found that it's too wide for the amount of you know space that i want to wrap on my headband yeah about three inches of ashiki will do so usually regular actually comes in about six inches. So you need to divide that into two in order to wrap your headband. So all i'm doing here is i'm just wrapping my headband with my actual key fabric. I already went about this in my previous video, where i showed you guys how to make another type of a shaky head gear, i'm going to have that video linked somewhere on the screen. Just in case, you want to get another look into another design of actually headgear that you can make for yourself, so i sped through this whole process i went about you know wrapping. I feel like people that have you know seen my previous video already know how this goes so in case you've not seen that video feel free to check that out. I already linked it on the screen earlier. All i'm doing here is still wrapping, and for this part i advise that you notch the usher key in order to give you ease when folding over to wrap. You know the remaining parts of your headband. I didn't notice my own as you can honestly. I forgot because, like i said, i was in hurry and i just wanted to make this head gear quickly before stepping out and yeah. That was why i went about it like this feel free to not your own. I shake it when you're trying to wrap it around so, like i said earlier, take your time, comb your ashy key as carefully as possible in order to get a fantastic result. What i'm doing now is i'm just applying some of that my glue to this edge at the bottom just to fold that part over, like i said this process took me less than an hour. It was such a fast and very easy process, so once i'm done wrapping this i'm going to start, you know taking care of the inner part of my headband. I got this ribbon from um miniso here in potakot, but you can go to your regular sewing material shop to get a proper velvet ribbon. Just in case you know, you don't want this type, because i found that this one was a bit too light. I would have preferred if i had a thicker type of ribbon, but still this still does the job right. It still does jumbo yeah, just in case you're, wondering feel free to go to regular taylor shop to get a proper ribbon, and this is what my headband looks like next up, i'm going to go about creating this stunning headgear that we are going to place on Top of the headband that we already wrapped and for this part, all you need to do is just create, gathers use your hand to create gathers i'm going to show you guys how and i'll be going about it. So just pay attention to the way i'm folding. My archer key and once you've created your dadas. You need your needle and thread just to sew that part in place. What this whole headgear entails is really just taking your time to create stunning gutters, and then you know sewing it down. So the goddess stays in place. I hope you guys understand everything. I'M saying so. All i'm doing now is just sewing on that gutters and it depends the amount of gutters you want to create on this. Your actually totally depends on you. It depends on how you know extra vegans. You want your actual key headgear to come out. If you want it like really extra vegans or you want something minimalistic you can reduce. You know reduce the size of the portions, that you are folding and gathering and then just create something minimalistic, but if you want something again, like my own feel, free to you know make your own bigger and create a lot of gathers for the purpose of this. My own ashoka headgear, i made four different portions of the others, and insert them together feel free to make your own more or less like. I said it all depends on you rocket. However, you like and own your style, so yeah. This is me still creating my gutters and all of that, if you've enjoyed this video so far, if you enjoyed the tutorial open to this point - and i get to subscribe to my channel - please help me i'm on my way to 1000 subscribers and we're so close And i'm really really looking forward to hitting 1000 before the end of april 2021. So please help me by smashing the subscribe button liking. My videos, when you watch them, sharing my channel with your friends and dropping comments down in the comment section with your thoughts suggestion on video ideas that you want me to create and all that good stuff, let's just connect with each other down in the comment section. Also, if you're not following me on my social media platforms, i also share some tutorials on there as well. I'M going to leave my handles on the screen, i'm very active on instagram and tick tock in particular, so make sure you're connecting with me on there. So now that i'm done creating my gathers and everything is looking yum yum yum it's time for us to attach the main headgear. Now this pasta already scrunched up and formed ruffles with it's time to attach it to the main headband that i will be wearing on our hair and what that's going to entail is still a little bit of needle work. Right, you're still going to use your needle and thread to tuck the ashoka headgear that i already scrunched up to your headband. This process is a bit tricky because you know the fabric has already clumped up and it's kind of thick so make sure you're using a big needle. You know, that's, you know, make the whole process easy for you. If you're using a small needle, it might not really be easy, and once i was done tucking my headgear to my headband, i went ahead to still use my glue gun to glue some parts down because i'm a very paranoid person. I don't want any wardrobe disaster whenever i, you know, wear my stuff out for any occasion, so i still went to give myself an extra security with my glue gun, i glued down the parts of the actual key that was not you know, lying flat properly and Yeah, that's pretty much it for this tutorial. Like i said it took me less than an hour. It was very easy and for those of you who you know, don't have sewing machines at them. This particular headgear does not require sewing machine. All you need is your needle and thread and your actual key, as well as your glue gun and if you don't have a glue gun. I got a couple of comments in my last tutorial in case you don't have glue gun, not to worry your regular ooh gum is going to give you a fantastic result, so don't feel pressured to go ahead to buy yourself a glue gun, but if you want To do exactly what i'm doing, you can feel free to go ahead, to get yourself a glue gun and go about making your stunning head gears for yourself. So, like i said earlier, this is this. This is what the ashiki headgear looks like, and ah i mean you guys just let me know what you think it down in the comment section. What do you think do you think this is stunning? Do you like it? Will you be trying it? Let me know down in the comment section anyway, as usual: i'm going to go ahead to try this myself, and this is me now you know i went ahead to do my makeup and this is what the headgear looks like on me. You guys, i mean i mean look at how stunning this looks. It'S so beautiful and i can't wait to see your recreations on different social media platforms when you go ahead to make any of my tutorials or recreate any of my tutorials on here. Please feel free to tag me in your post. I'M going to leave my handles on here on the screen. I'M always happy to meet you guys on different social media platforms. Thank you guys so much for watching if you made it to this point. Still i get to subscribe, this is the third one. Okay, the third one is the charm make sure. After listening to my voice, now just smash the subscribe button smash swatch, it smash it. It'S not gon na cost. You anything hit the subscribe button. If you guys subscribe to this channel, also give the video a big fat thumbs up that thumbs up, helps youtube spread my video to a wider audience. I want other people to see and learn from my videos right so make sure you smash the like button share. My video with your friends, your sister, your aunties, your nieces, okay, people that love diy tutorials share my videos with them and yeah. This is me again. Just flaunting i mean it is the headgear, for me is the edges, for me is everything for me. Thank you guys so much for watching. I love and i appreciate you all before you leave make sure you watch something else. I have videos linked on my channel and yeah. I can't wait to see you in the next one bye. You


Comments
Funmibi Olawore: #Roadto5000subscribers Thank you so much my dear Family for watching this video, I love and appreciate you all ❤. Please don't forget to SUBSCRIBE, LIKE, SHARE AND LEAVE ME YOUR FEEDBACK in the comment section.
ADENIKE DADA: This is beautiful, just showed a client This and she loved it. I'm recreating it soon. Well done ma'am
Shullamite Emmanuel: This is lovely a client just ordered something like this and I came across this its so easy thank u funmibi
F Mosope Ayeni-davies: This is a beautiful design Thank you for sharing
Anita Uyere: Wow, this is so gorgeous,I'm definitely trying this out
Claudia Jean Pierre: So pretty ❤️.you did a stunning Job. Thank you for sharing.
Germaine Lathouras: Stunning design I love it
ADENIKE DADA: so beautiful, I'm sure trying it out
Ibe Chidinma: Girl you are talented jare,, God knows that I am learning so much from you... You just earned your self an extra subscriber
DEBY GREAT: Ah this is wow am so trying this❤️
Kess_Love 7: This is so nice and easy to make ❤️❤️❤️
Agnes Koko: This is beautiful
Reennee Aphedo: This is a miracle for me. Someone brought this Ashoeke headpiece you are wearing for me to do, though I haven't seen your video then , I tried it got it. Will post on your Facebook page soon. Thanks soo much
Melanie C.: This piece is super beautiful. Absolutely loving it. But I can't follow how you make the bow from the tutorial. May just have to play with the fabric myself and try. Thanks again for sharing!
Queen Were The 1st: I am definitely going to make this! I love to be a show stopper
clara kpeglo: Beautiful
Adaobi Nnoli: Very lovely, thank God I didn't discard one of my old asooke, Will use it to try this
Confidence Adat: Beautiful....am going to try this...... thanks and God bless you
Adah Ngozi: So beautiful.definitely making myself one fr Saturday owambe
saffylew: stunning!
Imaobong Etok: Beautiful, nice But please always mention the name of the instrument and equipment you Inorder to help the learner
taiwo lois: Love it, will give it a try
Harriet Agyepong: This is so beautiful
Hasiya Hamza: Wow!!! You did a very good work here, thanks so much for sharing.. Pls where can I get something like the headband you used here?
Anthonia Mbadugha: Wonderful
Onyinye Udeaja: Thank you for this, how did you pass the needle through the headband
patricia nako akotia: Great job!
Ibrahim Beatrice: Hi Funmibi, this is a great one... Thumbs up... I'm so trying this
MORNINGLIGHT: Wow love this I will try it thanks
Bassey Slyvanus: What length did you use for the bow?
otamere sylvia looking forward to it.: Lovely . new subscriber.. Please what measurement did you use for the bows.
OlaJoke’s Journey: So beautiful! Please what gel did you used to gel your hair down?
Ruth Eberechukwu Mba: At last av seen what am looking for. Simple and elegant. Thanks so much sis i would love to cover mine and tack along with crinoline. Will it wotk? Thanks again
Vanessa: What other fabric can i use in place of the asooke fabric?
Big Mummy: It's beautiful
Ijeoma Christiana: Ma, please can you also use anakara material and apply thick interfacing it or crinoline before using. God bless you for me i have subscribed . Do you run an online class am interested to learn More for bussiness pururses. Thanks in anticipation.
adjoko fiati: Lovely great work more grace
Prisca Nnanna: Hi, I’m a new subscriber please where do I get that gum you used
Ijeoma Christiana: Thanks for the tutorial ma.please ma can I make use of combat material or thick Jean material. Thanks in anticipation.
Alphina Z D Koroma: Wow this is lovely
Uzoamaka Nancy: It is amazing.. Pls can u teach use how to make braided asooke headband
Bassey Slyvanus: L love the style good job
roshidat abeke: This is lovely. If I may ask, where did you get your glue gun from ma?
Joy Ogechi: Beautiful...... you're shocking me o I love it.....more wins and God bless you
destiny ibiwari: Can we use any other fabric for this aside asoeki
Brandy Kanyinsola: Is beautiful
Ijeoma Christiana: Thanks for the tutorial ma. Please ma is what is the name of the asoke. Is it as special one. Please ma where can one buy the gule gum.
Michael Igwe: Can I use satin fabric to achieve this
Omowunmi Esther: So lovely ma, pls where can I get the plastic headband
Ifeanyi Kalu: Nice job
Rose Nwaoha: Thanks this is nice
Marjorya Bell: Love it!! What kind of fabric is asooke??
Evelyn Emos: Nice one
Kemba Kirton: Very pretty... is Asooke the type of fabric that you're using?
Ebele Nnadozie: You got a new subscriber
Lawal Ololade: So so lovely. I'll be trying it definitely. But what about those of us that want something that will cover the head... as church workers concern
Millicent Kumah: Can I use brocade fabric
Yvonne Asamoah: It's so beautiful. How can make it if I don't have ashoke. What other fabric can I use please
Folasade Onanuga: Can I use sego gele
Victoria Nwafor: Can I use jus 1 straight gele ... will it be enough
Rita Ndukaife: Please can one use a dull face satin to make this head band
Ireti Ajibola: This is so wonderful This is too much
สาวปิ๊กป๊อก ไทภู: Sooogreatjob
Brandy Kanyinsola: Pls where can I get this glue
Jennifer Annan: Please is ashooke same as velvet?
Sotubo Oluwatosin: Oh! This is educating.....
Shirel semjon: You didn't tell the measurements
Incredible Bella: Please can you use any fabric of your choice
GUSTA'S CHANNEL: Very nyc
Olga ASSA: Hello I'm not Nigerian woman What's kind of tissu is Aso oke?
Imaobong Etok: Please what is the name of that gum
Damiete Oyibo: inches or cm?
Seyram Holmes-Attivor: How you got the gathers,it was fast
Rachel Obiesi: I don't have a glue gun
For Laughs😆: Thumbs up babe... Can velvet give this effect
Bunmi Sanda: Hot hot
Annah Serwaa: Save