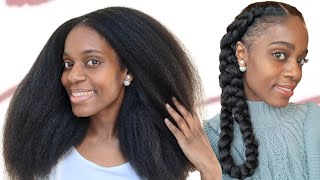
Easiest Faux Locs/Dreads Tutorial On Short/Long Hair No Crochet / How To
- Posted on 15 January, 2023
- Short Hair
- By Anonymous
How To Braid Faux Locs on short/long hair | Rosemary Matshavha / South African YouTuber
Hello guys,
In this video I will be showing you how to braid faux locks or faux locs. This is a Protective hairstyle step by step tutorial using Nina dreads and yarn /wool. I hope you guys find this tutorial helpful. PLEASE DON'T FORGET TO SUBSCRIBE, LIKE, COMMENT, SHARE & RING THE BELL so that you don't miss anything.
Thank you for watching my videos!
PRODUCTS TO USE:
- Nina Dreads
- Yarn Wool
- Comb, Scissor
WATCH OTHER VIDEOS:
- Faux locs on short hair tutorial: https://youtu.be/jtlIOSthexo
LET'S CONNECT:
Instagram: https://instagram.com/marry_la_rose?ut...
TikTok: @marrylarose (Rosemary Matshavha)
Facebook: Marry La Rose
#fauxlocks #fauxlocs #braids #howto #4chair #naturalhair #naturalhairstylesforwomen #protectivestyle #shorthair #knotlessbraids #locs #dreadlocks #dreadlocs #butterflylocs
KEYWORDS:
How to braid faux locs or locks without rubberband
Faux locks tutorial, faux locs on twa
Faux locs tutorial, butterfly locs tutorial
4c natural hair
how to braid for beginners
how to plait, butterfly Locs tutorial
distressed faux locs, soft locs tutorial
how to do/ install Durban dreadlocks or faux locs, natural hairstyles, natural hairstyles for black women, How to braid faux locs or locks without rubberband, Faux locks tutorial, faux locs on twa, Faux locs tutorial
Nationality: South African
Hey guys welcome to my channel, I am Rosemary, and in this video I will show you how I braid Fox locks on medium or long hair. I will use a yarn or wool Mina dreadlocks, and this is the package and how the locks look like. I cut a yarn that is a bit longer than the hair length and you'll see how I'll use it. I then unraveled one side of the dread, of which the length should be enough to cover all the natural hair after wrapping and also make sure that it's equivalent to the other previous dreads length. So if the dread still looks long depending on the length of your natural hair, you can decrease the length of the dreads by cutting it on the side you're going to use to wrap the one that you are unraveling now, while unraveling just ensure that you only Unravel on one side, never manipulate the other side, so you do that by holding the mid part tightly foreign to start braiding. I supported the natural hair into two then place the mid part in the middle of the hair. I then braided the natural hair with the yarn, so the yarn is just too secure at the beginning of the thread. I will braid at the same point until I feel like the hair and the dread is secured after that I'll just spread the natural hair with the unraveled thread. If you don't want to use the yarn method, you can just go straight to braiding the unraveled red with the natural hair, so you can just separate the natural hair into two and then just braid using that method of box braids towards the hair ends. I stopped using the braiding method for box braids and then to protect the hair ends and also prevent hair loss. I use the yarn to secure at the hair ends and then, after finishing all the natural hair, I just tie the yarn now moving on to the next step to wrap the dread. I divided the unravel part into two I'll start by separating the strands. You can also do that by coming. If the hair is Not Fragile like this one, so you can just place a comb through the hair and then it's gon na be separated well enough, so that it can be easier to wrap the hair. I started by using one strand to wrap. The important part here is to ensure that you do not leave any space while wrapping after wrapping the first part. I continued wrapping with the second strand, while you are busy watching. Please do not forget to subscribe. If you haven't comment - and most importantly, please - leave a like - I will appreciate that a lot. This will help with pushing this video to more people who might benefit from this tutorial. When I'm about to finish ripping the dread, I'm going to wrap backwards towards the hair roots to prevent unraveling and I'll finish off. By doing what I'm demonstrating now, I'm not sure what to call it, and that is to blend the hair feather and securing. And then here I'm just repeating the same method for the last time. So I just unraveled half of the bread, almost half and then placed it in the middle of the natural hair and then use the yarn to secure at the bottom. And then, when I'm done, securing using the yarn I'm going to braid using the box braids method. So it's the Natural Hair Plus the the unraveled thread after braiding, I'm going to tie I'm going to use the yarn to braid at the end to secure the natural hair and then tie when I'm done braiding the natural hair. So I took half of the unraveled thread and then use this to use it to wrap and then making sure that the original space in between while doing the wrapping after ripping the first half I'm going to take the second half of the dread finish off. And then make sure that the thread is secure and ready to be slayed softer braiding. I used the hemuse to lay the hair down and ensure that there is no floating and then indeed, the hair was laid very well so hair Muse promises to ensure that the hair shines and then also provide extra hold. And this is how the dreads look like they look very beautiful and super long. Thank you. Thank you. So much for watching, please do not forget to subscribe. Give me a thumbs up comment and also share. If you can - and I will see you on my next tutorial - thank you - bye

Comments
Morwa Magana: ❤❤❤