Revolution'S Hair Wrap - An Honest Review!
- Posted on 03 November, 2022
- Short Hair
- By Anonymous
I've used Revolution's Hair Wrap for a week - find out what I like about it, and what I don't!
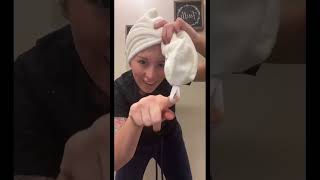
Hello there welcome back. Welcome to my second little look at revolutions. Hair wrap did an unboxing the other week and I've had people say. Please, please do a review. So this is it I'm going to talk you through the storage. Tell you what I think of it and tell you how it's supposed to be used. I think not really sure. If I'm doing it right to be honest um I haven't had the best results so far, so please do um. Stick with it. Have a look at uh what I'm going to talk you through and tell me what you think of it as well? Firstly, storage. I was hoping to be able to store it in the box, but, as you see the inserts in here, it's really hard to get it back into um into position and get the plug put under here, so that the Box shuts. I'Ve forgot that idea pretty quickly and I've actually got from Amazon, which I had for all my other tools, this storage box. So it's heat resistant, you can put all the bits in you can put the instructions in the back. I'Ve also got a heat mat which I got with another device, because the other problem with this device is that the ends get super hot and it's really hard to take them off if you want to switch between um attachments. So a couple of negative points there on the positive this unit was filled, the storage unit. With all of my other things, it's my hair, dryer in the middle. I had a curling Tong in here something else there, I'm only using this now, so that is as far as I'm concerned, pretty good. I'Ve actually jettisoned a lot of my old appliances and I'm just using the Revolution Hair wrap. So that must tell you that I like it, I think I do um, I'm still getting to grips with it. As I say, let me show you. This is the actual tool, so this is what you use um. It'S got the motor in it. This bit spins around here, probably be very careful not to cover that what I've done in the past is sort of put the tool sort of help gripped it in between my knees as I've been um sort of fiddling about and changing the settings. That'S not a great idea, because that's where your air flow is coming in and the device will overheat so make sure you don't cover this this bit spins, but the chord um attachment doesn't, which again is a little bit of a failure, because it's not as easy To twist the device around you've got your settings here. Now, that's the on and off button at the top. That'S pretty easy and this Cycles between motor and heat speeds here, and so you just press that a couple of times to get it up to the hottest heat temperature and the hottest speed. I was thinking well, can you do a slow speed but a hot heat as it were, and I don't think you can. I think you've just got the three Cycles there haven't got it plugged in, but you get the idea and then your attachments go on the top and again another little negative here. I wasn't completely sure how to attach them. Let me get out from the back of my storage unit um the vent attachment. This is what you use to dry, your hair. First of all, now first thing to know: the air doesn't come out of this bit. It comes out of this bit and, what's quite handy, is that you can position this wherever you want on the one. So if you want your controls away from where the heat comes out, you can position it like that. If you want it the other way, you can have it like that, and then you can see your controls where the Heat's coming out. If that makes sense, so let me do that and it says about lining up with the vent and with The Ridges, but actually there's nothing inside that you have to line up in any sense. You know I was thinking there might be some sort of guidance lines or something, but it isn't you just position it neatly over the top, and then you really have to shove it in hard like that and then that pops it on and it will don't spin Around from there, so when you've put it on, that's where it's going to stay, so that's your hair dryer, it's ionic, as is the entire um series of attachments on this. So it's supposed to give you smooth, um, hair drying, um, it's not quite as efficient as my normal BaByliss hair dryer, but it's good enough um. So I've used it a couple of times now on totally wet hair. It'S dried quickly! It'S dried! Quite effectively. There has been smooth and um yeah easy to use, and probably more so than a traditional hair dryer, because you know you can put your hand wherever you want to on the wand and you can move it around so impressed with the hair drying. So that's why? I now no longer have my BaByliss hair dryer in that storage box. I'Ve got this now. As I say, this gets super super hot. So what I've had to do is wrap around my heat mat around this to remove it and it takes quite a pull. It really is so you've got to be quite strong to do it. Let me try off camera. Look I've nearly wrecked the room trying to get that off. So, if you're not incredibly strong, if you've got issues with grip um, this might not be for you just because it does take a lot of work to get it on and off. Now. This is the hot brush attachment which again goes on the same way. Whatever way you want to pop it on do the same, I'm gon na have to try and do this in the air on camera. It'S not easy and it's come off again so line it up super straight and then push it down. Let'S say it doesn't matter where, on the one, what position so you can have it facing front, or back I find with this now I do have a jml hot brush. That is my all-time favorite tool. This is not going to replace that this is very. The air comes out in quite an uncontrolled way um, but it is effective. You can just straighten out your hair. My hair tends to Kink here underneath so I have been able to. I just pull the hair straight, pull that down and it works really well. So again, I don't think this is going to replace your bespoke hot brush if you use a hot brush every day and that's what you love. But if you want to use this as an all kind of round tool, something that you can do everything with it's, not bad, it does the job. So that is the hot brush attachment. Let me take that off now. The thing we've all been waiting for the thing that, for me, is a bit of a disappointment. Is the um Styler, the actual thing that I think for all of us. This automatic hair wrapping thing where you're going to curl the hair using this attachment, I'm gon na, have to get it to work. I don't know whether it's just me being super inefficient. It'S not automatically gripping the hair. I'Ve literally haven't really done it. I'Ve just done a few seconds either side just to try and get it to work on this occasion, and it hasn't. It'S left me with a slight curl. This is minimal. This is sort of five minutes, just minimal application. What I've found I've had to do section. The hair off and just take a small amount and I've tried to offer it up either way when it's been on, and this is not automatically wrap. So what I've ended up doing is guiding it on myself, wrapping it on myself, leaving it on for a few uh seconds I think up to about 10, and then you can actually do a cool shot. So you can cycle back down to your call, setting to set it um. I need to do a lot more experimentation with this because so far I haven't got it to work successfully um, but I have just by using it as an ordinary hot brush. Without the auto automatic you know facility, not not wrapping the hair automatically, it has done the trick. It has curled the hair slightly enough just to give it a bit of shape and a little bit of body. So I'm going to keep trying with this and if I do get it to work, I will come back to you, but so far, no matter how I've tried it, it hasn't automatically wrapped the hair so Revolution. If you're watching. You want to tell me a bit more how to do this. I'Ve tried to follow the instructions you're supposed to move the brush up and down to get it to automatically engage with the hair. I'Ve tried different thicknesses of sections, no joy. The other thing is a lot of people use these sort of automatic wrap stylers on slightly damp hair in the revolution instructions. It says to use both this and the brush attachments on dry hair. So again I don't know if you're going to get the longevity of curl unless the hair is slightly damp, but that's up to you to experiment with so overall it has replaced my hair dryer. It will replace my hot Tong, which I was never particularly very good at. To be honest, I was worried. It was going to burn my hair. This seems a little bit quicker because you are using the hot air to wrap as opposed to a really burning hot tom. So I I'm happy with that. Um, I'm just a bit disappointed. I haven't managed to literally get it to work in terms of the automatic gripping of the hair, but I'm prepared to admit that could be my fault, but I have looked at various videos. I'Ve looked at the instructions very carefully. I must be missing something anyway. I hope you've enjoyed that review. Let me know if you've managed to get this to work, to automatically wrap your hair and what you've done, and I will then come back with, hopefully a more positive review, but it's great quality um. It looks fabulous. It'S very giftable, as I've said in my previous videos. So if you haven't got a Dyson, if you can't afford a Dyson or a shark, and you want to experiment with this type of Styler, it's not a bad place to start. I just wish I could use this effectively, who knows I'll, keep trying hope you've enjoyed this review. If so, please, like this video share. This video follow me here on YouTube and I'll, be back with some more reviews till then take care bye,


Comments
LindsayMichelle: It's not just you, I bought it and can not get the curl bit to work at all. If you get it to work a tutorial would be brilliant lol x
Skye: Do you have the link for it I can’t find it anywhere
Natalie Flores: