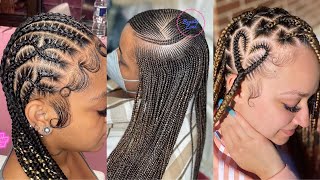
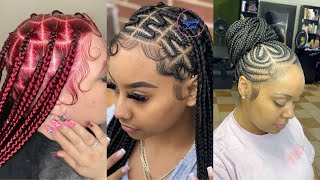
Invisible Part Closure Piece Install On Black Women Hair Sew In Method Tutorial Part 5
For Free Giveaways & Weekly Updates, Stay Connected By Email! http://eepurl.com/Am3Kb
Buy My Books, DVDs, and T-Shirts at http://www.howtoblackhairstore.com
My Website: http://www.howtoblackhair.com
Instagram: http://www.instagram.com/BreannaRutter...
Twitter: http://www.twitter.com/BreannaRutter
Facebook: https://www.facebook.com/OfficialBrean...
Google +: https://www.google.com/+BlackWomenHair...
Got Hair Questions? Email Me!
Email for Business Inquiries
To achieve the Invisible Part Full Sew In Hairstyle, you will need as follows;
(2)Packs of Weft Human Hair Extensions
http://www.amazon.com/gp/product/B004O...
Flat Iron
http://www.amazon.com/gp/product/B001M...
(1) Black Wig Cap
http://www.amazon.com/gp/product/B0017...
Scissors
http://www.amazon.com/gp/product/B004K...
(1) Curved Needle
http://www.amazon.com/gp/product/B0001...
(1) Spool of Black Weaving Thread
http://www.amazon.com/gp/product/B005Z...
(1) Hair Comb
http://www.amazon.com/gp/product/B001T...
Hair Spray Bottle
http://www.amazon.com/gp/product/B002R...
Olive Oil
http://www.amazon.com/gp/product/B003Y...
As you sew in your weave extensions, keep in mind how you would wear your hair.
Finishing off your full sew in invisible part weave is the deciding factor as to whether or not your hair will be hot or not.
Installing your closure is the most important part of this style because if it is installed improperly, it is the first thing you notice.
Sometimes it may look like there is a piece of hair floating on top of your head which is not good.
You should not be able to look through the closure piece, it should be completely flat and undetectable.
Sometimes, the closure is installed with glue and even if it looks beautiful, when it comes time to uninstall, the issues arise.
Part 1 https://www.youtube.com/watch?v=0EmZXG...
Part 2
https://www.youtube.com/watch?v=L13-xX...
Part 3
https://www.youtube.com/watch?v=npiyFy...
Part 4
https://www.youtube.com/watch?v=Xk9ztG...
Part 5
https://www.youtube.com/watch?v=VBFBqZ...
Part 6
https://www.youtube.com/watch?v=yggc14...
Part 7
https://www.youtube.com/watch?v=avTMOW...
Part 8
https://www.youtube.com/watch?v=PqKMdf...
Thanks For Watching!
DISCLAIMER: All suggestions, tips, prizes, techniques and advice given are for informational purposes only and should be used at your discretion and best judgment. I highly recommend conducting strand tests when trying or using new products, hair appliances and product mixes. I am not responsible or liable for adverse or undesirable effects including hair loss, hair breakage or other hair/scalp/skin/body damage as a direct or indirect result of the suggestions, tips, prizes, techniques and/or advice given.
________________________________________
FTC: I am not representing, being paid by, or endorsing any of the product brands in this video & I purchased everything with my own money - UNLESS OTHERWISE STATED in video/blog content. There are links to products that might be helpful based on the content of this video/blog. Each of your purchases via our Amazon affiliation links supports our cause at no additional cost to you.
Music "Easy Lemon" Kevin MacLeod (incompetech.com)
Here we are in step number 5 of the invisible part sew in hairstyle in this that I will show you in detail how to sew each individual piece of extensions onto your braids or your invisible part. Now that all of your extensions around your head have been sewn in this step are going to concentrate on finishing our style on our individual pieces of extensions to finish our invisible part closure. So to begin, I want to talk a little bit about the needles that I have prepared on my table. I have a lot of needles. You can use only one needle if you like, but using multiple needles, will help you to continue to flow, as you are sewing on your extensions. The thread on these needles are short because, as I am sewing on my pieces for my invisible part closure, I want to make sure that I have a small amount of thread to control the amount of tangles and knots that could happen. But when I am sewing throughout my entire head, I wind up literally 2 to 3 feet of thread to help me to continually flow and sew without having to make multiple stops, because I have ran out of thread on my needle. So I highly suggest that you use many needles to achieve your style so that you don’t have to reload them more than you need to so now we are off to actually closing up our invisible part closure. At this point, you want to take your extensions that you have, since you will be only using small amounts at once. You do not have to worry about your hair running out, because you really want to use this much hair. So now you just want to take one of your ends of your extensions, and you want to place it on one of your first braids that’s closest to your hair line. We will start on the right side. I will measure a piece for this from this track. Piece and then I will sew it on to the braid. You will notice that, as you sew up all of your braids, it will show the illusion that the only thing is your scalp, showing with all of your hair sewn. So, just to make the simple were going to go one at a time when to take my extensions place it on the braid first to my hairline and measure it so once I measure it there, I am going to measure it here and stop before the weft. So at that point, that is where you want to cut your weft of your extension. You can overestimate just a little bit to make sure you cover all that space that you need so now that marks the spot, where I want to cut I'm going to take my scissors trim that portion you slide your scissors in and just go ahead and make A quick snip so now are going measure this piece back to our first braid to see how it looks and it still overextends a little bit when we saw this piece onto our braid alongside it, we can just turn off the excess to make sure if it's Just perfectly so now what you want to do it! This piece is: take your needle and thread and make sure to secure 2 knots on here. So you can begin sewing the piece onto your braid. Doing your invisible part. Closure is the same thing as if you're sewing. All of your extensions on the only difference is that were just focusing on a little amount of hair at a time. So as you so on the amount of hair. To finish with your braid, you go on to the next braid and you do the same process. So now I'm just going to get my needle and thread ready at the beginning of my track, so I go through the weft. I am going to do my knot. Technique so retie that knot open thread once once twice and pull through, and that is why you cut that excess thread, that's above the knot to make sure that it doesn't stick out from your style. Now we are going to creat our second knot at the very beginning of the extension piece so that we can begin to sew. So I am going to go around the thread once twice and pull-through. Now the needle and thread is ready for me to begin sewing. It onto my braid, so just as you don't about your head, you going to do the same process to sign on a smaller section of braid, so I am going to bring this up to the beginning of my braid here now overextend pass my braid. I would just snug and as perfect as I can to get it right at the beginning of my braid. At this point, the same thing applies: taking your needle, you go through the braid and then you go through the weft as well from the braid through the weft, and then I'm going to pull the needle all the way through and create my knot so hold that Thread open it up and wrap it around once twice and pull-through and there's my first knot. Remember at the beginning of your track piece and at the end you want to create 2 knots. So here's my 2nd knot once again under the braid under the weft. This time, pull-through and them my knot, technique once twice all the needle through there's my 2nd knot right down the so now just to do single knots along the way. Until I make my last stitch there, which will be two knots under the braid will under the weft pull through wrap it around the string once wrap it around twice and pull the needle through. So now. Here I am with my last stich there and I'm going to make 2 stitches, but first let me go ahead and take my scissors and trim off this excess weft here so estimate how much you need and cut that piece off and I'm going to make sure To go under the braid and through the weft since that's the end of my weft under the braid through the weft, my knot once twice pull through and then do it a 2nd time at the end, under the under the braid under the weft and pull-through. Do my knot technique and pull my needle straight through from now you've done that I just like to open a thread just a little bit to tighten it up just a notch, and then I take my scissors and cut the thread off the actual piece and there You see, you have sewn your first piece of hair for your actual invisible part. As you notice, there is a very small gaping hole there. You do not have to worry because, as you stack more and more pieces of hair, it will look extremely flawless and seamless. So, as you stack more extensions, for example, in the grab, my next one and put it back up to the 2nd braid, you can see that it covers the first braid. As you stack up more and more and more and more, you will notice that the hair will flow downwards. To show your scalp in the same thing will happen on the other side. So now we are going to go to our 2nd braid. The same thing applies to the measure it. You are going to take your scissors and cut that piece, and are you going to prepare your needle and thread on your track piece through the weft? Do your knot technique, put it around the weft the 2nd time and do your knot technique. You have a little knot there just a little bubble of the thread. I am just going to snip it off and now you are going to begin sewing this to you 2nd braid. So I am just smoothing the hair out of the way some stray hairs, bring it up to my braid. An I am going to begin sewing. Go directly underneath the beginning of my braid here and through the weft pull the needle through create my knot once twice pull-through, and I do the 2nd time since this is the beginning of my extension under the weft. The same knot technique now continue with a single knot here and then a double knot at the very end, under the braid through the weft, create your knot to make your 2nd again and in the open up the thread, the just that and then you are going To trim with your scissors an there, you go your 2nd piece just going to continue to work. Your way up. You will notice that if there is a small gap in between the hair here is starting to close up, as you add, more pieces of hair along the way. So now that you have finished sewing on all your individual pieces for your invisible part section last, I will show you how to create your closure for your invisible part style. To finish your invisible part style, you need to create your final closure and sew it once your head, the materials you will need to do. That will be a piece of your extensions needle and thread scissors, a comb, and you will need flat irons to flatten your closure before you sew it onto your head. So with the amount of extensions that you need, you want to take your extensions and grab. One end and measure across the opening that is left on top of your head, so this is about how much space from one side to another. It is my closure to make sure you have the perfect amount extensions you want to double that amount which I have here and trim off your extension or track piece. This will serve as your closure piece to to create your closure piece. What we will do is always start our closure. The way we always knotted it you go through the weft, create your second knot and then do your knotting technique and then go around the weft again to create a 2nd knot. So you take the needle and thread you going to go through the weft, create your knot. Then you going to create a 2nd knot, so from this point on there will be only one not along the way until you reach the very end of your track. Piece. Remember at the very end you go through the and weft you want to make sure that you do a double knot at the end as well. So from this point, what you want to do is go ahead and actually roll your extensions in a certain direction. So if you are starting on the left side, you are going to roll to the right, because your extension will start to actually form a circle. So you want to continue to roll the extension. Only one at a time make your stich roll. It again make your stich. You are going to do that throughout this piece until you've reached the very edge to create your circle to show you have is done to start at the beginning, I'm going to roll it to the side, just on end this time to go underneath all of the Wefts and make one single knot and I'm going to continue to roll in the direction until I finish so I am going to roll a little bit and went to take my needle put it underneath all of the wefts and create a knot roll it again. Underneath all of wefts and create your knot now at this last moment, you're going to go through the wefts, then you go underneath all the wefts and create your knot and once again through that last weft, underneath all the wefts bring it up. And now you tie your last knot now at this moment. What you want to do, after you have secured your last knot is to cut the string off from your closure piece now. From this point, we're going to flip closure piece over to this side will spread. The hair is evenly all around as we possibly can and flatten it as flat as we can with our flat iron. So I am going to spread the hair as much as I can all around and take her flat iron insert it underneath. Try your best to be careful and just go ahead and flatten the weft and the hair. It may take a little working on, but just be careful and continue to flatten as best as you can so now my closure piece is finished and to make sure that it's flat, what you want to do is spread the hair and lay on the table to Make sure that it's flat against now the point of make sure that your closure is land so that when you so it onto your head, it doesn't stand on top of your. You wanted to lay a splat to your head as possible. So now what you want to do before you begin sowing your closure is to take your closure turn it around to expose the weft. You need to connect your needle and thread onto this closure piece to make it easy to sew it onto your head. So now I am going to take my needle and thread and am simply going to scoop up some thread. That'S already connected onto this closure. Put my needle through and create my knot, open up thread once twice and pull-through. You want to do this 2 times just to make sure it secure go through the thread again on the closure piece with your needle pull your needle out and wrap your needle around the string once will and twice and pull-through. So now your strand and your needle is connected to your closure piece from this point we can begin to so the closure piece onto our head so right before you actually so your closure piece once your head, you are going to take your closure piece and secure All of the hair around with a rubber band so that it does not get tangled or in knots. So you are going to turn your closure piece around to let the hairs fall down. You are going to gather all of the hair making sure to leave the string out and you are going to take your rubber band and simply secure it around the hair. Now that its secured, we are going to begin to so our closure onto out head. So in my left - and I have my closure piece in my right hand - I have the needle. So what I'm going to do is take the base of my closure and apply that directly on my scalp to begin sewing. So once I place it there, when I want to do, is take my needle in either scoop up some thread, hair or weft from another piece to make sure that the closure is pinned down on top of my head so making sure that positioned, I am going To take my needle scoop up some hair and then I'm going to go underneath the closure, through a little bit of weft, pull the needle through and do my knot technique. Now that you create your first knot, you going to work your way all the way around your closure piece until you reach that point again, but once again, to the only hair back to the little bit to expose the weft to pick up either. Some hair was string for weft of another piece, pull it through a little bit put it through the weft of my closure. Just little bit of the weft on the outer edge push the needle through, and I not take one twice an pull through. So, as you can see, is only held by 2 stitches here, the back has not been sewn down. You are just going to continue to work your way around in little areas at a time to make sure you sew the piece down, so I am going to go a little bit underneath the hair and I am going to sew my actual closure piece push the Needle through and do my knot, depending on how big or small your closure piece is, will also vary with the amount of knots that you tie around your closure piece. So now we are back here and I probably have to do 2 or 3 more stitches to secure the side. Here I am going to dig under a little bit of a braid out to see their go underneath some of the weft of the closure push the needle through, create my knot, and now I can feel here that I only have one more stitch to do in This spot just to make sure it secure. So now I am going to go underneath some of my hair, some of the weft of the closure piece, as well mainly on the outer edge push through the weft for the needle out, create my last knot. I am going to tighten that and open up the thread. Just a little bit is something that I like to do is to secure a little bit more for a little bit, and then I want to take my scissors and I'm going to cut that thread off now, as you remove the rubber band and comb your hair, All the way down from all sides, you have secured your closure in this step. I showed you how to create your closure and also how to sew it onto your head. Remember that creating your closure and installing your closure is an easy process. You just want to make sure that you practice the same sewing techniques that you have been doing with your hair all along in the next, that step number 6 I'll, show you how to cut and style your invisible part sew in


Comments
Breanna Rutter: YOUTUBE HASN'T Been Showing You All My New Videos?? CLICK THE BELL ICON Next To The Subscribe Button to Turn on Channel Notifications To Never Miss A New Video Again!
WellDamn24: I'm not here for weave but I absolutely respect this woman's efforts and work both on weaving and these videos.
coffee fiend: I'm a middle age white woman. I know nothing about weaves and hair .Found you by accident. You gave me a great education. You are a great teacher. Thanks
Chanel Tapper: I've never been able to install a weave, let alone a full head. I did so almost flawlessly with your vid tutorials. Thank you so much!
SELENA Thoronka: Absolutely detailed and professional.
Reminisce: I love the videos you do I watched one today and did a sew in for the first time and it turned out beautiful..... and to all the people who think her videos are to long why take your time and watch them dummy
Erin Gallant: You are incredibly talented to do this on yourself. Great video
Ina Houston: Girl! Thank you so much for this tutorial!!!
Malaaika Lampkins: I did my first full head sew in with invisible part and it looked GREAT! Thanks all to you Breanna.
Plants and Prosperity: A BIG thank you to you!!! You do t know how much you have helped me but, God bless you for sharing your techniques!
radlegend: OMG! You're amazing! I've been contemplating doing my own single braids/weaves for a while, simply because no stylist has ever been able to do what I want. With these tutorials, I think I can!! :)
Tanika I.: Great closure technique! So happy I found this!
Pure Noire: May God bless you... you're so kind and lovely while explaining each step. thank you for sharing this wonderful talent of yours. I will be using these tips when I next do my weave. much appreciated x
Sharon Dixon: you did an amazing job on giving step by step instructions. very professional.
Tammie Williams: I really enjoy watching your tutorials. I'm learning how to sew in correctly. Thanks you're very detailed and easy to folks.
Sweeti Kai: You are far more thorough and professional than any other weave tutorials. Thank you for this channel
Angela Anderson: Thanks for the level of detail. I have been braiding hair and sewing weave for as long as I can remember and your video actually taught me something. Thanks for sharing!
Adele Napier: Thank you, thank you, thank you Breanna for your very, very detailed videos!! You have taken away all fear to at least TRY to do my own sew in!
Latasha Boyd: You did an amazing job explaining and styling...thanks so much for your help
shyah1973: Excellent video......very professional & polished.
purplepacion: Wow...this was simple & very detailed. I truly appreciate this!
brandi bryant: You are a great educator. Very detailed and easy to learn. Thank you ❤️
Weave hair killer: This video was wonderful...you did an amazing job!! I really wanted to see the style after it was curled though!! Thanks for posting this!! :)
Leyonna: I just want to thank you for taking the time to show how to us how to do this. I actually found these videos, watched them, tried it on a mannequin, then on myself and I love the results. You're amazing. Keep up the good work. I truly appreciate what you do.
Tanika I.: Great closure technique! So happy I found this!
MS. Robinson: Very well spoken easy to understand! Keep up the good work!
LeilaniLovee: Thank u! I really needed a detailed tutorial on a sewn closure. It doesn't seem so difficult now. I really appreciate all your videos!
kacn28: You just blew my mind girl. Thank you so much. I've been looking for a way to do this for months now :)
lizellie1: Wow! This is amazing. I've watched your other videos and found that there is no one as thorough as you have been. You are A M A Z I N G!..... Thanks for this tutorial. You are a true professional.
Queen Kae: Exactly what I was looking for. Thank you
Hephzibah Niamh: I really like watching your videos. I should have watched this before doing my last weave. I know where to go to now every time I do my hair. Your videos help me do my own hair and even other people's hair too. Thanks.
AKIYIAKELLY: Excellent video.. I have been trying to do this sew in technique for a while. Thanks so much now I know how to do it :-)
Breanna Rutter: You're welcome and with your continued support (watching, sharing, commenting) I can keep giving you and everyone my best and all that I have to offer! Thanks for taking the time to say this c:
Reba Gordon Matthews: You have created excellent videos. I feel that I can do my own hair from following your tutorials. OMG! You are GREAT!
Kenika Roberts: I love how u explain an detailed everything.
Esther B: Thanks so much for this! I definitely understand how to do it better now! Yay!
RoyalBeliefs: You did a very good job with your tutorial , very thorough.
B4BESS: Breanna, you are really good in your instrutional video. You instruction is detailed and clear.. I do this but don't use cap.. Great job with your tutorial. Thanks
Adrienne Curry: Brenna thank you so much for showing me how to create a closure using the sewing method. This makes sense now thank you
daniyah_is_typing: U're a true tutor, amazes me every time. U take ur time and truly expound on the task ahead. Gr8 teacher, keep up ur amazing work!!!
MurderPorn: your positive attitude and your demeanor has me thinking you can teach anything! A woman's hair is extremely important to her real or weave. You are patient, clear and AMAZING. THANK YOU.
Issa MANII: Thanks you help a lot I love how you talked through the whole thing it was a lot of help
Brhianna Price Aka Snoopy That’s Me: thank you Breanna!!!!!! I too am a Brhianna and I never understood how to cover my own tracks when I tried to do my invisible line years ago the same way you did minus the closure piece which discouraged me to try again. I found ur hair style and was like WOW I'm going to watch her!!! then found out we have the same name and u have explained everything thoroughly!!!! thanks lady!!
Disha Holloway: I love how in detail every one of your videos are!
MrsCookieEvans: I like your videos they are very helpful. Yes they are long but its good that you give every bit of info you can to us. I like it thanks.
NeCee7569: I appreciate how "simple" you made this look. I think I'll pay my hair dresser 1 last time and then just do my own hair- I wish you were in my area.
candance foster: She is excellent with her teaching how to do the different techniques thank you
Islande Pierre-Louis: Perfect and beautiful but it's too long That's the problem, otherwise, well done Thank you for sharing!
Isibabe777: Nice video. I like how detailed you are in your tutorials. Keep it up
Breanna Rutter: Thank you so much for such a compliment and thank you for watching and showing your support!
ngumss k: You know why i love you.....your teaching method is simple and easy to understand. You do not have ridiculous music in the background Your videos are clear and provide information on each step I believe in my books you are the best teacher on the Internet
sibongile soko: i never Thought I would be able to plat ever until I landed on one of your videos by mistake and now I can conrow my hair, thank you so much. continue teaching us.
sibongile soko: i never Thought I would be able to plat ever until I landed on one of your videos by mistake and now I can conrow my hair, thank you so much. continue teaching us.
sibongile soko: i never Thought I would be able to plat ever until I landed on one of your videos by mistake and now I can conrow my hair, thank you so much. continue teaching us.
sibongile soko: i never Thought I would be able to plat ever until I landed on one of your videos by mistake and now I can conrow my hair, thank you so much. continue teaching us.
sibongile soko: i never Thought I would be able to plat ever until I landed on one of your videos by mistake and now I can conrow my hair, thank you so much. continue teaching us.
sibongile soko: i never Thought I would be able to plat ever until I landed on one of your videos by mistake and now I can conrow my hair, thank you so much. continue teaching us.
Breanna Rutter: Thank you for your gratitude, love, & encouragement. I try my best to be a blessing to as many people as I can. Your words have helped me through the bad day I am having today Thank You!
Breanna Rutter: You're welcome Joseph, I'm happy that my videos are helping you & thank you for taking the time to let me know that you appreciate my videos c:
San's World: love this one....will be using this one this weekend
Alice Smith: Thank you so much for the video. It was very helpful!
AnneEsther: thanks a lot of this tutorial t's very detailed so easy to learn from.
Evenia Gamanya: Amazing....best video I've seen,am definitely gonna try the invisible parting now....Confident I can do it
Blessothers2: Your videos are very informative, anyone can learn step by step from this video. Thanks for sharing
Evenia Gamanya: Amazing....best video I've seen,am definitely gonna try the invisible parting now....Confident I can do it
SogeQueen: Thank you for posting all kinds of hair vids! I'm so sick of the Natural nazis floating around here bashing weaves. If done right, They can be a damn good protective style,
Carolyn Doss: very profesionaly done I understood perfectly. Thanks
sassysistah88: Omg I loveeee u this was absolutely thee best demo ever u were so calm and patient and showed how to do everything perfectly, i did my hair and its perfect I will subscribe ❤❤❤
Red Bloop Creature: Thanks so much! We had to look your video up in a pinch. My hair turned out pretty!
Beautiful Butterfly: You done this Very professional..and classy thank you
sunnydays212003: I love this tutorial thanks for sharing, I do have one question, how do I take this down without damaging my hair?
malawianbabe1: Seriously u are the Best weave teacher ever! You have taught me what i was lacking, thank you very much. : )
Upendo Chikoti: Thank you so much for the video! You don't even understand how much money you are going to same me. I live in Australia and getting weaves or just afro hair done is expensive and most times not even worth the amount you're paying. As a student your videos will help me take better care of my natural hair and have fun with it without breaking the bank. I already braid my own hair was just waiting for the right weave tutorial. Thank you so much!!!
Leniyems Victorero: You are so good explaining thank you
Everlasting42: Awesome tutorial, Thank you!
thegoodfaery: I'd like to ask what the benefit is of using the wig cap versus sewing the extensions directly to your braids?
Peewee: Thank you for all your videos, I have saved a lot of money!!!!
Lexi Redd: You are an amazing teacher!
Mika Chantal: I knew how to do the invisible part with the glue! but this helped me alot with the sew in. Question what is the cap for never seen that before? Thanks for this tutorial
kadi Kay: Great job. Luv your vids. Teaches me all i need to know. Thnks!
Al: I just love your way of explaining things!!!
Celeste Marks: Breanna you are the best. Thanks for the help
Ivy Too: Hi! Well I'm 15 and I'm thinking about doing a sew and I wondered how long does it take? How much hair would I need and what type of hair did you use?
Laesha Ebony: Great job. This video is super informative
Denise McKinley: I really enjoyed this tutorial of the invisible part sew-in.
cocoversache: Best tutorial ever !!! Thank you
Breanna Rutter: You are so welcome and I am so happy that I could help!
Tokunbo Basualdo: Girl!! Thank u ! Thank u.i installed my weave myself following ur directions.i dnt think I wld ever ever want to go to the salon again.thanks a lot.u can check on my picture profile to see my look.thanks once again
Katherine Allen: oh my i love your videos...i so much better at doing this...and i use your techniques to make my wigs also.....thank you so much love...
Breanna Rutter: Awesome Akiya, Im glad to teach and glad I could help!
Miriam Sanz Extensions: I love your video girl, you are The best!!and anyone that think The video is too long should stop watching...Simple.
hillzow: You are amazingly profetional. Am Glad you did this, now am going to do it on my hair....
ItsAmberJay: most informative tutorial on sewing hair ... i just bought some hair online and i really want to do it myself ... my method is okayy but this is better ! thanks
Kgalalelo Miah: Wow you weren't kidding when u said step by step...great videos gave me the exact information I been trying to get for a while. You are a great educator you dont leave anything out. Umm one more thing why do we need a weave cap
K A: I think your videos are very clean and organized. They're real good and detailed the way you explain is very understandable I don't get people sometimes nothing satisfies them... .......My thing is people are always complaining. I've seen videos the people move so fast you hardly get to see the details how they do the style to even learn from it much less. It's like they miss certain aspects of how they got from one point in the hair to another. Being that it was so fast and sloppy people complain, oh it was so rushed. Then you get videos where its slow and detailed oh it's too long and dragged speed it up, everyone is different. Some people like it quick and to the chase,some like it slow detailed and step by step. If it's not what you want then continue to a next video keep it moving simple. It's called YouTube you have a wide range and variety that suits your needs.Anyway great job honey it takes a lot of patience time and effort at least you making your money and making a difference. Don't let negativity worry you keep being awesome!!!
Chrissy 212e: Whow complete guide to weave in 8 very informative videos pretty awesome:) Everyones wearing wigs now so weaves are no longer that popular especially as you can take your wig off daily
Breanna Rutter: Thank you Kona and I'm glad you like and appreciate my channel, I will continue to bring you my best!
Boxing with the Middlebrooks: Wonderful in debth video. I love your method, I love it love love it
Love Repent: very fabulous great instruction.
Yolanda Maphalala: You are a QUEEN!!! Thank you