Easy Braided Updos! (Only 10 Mins!)
- Posted on 20 January, 2021
- Updos
- By Anonymous
Hope you enjoyed these quick styles! The Straighening iron I used is from https://stylr.pro/
and you can use sweet10 to receive 10% discount
The head is from https://www.limage.de/trainingskoepfe.... and it’s the Louisa head. If you use sweethearts15 you get 15% off.
Please take a look at my Instagram https://www.instagram.com/sweethearts_...
for daily inspiration
Thanks for watching! See you next week ❤️Beth
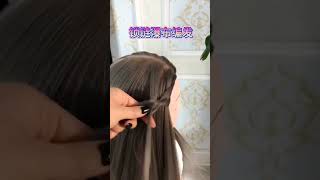
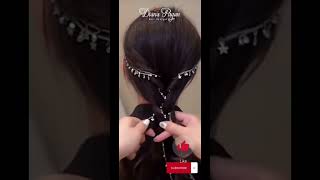
Hi everyone, it's beth from sweethearts hair and welcome back to another tutorial. So today, i'm again with louisa filming myself, i'm camerawoman, i'm editor and hairstylist and locked down, and so i thought i'd show you today, not one but two styles. So what we're thinking of today is quick, so it could be a friend said: oh my gosh. I'Ve got to go somewhere. Can you help me do my hair? It could be that you're, a stylist and you're doing a wedding and you've got an extra bride made that you didn't know about. I want to teach you two really beautiful, but really quick styles to do in those situations: no prep, no curling, just styling dough. So, let's get started so the first thing we're going to do guys is just take out a bit of a zigzaggy sort of part line at the front, not loads and loads of hair. Just about that much on both sides and pin for me, okay. So i'm just going to take my fingers there and just grab this top section here, not taking the sides yet so into three goes: regular french braid we're going to cross over the middle cross over the middle one. More time thumb goes down cross over the middle and then we're going to take a section from this side. Just a nice sweeping section again use your comb or your fingers to create that nice, smooth braid crossing over take one from the other side, so regular french braid at the minute guys. Now what i want is. I want the braid to kind of sit up a little bit, so i want the sections at the end to sweep. So what i'm going to do is almost take my hands and just lift up that braid a little bit cross over taking these sections. Another section guys fold it into that braids cross it over and i'm going to lift again we're going to manipulate these strands afterwards. Okay, so then you see just lifting up those hands now on these sections. Now, once you get by the ear, i want you to think don't take just horizontally like that you're going to kind of come up, maybe even a little bit more here. So can you see how i've come up to meet the braid there same? On the other side, so we're not going to go just straight across we're going to bring our hand a bit lower and up, and then this last one on this side. You see how basically the braids finished about here, but my hair's been swept up to meet it. That'S because we've been pushing that braid off last one here again sweeping upwards and then once you've done that i want you to almost like secure it. By doing quite a tight braid and that's going to keep that plaque sitting up off the neck, so you're just going to pop in an elastic there. Now what we're going to start doing now, you'll be looking in the mirror. For this always look in your mirror. When you're teasing anything around this area here because it can look great from the back but terrible from the front, so i'm just guessing, but don't you do that? Okay! So now you can kind of come into these center pieces and just start to give them a little bit of a tease out just a little bit. We can do some more in a minute now. What you're going to do is you're going to take your fingers and just make sure that there's a little gap sitting underneath that braid and if there isn't just kind of loosen it with your fingers. Okay and then you're going to take hold of this plaque and you're going to push it underneath, okay, so so taking hold of this plait and we're really going to try and push this as far up as it will go now, if you look from the side, You can see that you've really created much more of an updo type shape because the hairs come away from the head and then you're just going to get some long, pins guys and just go in there and just secure that to the plait. So literally, i'm just taking a pin going underneath and just weaving it through and just securing that in there and then just coming back to this back section, pinning them together getting a grip and just weaving that through the braids and then you can just go in With your cone with the prongs, and if you want to you, can just kind of like lift up this top area a little bit, you can also go to the sides and just create a little bit more sort of depth and definition just by teasing up some Strands or if you're, in a rush, that's it for the braid now coming back to these side sections guys, so some people are gon na want um some bits down just to frame the face. Now, with these bits here, i'm just going to kind of like sweep these in, so i'm just kind of teasing them down using a topsy tail just to push and i'll just tuck this tail in guys, i'm not gon na like pull that through or anything. I'M just gon na wind it up and that's the beauty of creating this sort of, like french braid, with the hole sort of running through it is that just tucks and then just pin and this side bit here, i'm going to make mine just kind of cover That ear just again to just give it that little bit more of an updo feel and then i'm just going to do guys a really quick sort of almost bend to the hair. So i'm just picking up that strands. My elbow comes up. These are my new titanium straighteners and i love them. I'Ll put the link in i've got a 10 discount for you as well. They just they close their hair down. It'S a drier, curl um. I just love them. Actually, i always so that is style number one. Complete, i reckon, if i wasn't talking to you guys, maybe that would have taken me 10 minutes. It may be even less if i was really under pressure, and so i'm just going to do a little lobby as a spin for you. So we decided to keep bits out, but some clients obviously wouldn't like that. We'Ve made it more of an updo by keeping those strands coming up to the braids around. She goes really quick, really simple: oh steady, louisa, nice wedding or occasion updo. So that's number one done: let's move on to number two now with this style, guys again you guessed it! I want you to leave a little bit out the front and we can decide what we're doing with that afterwards. So think, quick, guys, think really really quick. I'M just going to literally split the hair into two and just kind of rough as well, so just roughly two, i'm just going to bring that side out of my way. Come back round to this side and all you're going to be doing is a french lace. Braid, which means that we're only going to be taken from one side, so i'm going to just take a strand of hair i'll, just turn her a little bit now i don't want to take the hair. That'S right on this part line here, i'm just going to come in a little bit: okay, you're going to break that hair into three okay cross over the middle cross over the middle cross over the middle. But we're not going to add on this side so we'll cross over the middle again. Now i'm going to start taking hair and adding it in okay. But again, i'm not going to pick up this section here. Okay, i'm just going to come in a little bit on my first few sections, i'm trying to create a really soft hairline and if i pull it from the side, it's just going to look too severe. So i'm just going to leave that there cross over the middle, we're not taking any from this side. So again, just coming back to this side, and now i will just start to pick up the section from here: can you see how it's created a much softer part line at the top here, so it's just a regular french braids, so i'll just turn. Louise a little bit now: okay, so we're going to take a section of hair, i'm going to start taking slightly bigger sections, now remember: to use your product when needed, keep adding those sections and just from this side. So quick, quick, quick, quick, quick! We need an update. It'S got to be fast, make sure you clean your sections, guys, don't get that messy break going taking another one last one's going in on this side and then i'm just gon na do a regular braids. I'M just teasing it out a little bit if i was doing this on a person now, i'd probably use a little bit of sort of like a shine spray or a dry oil on this sections of hair, just to make sure it weren't too dry. So just pop in an elastic there, so coming to the other side guys exactly the same so you're going to take your section of hair, don't take it right from the part line just come in a little bit start that braid, so we're passing over the center. Passing over the center passing over the center pass over the center and then we're starting to add just from this side, leaving those few sections just by that part line nice and gentle with your hands when you're wedding, braiding or occasion braiding. We don't want to get that tight, then i'll come back to the top there and just create that nice soft sweep. I always seem to get hurt. I'M talking, never look. When i'm walking on and again you'll just tease out this braid. You can decide if you want to tease this out afterwards. It'S completely up to you on the look that you're going for. Are you going for a sort of teased out sort of more relaxed look, or do you want to keep it a bit more sort of neat and smooth? So next, what i'm going to do is just literally grab hold of these braids and just secure them to the head with a long hair grip. So i'll just push that into the braid like that, you can't see the hairpin you can just go in and just give everything a little bit of a lift same on this side, i'm just weaving that hairpin through and then i'm literally guys just gon na. Take these hair, braids and just kind of roughly pin them in. I don't want this style to look too perfect and again we're just going to give that hair. A quick turn so literally take you one minute to curl these front bits guys and then again similar to what we did on the other style guys just to sort of make it look more up. Dewy, i'm just going to take this side section here. I'Ve left some out and i'm just going to kind of like pin it about there and then again on this side, guys i'm going to do the same. So i'm just going to kind of sweep that section down and then it's just a matter of kind of like looking at the style from all angles. Remember, like i said last week, make sure you don't look at a style as a two-dimensional piece. You'Ve got to keep moving around, making sure that you haven't missed any pins that are on display or any little bit that needs to be sprayed. So that's our second style done. Another louisa spin coming right up. So can you see it's just attention to detail, not taking those strands too close to the part line. Having these bits sweeping on the side is really going to make a difference. We didn't have to curl the hair. It would have only taken about 10 minutes in real time, and i just think that is a really really really pretty wedding style in 10 minutes. So i hope you enjoyed my tutorial for the day, don't forget to say it which one you prefer, and i will see you next week for another video bye.
Comments
e_kychkina: The first style is my favourite daytime “braid and go”! I braid with larger sections of hair, and it looks more relaxed.
Rebecca Kupferstein: The second one is so great! You make it look so easy
MLC Bean: Love, love, love!!! Thank you for showing us all these great tips and techniques on how to turn something easy and ordinary into special and fabulous!!!
Priscilla Todd: Both r beautiful, but style 2 is really pretty! And u r doing a great job by your self by the way, love watching your videos and seeing what new styles u come up with so that I can try out. Thank u for hanging in there during these tough times.
Pri Correia: I LOVE the second one! I'm gonna try to do it~
Christy Hargis: Both styles are absolutely stunning! #2 is my personal favorite. Thank you for such an informative post! I can actually follow along, you are a great teacher!
Sister Salina Garber: I like both both I would probably go with 2 for wedding and 1 for fancy night out ❤️ did it once again Beth love it
Erin Stricklin: Beth, both styles are lovely! I prefer the first look because I think it would be easier for me to do on myself.
Dawn Hurst: Both are very cool. Personally prefer the second look for myself but both are great. X
Mindy’s Pretty Hair Salon: So pretty! Can’t wait to try them!
Carina Uematsu: So beautiful!! I want to try out look number two
AubrynMusic: Lovely! I like the second one best ♥️
Kim McG: I LOVE the second one. Gorgeous
Ashley Guthrie: The braid tucked under would be a nice winter style to keep ends from getting damaged with all the dryness and frigid Temps and friction from scarves and coats
Kelli Hicks: Oh, wow! Those are both so pretty. It's hard to choose which one I like more. But if I were pressed to pick one, I think I'd go with the first style.
Preslava Minkova: I enjoyed both styles, but if I have to choose, I would go for the second look.
Светлана Константинова: Вы сделали из простой косы прическу. Спасибо. Много лет заплетаю волосы таким образом, а прическу никогда не делала. Классно.
elena mill: Love it! Thank you!
Kim Burke: I really love them both.
Donna Okoniewski: Both styles are nice ~ I like the second one best. Thank you so much for sharing.
Briana Hernandez: I adore your beautiful hairstyles, I look at how you do them and I comb myself
Nickell Francis: I really like both hair styles so pretty
joan angel: Just watching now. Both her good. Great for a quickie up Do but stylish too. Thanks. X
Trish Pipkins: I love both. Number 2 is my favorite.
Vampire L: yes, we need beautiful hairstyle but can finish in a short time!♡♡♡
C Toney: My fav is style 2. Love the addition of the wispy brought back to add some femininity and whimsy.
The Status World: Lovely Hairstyles!! ❤
Looloos Hair: Both styles are fabulous
Shanna 1405: both are beautiful but prefer the second style :)
kmgothi5: I really liked the first one. I appreciate your explanation, especially as it pertained to the hair at the part. That was an ah ha moment for me
Mkc Lore: *I LOVE BOTH, BUT, I THINK THE FIRST ONE IS EASIER, SO THAT'S MY CHOICE!! XOXO FROM MÉXICO*
Lindsay Burrett: The second one is stunning! The first is beautiful as well but the second one screams bridal or formal more to me but also seems more wearable like on a Thursday to brunch or something. Ya know?
Nakit za lepotice: Sooo pretty :) I have short hair, but now I wish I have something to play with.
시썬데이 SiSunDay: So pretty
Żanka: Sooo pretty! I like number 2 more
الشبح: vary amazing
poppy_hairstyles: my favorite is the first one !!
Maryam Malik: Loved both ! My fav wud be the second one
Kerrytaylor: Love these up dos can you pls recommend the best Kirby grips, I’m sick of buying rubbish ones xx
VersaStyle by Laura: Love these Beth you hair whizz ❤️
Jennifer Lucas: I like #2 the most. What is the needle-like tool called you are using for threading pieces through the braids?
Rukmani Sindhu Thangam: Oooh yes! Was just thinking of updos! And was thinking I don’t have the volume or even the fake bun thing. I have just the right amount of hair for the first style! Can I do a Dutch braid for the second style?
Carla Alcoser: So beautiful
Lisa Ruiz: I love your styles but I would love more if you would teach me/us how to prep hair and what products to use before even starting a style
Helloísy Gomes: You're the best!! Nice hairstyles!!
Molly Thayer: Hope I can learn this before easter.
Christine Held: Both are beautiful. But the second is more for a formal occasion. The first Is more everyday because I can do it my self.
Angela K: #2 is favorite, but 1 I can do on myself and #2 for someone else
buse göçmen: can you please make a tutorial for Yulia Tymoshenko braid??
Lesley Graham: Nice colours through that mannequin, makes it more effective x
Glamrockqueen: Love both of these styles, wish I hadn't had my hair cut now. How are you coping with the home schooling me duck? xx
La reina de las trenzas: So beautiful
Cooking with Fozia: Awesome..
Baad Ducky: Can you do these on short hair
Andy Smart: Nice work, as always. ✅. Did somebody tell your daughters how much models get paid per hour and they’ve started asking to be paid?
Lesley Graham: Beth, what mannequin is it, by the way, she has great hair
cricket world: You r my sweetheart ❤️
Monica Valdes: I love both but 2and one the best
Areeb Imdad: ❤❤❤❤❤❤
Haleema zafar here: Woww...
Jeannette Kruger: Toll
Christiane Sonstwas: I love #2 but I need a hairdresser for help - doing it by myselfe I look like "Kindergarten- Child-Updo-Accident" :D
tina 72: Liked second one
Awakened One🌷🌺: Fab! Where are the heads from please?
ilseanaly toledano alvarez:
Joanna Wood: How come you don't do hairstyles on your children's hair lately?
Fidan Gülcan: I love sister❤️
Rukmani Sindhu Thangam: Is it really a Beth tutorial if she doesn’t tease the hair a little bit?!
Bb Al: Yes good
Haiku Hiaku: Deuce