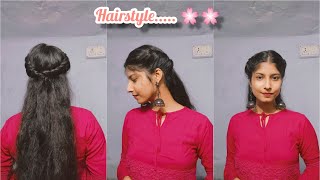
Easy Updo For Medium/Shoulder Length Hair
- Posted on 10 May, 2014
- Updos
- By Anonymous
Skip to 0:52 to get started. Finished hair at 9:55.
From one hair non-expert to another, I hope you find this helpful!
Blog post with photos: http://modernmartha.com/2014/05/easy-u...
You need:
dry shampoo (optional)
bobby pins
hairspray
headband (optional)
--------------------
POPULAR VIDEOS
DIY Recycled Magazine Organizer: http://www.youtube.com/watch?v=3PVUovT...
Crest 3D White Professional Effects Whitestrips: http://www.youtube.com/watch?v=pN2rxys...
Vanity & Makeup Storage Makeover: http://www.youtube.com/watch?v=Js-XNQP...
My Makeup Collection: http://www.youtube.com/watch?v=-_k9LTs...
DIY Recycled Brush Holder: http://www.youtube.com/watch?v=grSwSoi...
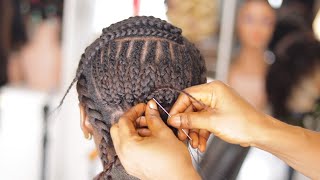
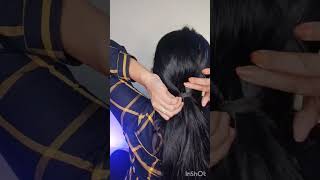
Hey everyone today, I'm gon na show you how to get this updo. I just want to disclaim up front that I am NOT a hair person, I'm not very skilled with hair, but I did this up too and it worked and it was kind of awesome. So I thought I would do it again for you guys, because if I can do this, you can certainly do this so keep watching. First, I straighten the top like half of my hair, just to get the roots straight. I have curly hair, but if you have straight hair, you might want to instead curl the bottoms up a bit to give you a little more texture and balance to work with my hair doesn't seem to hold bobby pins very well. So, to give it a little texture and give it a little like I'm gon na put in some dry shampoo. This is the Dove refresh and care volume dry shampoo. It'S gon na work that, in with my fingers, so your hair can really be pretty messy. For this I mean I felt like rat's nest, hair going on right now. This is like day three hair with, like straightened dry shampoo, the roots so yeah anyway, it doesn't have to be super nice, I'm gon na start on this side and we're gon na pull out the section of hair that I want to stick out and then I'm Going to pull all this back and smooth the roots down, because we're gon na start a twist starting from the ear and going back. So I want to get this hair, nice and smooth so that we don't have to pin it back too much. Okay, so starting right there above my ear, I'm gon na start making a twist with about half of the hair. So about this point, and instead of following the hairline down here, I'm going to come down and bring it across my head a little bit to make the roll, because the rule is gon na, come on down a little bit. So you want to give it a little room to puff out so again, starting at the ear or smoothing everything down up here, going to start twisting so this hand I'm using to hold the twist and this hand I'm using to bring in more hair, and you Want to try and keep the twist tight all right. So at this point you should have little take a peek and, assuming that's looking good to you, we can start putting in some bobby pins, so I'm gon na hold my twist now with this hand and then put the bobby pins in with this hand, going that Way we're playing line up front there from the one at the base of the twist going downwards, and this is real, just a pin it all right and then I'm going to take that bunch of hair. That'S coming out of that choice. Now about that much hair, and I'm going to twist my guess: choices in the right where I'm gon na roll it up like this, that it can be extremely messy and then just pin it and your little curl and we're just gon na be doing a bunch Of those messy curls all over you're, going to see bobby pins um, I'm sure there's a way to finesse it so that there are no bobby pins showing. But this is an amateur update. Guys honestly like this would be a cute hairstyle alone. So I'm going to take then some of the hair from up top and instead of curling it and wrapping it upwards. I'M gon na rub it downwards. I'M gon na stick that right there I'm going to keep doing that kind of rotating between taking lower and upper pieces of hair just to layer it. So I'm going to take it from the bottom. I'M curling my hair up and pinning it in and when I take it from the top, I'm curling it down and pinning it in got just one more bottom section: I'm gon na roll up and then this last big chunk of hair includes my like front layers And I am NOT gon na leave out the whole thing. I'M just gon na pick a little bit on the side to leave out like that, and then I want the very front piece to kind of like elegantly wrap like that. You know so I'm going to keep that out as well for now and then I take this one big last chunk, so it's really smooth at the top and then I'm gon na bring that back here with everything else. So we are almost there now, I'm gon na take this front section and I'm gon na twist it just delicately slightly. Oh and again, leaving out my little bit of hair there and I'm going to tuck this down, I'm going to try to cover up a bobby pin, you know or two on my way, convenient and then I'm gon na stick this down in between some curls. I think and pin it to the hair. That'S the plan at least so I'm gon na do a pin, that's going forward in that direction. Oh, that didn't feel good try to cover that a little bit and then a little floppy back there all right now, I'm gon na stick this down in between the curls and pin it. So I'm just gon na uh play with us a little bit. Try to get it to be a little more poufy. I always think it's better to make it tighter and then loosen it and have it too loose, and then it's a really difficult to tighten. So before I messed with the front sections. I'M just gon na check the back and see if there's any of loosens. I want to tuck in anything like that. So here's a little in right here, that's popping out, I'm just gon na find a home for it all right. So the science section this one, I'm gon na touch up a little bit boom with my curling wand, just to get it in that nice spring lit shape, and then I'm gon na separate this out a bit, make them a little softer and that's pretty much it. I mean I'm gon na spray, it hair spray, the bejesus out of this. In a second cuz, I told you, my hair doesn't really hold bobby pins really well, and I wore this previously lasted all night long, so you should begin another trick. I'Ve heard is, you can actually spray your bobby pins with hairspray to give them a little more texture before you put them in your hair um, I'm gon na try that sometimes I recommend it. I just heard it Pinterest, you know um, so this is it guys. It'S a pretty simple up: do it's the updo for people who can't do updos now, it's time this is the Aussie mega hairspray it's flexible design like because then you can layer it up, and now that I have destroyed the world with one single updo. This is pretty much it. I did this hairstyle for specifically for a flapper party that I went to. It was a Great Gatsby themed party, so my friend made me a feather headpiece and I attached it to a headband just a little sparkly headband that I got from Walgreens. So I put this in my hair about here. You can see that I just set it in like this, you guys how laughs we're doing look right now. So if you have any questions well anything I did please let me know, and I will talk to you guys later - bye
Comments
M K: I loved this tutorial. I have crazy hair that isn't easy to pull up very cute so I am hopeful that this does the trick for me. Great video & super awesome personality!
garzanena: Very cute, I love this!
Olivia Frescura: LOL at work that updo! That style is gorgeous! Looks great on you. April (and March) Empties | OliviaMakeupChannel
jojobabes2008: Love it :)
Mila Hitomi: THANKYOU SO MUCH! I have a 1920's new years eve party coming up and I don't want super curly hair this is perfect specially since your hair is a similar length to mine!
duckyone20: LOVE LOVE LOVE this on you! and the do as well
janine richards: I can c where you are going with this and it's a great idea, with practice this has the makings of a fab up do well done x