How To Crimper Straighten// Makes Hairstyles Last Days// Secret To Amazing Updos
Thanks so much for watching this tutorial on how to crimper straighten. Honestly, this technique will make your hairstyles so much better and stay for days!!! My hairstyling ability has drastically improved since using a crimper to straighten the hair.
Other tutorials you may like:
Romantic Fishtail Updo:
https://www.youtube.com/watch?v=KbnWqn...
EASY BOHO UPDO
https://www.youtube.com/watch?v=CxUb0S...
For more short tutorials, pictorials and bridal hairstyles check out my IG
Instagram: https://www.instagram.com/hair_styles_...
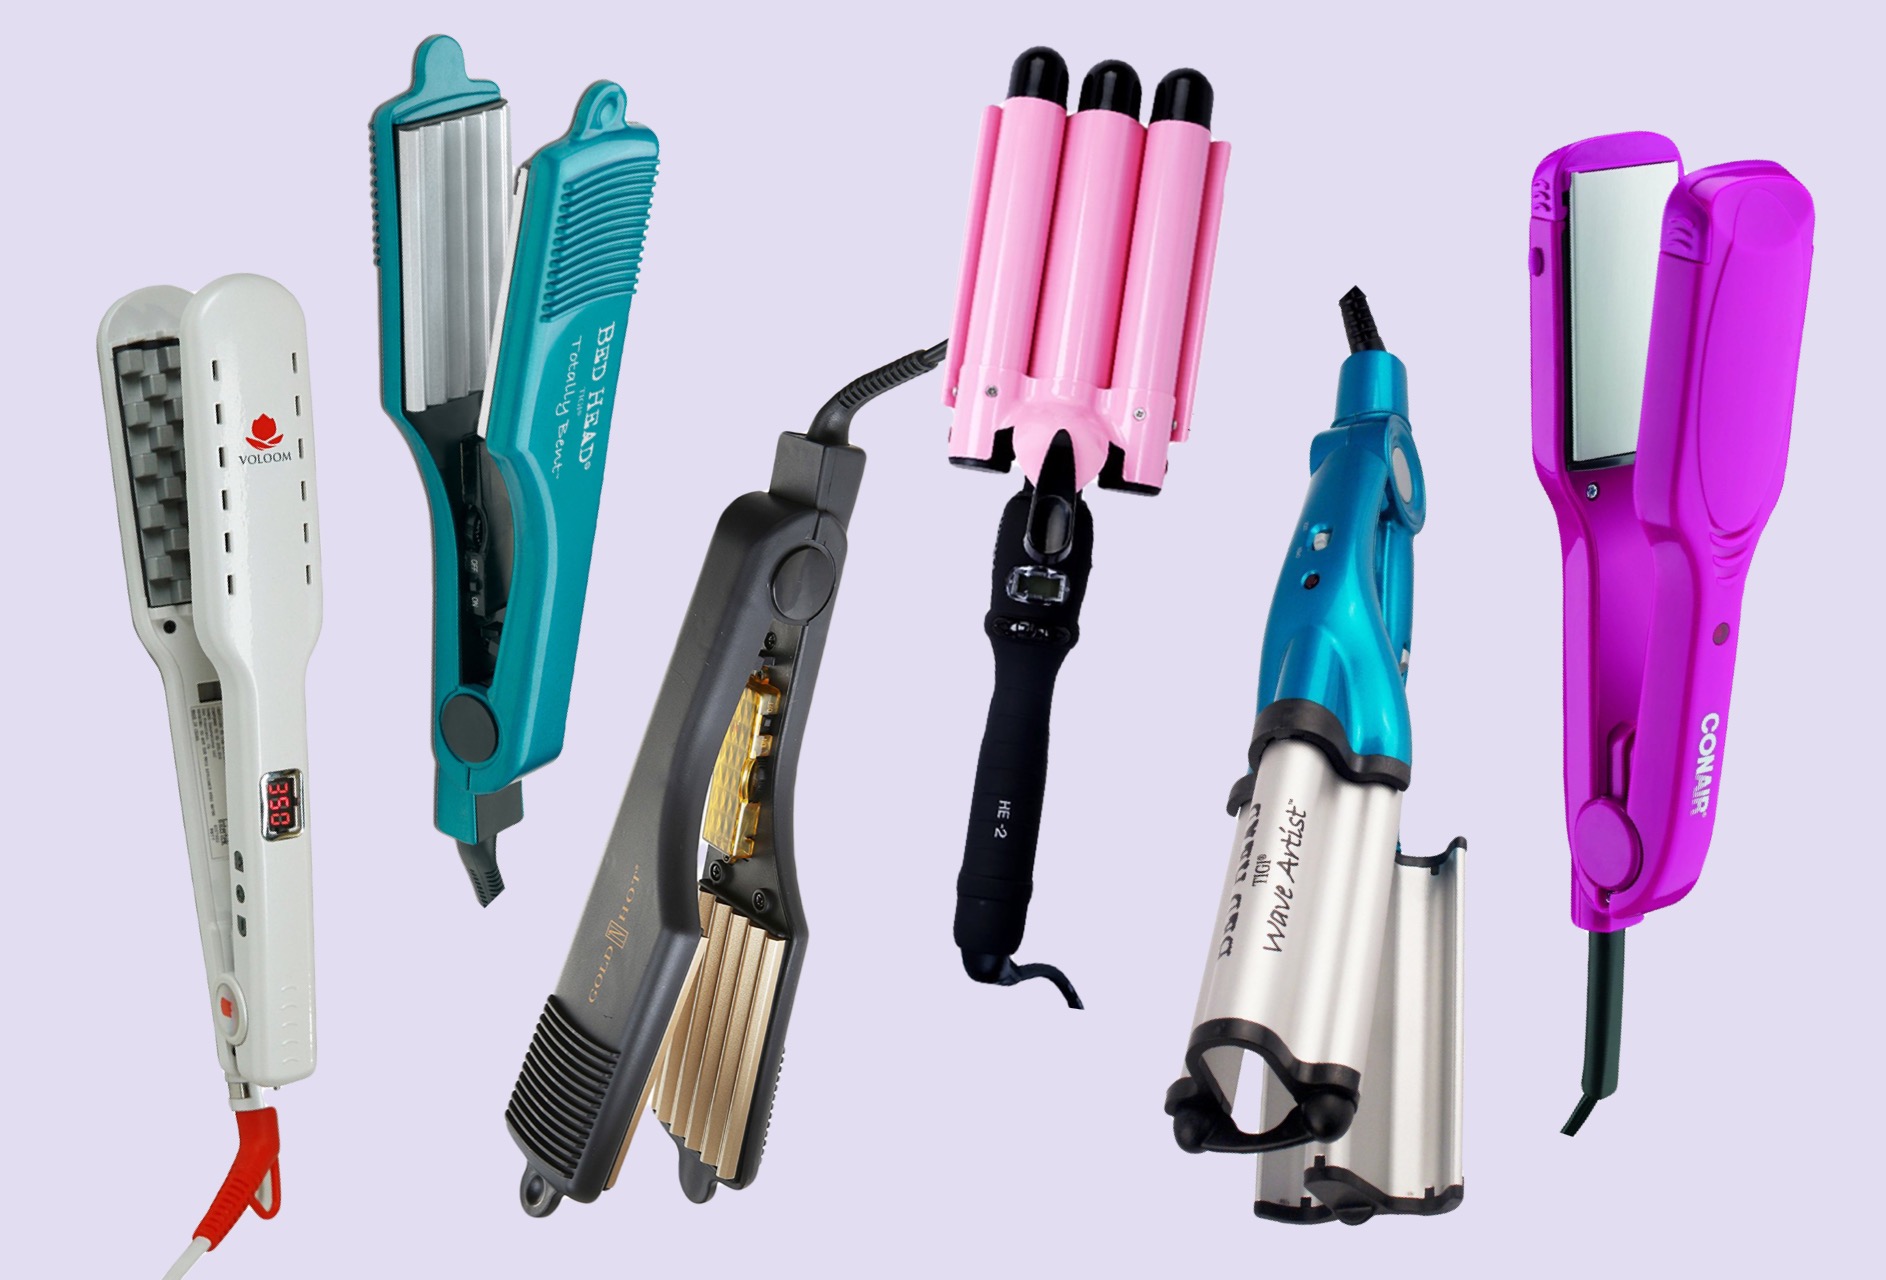
G'Day it's jay and welcome back to my channel. So today we're going to be looking at crimper straightening, so first off what is crimper straightening, so crimper straightening is when you use a crimper which has little ridges in it to straighten your hair instead of a regular straightener. So why would you use a crimper straightener? So, for four main reasons reduces flyaways, helps the hair stay in longer adds volume and reduces the amount of product you need to use. So, as you know, straightening helps to reduce your hair flyaways, but the same thing is for when you crimp a strain it has. The same flyaways benefit. Second, one is help the hair stay in place. So how does crimper straightening help the hair stay in place so what it does, instead of having their hair completely smooth, where it's all just laying on top of each other? It makes little zigzags in the hair now the best way to kind of imagine this, because it's not always really seen that well is cardboard and you think how much stronger card body is compared to paper or something with just one thin layer now cardboard has all Those little ridges in it that help it stay strong. So this is the same for crimper straightening. It'S going to make those zigzags that are going to help the hair both stay in place and hold that position. So the next one is, it adds volume. So this is a great one. When you do cremper straighten your hair, you normally get a little bit extra volume as it is, but when you do an up style, it creates so much more volume, because every little piece that you do and pull out has so much volume added because of those Zigzags, so the last one is, and it might be a little bit obvious with all the other examples is it reduces the amount of product you need to use you think about if you've already got ridges in your hair, giving extra texture giving extra volume you're not Going to need to use as much of those products as well as when you bobby pin something that has been crimper-strained compared to regular straightening is gon na, be a big difference, because regular straightening makes the hair silkier. And if you put a bobby pin in you might miss a little piece, it could slide down the bobby, pin, there's heaps of different things. That could go wrong in a sense, but when you crimp a straighten you're holding that place more in and that you can actually stick a bobby pin in a lot easier and let it hold so when to use a crimper straightener. So when do you actually crimp a straighten, so most hairstyles you'll, see on pinterest and all across social media is actually hairstyles that were hair prepped through crimper straightening now a lot of times, people imagine crimper straightening as well. The hair is just full and absolutely everywhere. That is not the case. Most of the time. You cannot even tell that your hair has been crimped stringed. It is so small. The little ridges now the most important time to use crimper straightening technique is when the client has thin or silky hair, so for thin hair. It'S going to add that extra texture that you need and extra volume, so you can make the style. Look a more a lot more full and that's how you see on the web, where people have such short, hair and very thin, and then suddenly they have a lot more extravagant hairstyle. It'S because every strand there has had to have little ridges put in it. To give as much volume as possible next one is oily hair. Oily silky hair can be great when it's straight, but when you try and curl it when you try and style it can be so hard to stay in place so using the crimper straightening technique. It is going to help that hair stay so much longer and be so much easier to style. Okay, now, let's get to the actual technique of how to crimp a straighten. So i'm just going to do this in my own hair, it's a bit like straightening, your hair, that you want to get the whole head so once you know that there is no knots in the hair, so make sure you give it a good brush. You just want to grab a section and just do little dabs in the hair. Now i've got mine on really hot, to show you what it's like when you do at a really really heavy heat. Now you might be like whoa. This is so obvious. Well, the hotter you do it the more obvious it will be, and also depending on the brand of crimper you get. But when you brush it out, you can't actually notice it that much and i would not do something this heavy of a crimper straighten um unless it was an updo. So for curls i would do a lot lighter. So how i would do a lighter technique would be just doing the same thing but dabbing it um a lot quicker and also reducing the heat, so that one was at around 230 degrees, and now i've got it at around 180.. Now you can see that one is a lot less obvious. It'S literally that easy! Look! How straight and silky this hair looks. I just give it a little bit of a brush through, but it's literally yeah that easy. If you want a bit less of the crimp in it, you can also take bigger sections um and again, if you are working with a client who really doesn't have a lot of hair, you can take smaller sections and really try and make sure that every single Strand has a good groove in it just to give as much volume as possible, so i've just gone in and straightened the right side of my hair to just show you the difference between crimper straightening and normal straightening. So this one was done very quickly. I would normally spend a lot more time make it a bit fuller, so you can just see how much more volume this one has. Yet it still is pretty smooth um yeah. Now i just want to quickly show you the difference between the hairstyles i did before. I learned crimper straightening to now so these first few you can see they have a lot of frizz. This is before i started doing this technique. Um, you can see the structure. There wasn't a lot of texture in my hair um. There wasn't a lot of volume either and then now, with my recent work, you can see there's so much more texture, there's volume um, obviously there's some other factors that have come into play, but they've only been about a year to two years. Difference between the first photos and these ones
Comments
Dayana Ulibarri: Really cool! I didn’t know this! I will be doing my own hair for my wedding and I’ll give this a try!!