Natural Hair Challenge - 30 Days, 30 Updos: Basic How To'S
The intro video to my 30 Days, 30 Updos tutorials. Please watch these instructions before watching the rest of the videos!
Don't forget to check out my blog: www.aishaandlife.com
Tweet me @Aishaandlife
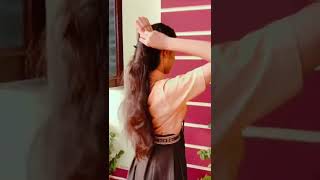
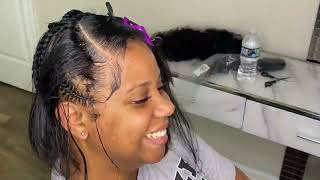
I figured the best way to start off. These tutorials is by doing a tutorial that teaches you guys, especially the readers out there, who are very style, challenged I've gotten quite a few tweets and emails etc from people who have said that you know. I love your Styles and your videos and everything, but I still don't know how to do a flat twist or what do you mean when you say XYZ, so I figured um basically to explain it very simply. My thirty days, thirty updos challenge was very challenging, which was awesome and everything, and most of the spells that I rocked for that month were completely new styles. I got quite a few of them from other natural hair bloggers and vloggers out there and some of them. I just made up, but I figured a lot of the videos will be explaining things as if you already know what I'm talking about. So please carry on watching this video because I'm going to explain to you and show you exactly how I do a flat twist. A loose twist puff, I called it, and I think that other one is a roll, tuck and pin or otherwise known as twist up. So basically what I did with my 30 day thirty days, thirty updos challenge is i remixed using a lot of these different techniques. That'S why I'm saying if you watch this video first it'll set you up to watch the rest of the tutorials okay, so here we go so as usual, with all of my 30 days city, up to tutorials, I'm gon na start off with hair. That'S been stretched. This actually isn't as stretched as my African go I've just sort of given it a bit of a break from the challenge, and so it's quite shrunken. Still that's what I'm rocking the next day or two, but just to give you a quick sort of indication, I'm not sure if you can see against my skin, but my hair reaches up to here. So that's basically what like shoulder length. Basically, so it's kind of uniform throughout, so I should you could see that that's how long my hair is when it's fully sort of pulled out and stretched okay. So I think the first thing I'm going to start to show you is how to do a flat twist. Actually, no I'm going to teach you how to do a normal twist, first, just in case you're, not so sure. Okay, so just part your hair, I'm just going to show you like a big one, so you can actually see it properly. So I take a section of my hair, so when I tell you that I slept in twist, this is what I mean. I basically just part my hair into two two strands, and then I literally just twist them around each other okay. So it's up to you how big or how small you want the twist and for some of my readers they've also seem to have struggle to do this with their hair and they keep asking me what products I use. I don't apply any product when I do a twist like this, because if I do, which I have been doing for the past year and a half, I used to put some gel and some sprints or sheer butter, and it would just not Ravel so one day. Literally accidentally, I just sort of like well, you know watching TV or something along those lines. I just started doing this and for the first time my twists stayed. So if you see that your hair is similar to mine, maybe you can give this a go and just twist your hair without putting any products on it directly before obviously, okay. So I basically twist my hair, while it's still dry so, like I said you can make these as big or as small as you want for more curl definition make them a bit smaller. That'S what I usually do if I want that sort of like wavy kind of look in the front, you'll see that in quite a few of my updos okay. So this is just a normal twist. Some people call this a two to two strand twist, I'll, probably just refer to it as a twist: okay, okay, so part your hair, I'm gon na do a sort of nothing too chunky and nothing too tiny, either, because I want you to see what I'm doing. Okay, so I just part my hair, you can use your fingers, it doesn't matter, okay, so, depending on how my hair is then I'll, probably use a bit of my afro botanics, hair fertilizer use, whatever hair food or cream or whatever that you use. I just put a bit on my fingers to just put onto the sort of beginning part just to help it get a bit more of a flatter. Look. Okay! So now you've got this line start off by sectioning a bit of your hair in the front you're. Almost doing a sort of what's its name, other lines, you're kind of creating a right angle with the partition. Okay, so take that section separate it into two parts and then twist these around each other. Okay. So now they they're twisted around each other, I'm right-handed. So it might work a bit different for you left handers, but just have a look so now I've got these two parts. So what I'm going to do is I'm gon na section off another part of the hair from the rest of the sort of shaft and I'm going to add it to one of the strands and then I'm gon na twist over I'm gon na. Do the same thing section a bit of the hair: add it to this twist, o strand rather sorry and then twist it around. Okay, I'm going to show you one more time. So this is the twist. This is the rest of the hair you're gon na grab. Another piece from the rest of the hair and add it to my twist twist around keep doing that so now: you're, basically adding hair to one of the strands and twisting it round. Let'S continue doing that until you reach the end or if you decide that you're only having half and then just end where you need to end okay. So this is basically how a flat twist will look like, depending on how big or thick you want it to be. So what I'm going to also show you is something that I just recently started doing, because my hair is the texture it is sometimes I want it to look a bit smoother. So what I do is this is another way of doing a flat twist. So I don't know how you call it efficiently in the natural hair world. I kind of refer to this as double flat, twisting okay, so start off the same way, part of it of your hair, like so create two strands like before and then twist them round. Each other not once but twice or if you want. Sometimes I do it even three times in the beginning and then I carry on I grab a bit of hair. Add it to the strand twist, add a bit of hair. Add it to the strand and then twist twice this just sort of creates a bit more of a smoother. I don't want to say neater, but smoother kind of styles, so add to hair twist and sister and twist twice: okay, I'm gon na! Do it one more time so you've got your strands, you grab a bit of hair. Add it to one of the strands twist. It over add another bit of hair twist it over twice okay. So this is how it looks, and so sometimes if I refer to it as double twisting or maybe triple flat, twisting that's what I mean and it just sort of stays in your hair at the tighter and also gives you a sort of smoother kind of finish. Take a section of your hair and it doesn't matter if you create a rectangle or a line or whatever it is, but just some kind of what I usually do is just sort of like have like a bit of a square kind of thing. So I've got a bit of hair here so now. What I do is, I stretch it out. Usually my hair has a bit more stretch than this and it helps when you've got a bit more length to your hair in order to do this stuff. So so what I do is I separate the hair into two parts, but only at the end. Okay, so I haven't just like drawn a line here. This is really important because it gives you that sort of loose, puffy kind of look so doing this. I just twist literally just the ends: okay twist them round each other twist. Okay, until you get to a point and then what I do so now. I have this like sort of like puffy kind of thing here and then so, but this twist keeps the hair in place. Then what I do depending on what direction I want. I tack it in okay and then I take bobby, pin and secure where the twists ended and where it's tucked in okay, so you can see now I've got like a puffy thing going on there, the more hair you have, the longer hair you have, the bigger The puff is going to look like the last thing I'm gon na show. You is how I do a twist up. That'S my name for it so, but I've sort of found that a few weeks ago, that a lot of natural hair bloggers are actually referring to this as a roll pin and tuck or roll tuck and pin one of the two. So if I use that term, if you see someone else using that term and saying, but I should cause a twist up, it's the same thing. So again you just punch in here, and it really depends on how big you want to do it. Okay, so I'm part of my hair, depending on how resistant your hair is, for example, some of my updos, I was able to do a big chunky, roll and tuck. I'M just going to show you on this little hair right now. So what you do is, after you've parted your hair. You can use something to keep you here, sort of push the side if you need to so now. I'M just gon na basically grab my hair at the base like this and I'm going to sort of twist. It like that and then gather more hair and twist it upwards okay. So then I tuck it in grab more hair and twist let suck it in grab more hair and twist okay. So once you're done with that, you can either use a bobby pin to sort of like secure it here, especially if you have shorter hair. Let me just show you quickly just to help it stay in place and then at the bottom, depending on the style that you're going to do. You can either just continue, twisting and sort of find a creative way to tuck it in or add it to something. Whatever it is, you're going to do guys, that's it that was basically the basics one on one on how to follow. My updo tutorials hope that it was quite simple to explain, and now you are free to mix and match all sorts of things like. I did.
Comments
Betty-Alexandria Pride: Perfect. Perfect. Perfect! Lol. I love this channel so much! I just recently (and accidentally) created an updo from just two stand twisting and tucking my hair. I noticed though that the more my hair is stretched the less I have to detangle. So as a way of preserving length I decided to continue to do updos during the summer. :') and you have 30 that I can make my own.
marilyn cobb: So glad I found your channel I am new natural 8 months and in need of protective styles I just watched all 30 days!! thank you!
Simone Castillo: Excellent video, clear and concise instructions. Thanks so much!
providence nyandimu: Was thinking i need some nice professional look to wear my hair in the office this summer. I remembered you once had a 30 day challenge. Will be doing some of these this summer. Thanks Aisha you just saved my Fro.
Taunya Embery: I am so glad I found your channel - I love it! I did my big chop in February 2011 and have struggled ever since trying to find styles and someone else with my hair type. From the looks of your videos and pictures our hair type is identical . Thank you for taking the time to show us how to achieve your beautiful and creative styles. Such a pretty girl! I can now rock more than a puff...lol Keep them coming!!! :)
Empress Ntombi: Thank you so much for sharing. I was really feeling discouraged about my natural hair. But, your blog and YT channel has been a great inspiration. BTW. I am a Jamaican in Florida.
Jazzy T: I am so unbelievably happy that I found your channel from pinterest because I finally understand how to flat twist!! You explained everything so clearly! Also, I love your background music. Continue making your videos, they are the best :)
Tokunbo Basualdo: Lovely videos girl and we ve both got the same hair type.i hv never imagined leaving my hair without protective haie styles bcos my hair is damn hard!.my question is how to can I stretch my hair so to make it more manageable since I wld also wanna try the challenge. Thanks.
SunshineMena: this is the first time i've seen the double twisting!! u might have just invented something there =) can't wait for the tutorials! our hair is about the same length and i've been drooling over your updos forever!!! and since i couldn't figure out some of them i'm definitely excited!
msdeekay2012: great instructions didn't know about the double triple twisting just learnt something new. Thanks for sharing.
SuperNovaNatural: I finally understand how to do a flat twist. Great demos.
Aisha & Life: Me too...as in excited for you! Hope they're easy enough to follow!
Aisha & Life: Thanks again and I hope your hair story gets better for you
The JayBee Show: Very nice can't wait to try
Aisha & Life: Awesome!
Aisha & Life: Lol, yup all my 'secrets' will be revealed lol!
ZedianChicChannel: Yay... :)
Aisha & Life: ;)
Aisha & Life: Cool beans :)
Aisha & Life: :D