How To: Hollywood Waves | Easy & Detailed Step-By-Step Tutorial
- Posted on 26 August, 2021
- Wedding
- By Anonymous
HOW TO: Hollywood Waves! Finally a detailed step-by-step Hollywood waves hair tutorial that makes sense! ** How To Create Classic Hollywood Waves https://youtu.be/2a3Vse-Z_yU
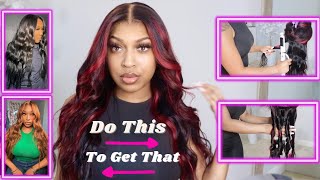
Today I am going to be showing you a glamorous old Hollywood waves hair tutorial. Vintage Hollywood waves is one of the most requested bridal looks of the season and still a complete struggle for many people (myself included before I dedicated a lot of time to figuring it out). This easy Hollywood waves video takes the mystery out of the style and allows you to execute it with confidence.
List of Products:
1. Frizz Ease by John Frieda: https://amzn.to/3sOfKt9
2. Sebastian Shaper (Light Hold): https://amzn.to/3zkgmsT
3. Sebastian Shaper+ (High Hold): https://amzn.to/3yfKBQ7
4. KMS Anti Humidity Seal: https://amzn.to/3mxKWLT
5. Teasing Brush: https://amzn.to/2WmpFtB
Find me on instagram: @glamgirlgabi
Email me here: [email protected]
Today, i'm going to be teaching you an easy and flawless way to execute one of the most requested, and also one of the most challenging bridal looks of the season. The hollywood wave, let's get started if you want a very classic wave. The very first step is to start by parting, the hair into a deep side part. It is very important when we are creating hollywood waves to add extensions into the hair, even if the client or even if you have very dense hair and the reason that we want to add extensions, is not for length like we would normally add them. It really is for scaffolding, so what extensions are going to do it's going to create this base? That'S going to carry the wave it's going to create the form and the structure that you need for such a defined and glossy look. Now, if you don't want to add extensions, it will still work. You may not get as glossy or as defined of a wave, but the biggest issue is that you're, probably not going to get a very long duration of whole time, depending on what kind of hair you have and the conditions that you're in if you're, in hot Or humid weather that wave has a tendency to fall very very quickly if you don't use that structural base of extensions now. This is how i add in my clip and extensions for maximum security. I start about one inch from the nape. I spray the section with a high hold hairspray, the one that i'm always reaching for and know is always really reliable, is sebastian shaper plus. I then take a backcombing brush and i aggressively backcomb the root to create a secure cushion to clip the extensions to once. My first row of extensions are in, i apply a generous amount of styling cream to a one-inch section of hair. Now the styling cream that i am using is called frizz-ease and it's by john frieda. I often also reach for the olaplex one. They both work really really well, but frizzy's is a much more affordable option and is just as good in my opinion for this look, it's really important to use a product like this before you apply heat at all, because this look is ultra glossy and ultra structured. If you have someone with frizzy hair and you curl it into that hot tulle, when it is frizzy and not completely smooth, you are going to get a frizzy end result and the wow factor of this look is that it's so integrated and so glossy so make Sure that if you have a client with with really frizzy or really curly hair, that you actually start from wet hair, you blow it out super smooth. First, don't use a flat iron or the curl will definitely drop but blow it out as smooth as you can. With a round brush using cream products and then before you actually put it into every single barrel, you want to make sure that piece is saturated with a cream product so that it's really glossy and smooth before you even start curling and then i spray a small Amount of light hold hairspray, the one that i always reach for is sebastian. Shaper, shaper plus is a high hold hairspray and shaper is a light hold hairspray, so don't mix them up, they look similar and they have like the same bottle. Just make sure that that plus isn't on there when you're doing this step, because if you do shape or plus it's going to be pretty difficult to work with the curl later now. What you're going to do is you're going to take that hair and you're going to pull it 90 degrees directly from the head and you're going to wrap that section flat at first and then you're actually going to twist the hair as you move it along the Barrel now this is actually incredibly important. This is what gives you the hollywood wave, so i'm going to show you on a mannequin head really close up, so you know exactly what i mean when i say: wrap the hair by twisting it. So what you're going to do is you're going to grab that 1 inch iron and you are going to put it right on the root now the root is flat, as you can see, and it's going to be really nice and smooth because of that smoothing cream. Now, you're going to wrap that first section flat. Just like that, and then you're going to take this section and you are going to twist it and you are going to put it through the barrel you're, going to twist it and you're going to put it around the barrel twist it and put it around the Barrel, so the only section that's flat is that very top rooted section and all of the other sections are twisted through the barrel now you're going to do this for every single piece of hair moving in one inch sections 90 degrees from the head. But the key here is that every single piece of hair needs to be curled in the exact same direction in the exact same angle, and you want to curl it away from the face on the dominant side. What that means is that when you create your part, so, for example, i have a really deep side part here. You want to plan your curls before you start curling, so that when you get to the front everything's going away from the face on this side, which means it's going towards the face on the side that you are going to tuck back. So make sure that when you are wrapping, you are wrapping this way away from the face around the entire head. So if you start at the back, make sure you think about that dominant side and what direction you need to start wrapping it now, as you can see, i drop another section above the extensions i spray the root with a high hold hairspray, i back home aggressively To create a cushion, i add another layer of extensions and then i begin the process of styling cream, a blast of light, hold hair spray and twisting that hair around the barrel. So you are not going to touch these curls yet because they are hot and hot hair will drop quickly. So we have to wait for every single piece of hair to set before you can even think about combing it out and creating that s shape. Now, when you get to the front you're still going to be doing the exact same thing moving through the head, but right here on that top section where people typically have a face frame or some type of curtain fringe or a normal fringe, you're actually going to Place the curling iron backwards, you're, going to still twist the hair but you're going to curl it completely backwards and then let it set when everything is curled up the front and the back is totally cool. I take a wet brush and i comb the entire thing out now. This is the point when people start getting freaked out and this when i was learning this, it was always the point where i then would panic. I would revert back. I would just start curling pieces and trying to like make it somewhat okay and it never ever turned out, and the reason is because when you are combing this entire thing out, it needs a minute to settle down it. Just does it needs a little bit of time to kind of form itself to chill out to settle down so make sure to comb like brush the heck out of this entire thing, using a wet brush or a tangle teezer. Any type of brush like that with flexi bristles work really well comb. It comb it from underneath comb it from the top and then just like give it a second to set. Now you can use a shine spray, a spray that i really like is by kms and it's an anti-humidity seal, which is also kind of works as a shine spray. You can go ahead and spray the entire thing trying to get all of those curls to integrate into one shape, which is exactly what it's going to start doing. If you need a little bit of extra reinforcement, you can take your hot curling iron and you can actually form it with the cot curling iron right on top of the shine spray, so you can start forming those waves with your actual physical iron. Now, when you get to the front, you want to do the exact same thing and then at the very top. You want to take your teaser brush and back comb it right at the roots backwards. Now this is where it gets a little tricky. What i like to do is i place my fingers into that area, and i manipulate the hair to shape it exactly where i want it to go, reinforcing the shape with layers of high hold hairspray. I then use that same hairspray to smooth out the side. That is tucked behind the ear and i secure it with crisscross bobby pins. At this point, my clients often like to add an accessory right here, and i really encourage it because it not only hides the bobby pin, but it makes a really striking bridal look and this is the gorgeous finished result. I really hope that i was able to demystify this really requested bridal style. I know a lot of people have a lot of issues trying to execute it and make it look perfect. If you have any questions at all, leave it in the comment section below. I would love to help you out and if you like, these bridal style videos give me a thumbs up so that i can make more and don't forget to subscribe. I'Ll, see you next week, bye


Comments
buddy holly: This is so pretty! I really loved the way you've explained it. I've watched like 10 other videos on how to do these waves but yours is the best!
Maggi Pixcar: I love your tutorial! It’s very detailed and super easy! Thank you for also sharing the products.
Mares Baffs: This was done so easily looks beautiful
Marilyn: Beautiful tutorial! You know what I like about you? The way you explain the process, very well spoken? Thank you!
S Nguyen: I love this - great step by step. Your hair looks amazing - you look amazing. Thank you for making these videos
Darlene Carman: Hi Gabi! you have so much charm and talent! Question for you I am 57 getting married in 1 month so this hairstyle will be for my wedding. I have great hair wavy not too frizzy just hits my top of my shoulders, face frame. Just letting it dry gives me a finger wave look which I love. For the wedding I would like to see that through the whole head, not so much like a glued to my head but soft .GOOD LUCK finding a stylist that can do a finger wave. I too am a stylist almost retired and wondering if I would be better off getting this look with a waving barrel or hot rollers..a bit nervous to wing It and just let it dry on that day hoping for the best. WOULD LOVE your suggestion pls
Shannon Day: For a short video you were excellent at explaining the details that are super important and helpful. Great job
Rosemakeupartist: Absolutely stunning and thoroughly explained
LiNdA BiTjiZ: Thank you! You made this super easy!!!
Nosheen Hannan: This was so informative and soooooo in detail. Thank you so much. i was so nervous before this video but now i think i can do it!!
B Pretty MUA: Gabi, I sent this video to my assistant and asked her to do this curl type on my bride who wanted an updo followed by glowing glamour waves for her wedding. I had the John frieda and Sebastian shaper hair sprays and it all worked like a charm. I was able to style the hair up then take it down and brush it out four hours later, it was perfection!!!! Thank you for this video, it helped me explain what I needed and your tips worked!!!!
Livin' La Vida Joannisss: Awesome video! Great pointers, very detailed.
Boujeè Artistry: Just came across your video and I definitely hit the subscribe button. I love how detailed and visual you are with your videos. Also very to the point and as a hair and make up artist I love it keep making more please ❤️
Milla: Best tutorial for waves on YouTube! So well explained.
R B: Bless you, I've been doing hair for 10 years and this is the first video about Hollywood waves that just makes sense to me. Thanks Kween! :)
Mayela Mendoza: Amazing tutorial thank you so much
Yvette m.: Great tutorial !!!! I will try this week!!
Ashley Studio : thank you so much for this! you really broke this down into simple,w ell explained steps
MaNell Hembree: This is SUCH a fantastic video and you are an excellent teacher! Thank you! One question: do you remember what extensions you used?
Chisailuver: Beautifully explained and demonstrated, especially what products to use and WHY they're used! Thankyou for this!!
Subamua: I always wanted to create Hollywood wave. But I'm also worrying there is highest possible curl drop to straight.. Your video explains perfect detail as i wanted..
Cintia Silva: Thank you very much. Made it easier to work with the wave.
דניאלה מלה: Thank you for this video. I would like to ask if you apply a heat protector in the beginning. Is it necessary ?
A H: This is the only video that breaks every step down as precisely as possible. Thank u!
Lala Rodriguez: Love it . I am going to try it
Maggi Pixcar: And the way you show how to do the front part! Aaaahh Amazing! I
emilyjayynexo: Hi Gabi, do you have certain extensions you recommend, or will any do the trick?
n: man i love the details here! i hate to watch a video and have a ton of questions! subbed
Manon Ferrari: Amazing video, I want to try it out but I am wearing tape in hair extensions... so I am confused now with the clip in part
Beauty nerd: What hair extensions do you recommend in using in terms of brand and also, are those extensions the same length as the actual hair or a tad longer/ shorter?
AZ Sakamoto: Great tut!! What size curling iron and would u recommend a clamp style tool?
karli mulvaney: Hey. Any tips how you could do this style the night before the event? Thank you, great tutorial ❤️
nemo: how long this takes for a begginner to do?
Ellissa Palomo: I have a bride that is insisting on doing a middle part with this look. Any tips? Cause I’m kinda at a loss. I’ve only done it with a deep side part
Onlocationmakeup: Great video- excellent teacher!
Kunjal Patel: That was easy . Thanks for the video. Which curling tong are you using?
A A beauty: Amazing
Kaylah Evans: Holy crap she's a stunning bride
Lindsay Coulter (Lindsay Coulter Photography): You are so talented!!
Katrina Guerra Pousa: What brand extensions do you recommend? Is it just the two layers of extensions?
Taylor Lee: Trying this tomorrow for a wedding!
Glam Girl Gabi: If you have any questions about how to create this look, please leave it here in the comments! If you want to watch a different way to do a Hollywood Wave, check out this video next: https://youtu.be/2a3Vse-Z_yU **Check out my merch shop. Purchases are appreciated and go towards helping me create more content for you! @t
guinzette: What happened with your thread lift? Is it still effective?
Marisol Gonzales: Triple barrel iron is awesome
ahbeegee: do you still back comb without using extensions
gigi: i have naturally wavy thick hair so funny how i have to straighten it and re curl oh well
Marilyn: I have to do this hair style for a wedding in June and I’m having anxiety already
Georgette Maidiotis: What is the name of the curling iron?
Chase Bennett: can u please do a slick straight low ponytail tutorial with a ton of hairspray only?
Fjzf Gud: Wow nice job
Jan: Very nice
Brendalynn-Blaire Zillinger: You lost me at extensions. Not happening