4 Ways To Style Front Of Hair For Any Updo | Bridal Upstyle Ideas By Stephanie Brinkerhoff | Kenra
Learn these four ways to style the front of the hair for any updo, and tell us which one is your favorite!
00:00 Introduction
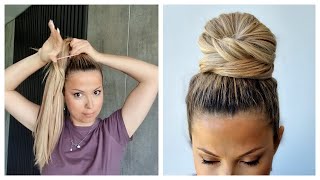
00:18 First look: Center part with loose pieces
03:25 Second look: Side part without any pieces out
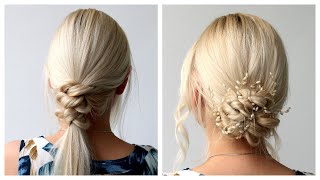
06:01: Third look: Swept back hairstyle
9:09: Fourth look: Classic side part with loose face-framing pieces
If you enjoyed this video, make sure to give it a thumbs up and tell us in the comments below what you'd like to learn next!
SUBSCRIBE NOW: http://bit.ly/KenraProfessionalSubscri...
VISIT OUR WEBSITE: https://www.kenraprofessional.com
WANT TO WATCH MORE?
Structured Wave, Step-by-Step Hairstyle Tutorial: https://youtu.be/HhEGxDeXpDU
HOW TO: Voluminous Blowout: https://youtu.be/ormAcJ-GnmU
About Kenra Professional
We are a purely professional brand dedicated to understanding and serving today’s stylists. Our passion is developing best-in-class innovations, delivering superior and reliable results. Kenra Professional strives to elevate the stylists’ artistry and craft.
CONNECT with Us!
FACEBOOK: https://www.facebook.com/KenraProfessi...
INSTAGRAM: https://www.instagram.com/kenraprofess...
TWITTER: https://twitter.com/Kenra_Haircare
TIKTOK: https://www.tiktok.com/@kenraprofessio...
4 Ways To Style Front Of Hair For Any Updo | Bridal Upstyle Ideas by Stephanie Brinkerhoff | Kenra
#updo #bridalhair
Hi everyone, i'm stephanie brinkerhoff, with hair and makeup by steph, and today, i'm here with kenra professional to walk you guys through different ways that you can style the front of an updo. The front can be very tricky at times, but it's also one of the most important parts. So i wanted to walk you guys through my process of how i approach this. Let'S go ahead and get started. Okay, the first look: we're going to create is a center part with loose pieces framing the face, so i'm beginning by the ear and i'm spraying the kenra hot spray 20 and doing loose curls with the flat iron. The hot spray 20 is a really good product because it has heat protectant and also will help add hold to the curls. I'M curling everything away from the face and, as i get a little bit higher, i'm going to start back combing at the roots and spraying. The kenra volume spray 25 to lock that back combing in place notice as well. How once i reach the top i'm taking the flat iron all the way to the roots, and i'm really pressing that heat on top of the backcombing and the product to glue that volume in place when you're doing a center part? Look, it's really important that you have good volume at the roots, so it doesn't end up looking too drab, okay, i'm going to move on to the other side curling. In the same way, all right once i have both sides. Curled, i'm going to start running my fingers through it to soften it a little bit. I don't want to go through it with a brush or anything like that, because i don't want to lose all of my texture, i'm going to start softly, getting the pieces pinned back to the center back and my process, for this is very organic. I like to just comb the hair back with my fingers and pin it that way, letting it fall naturally. So once i get the bulk of the side back, i'm going to start working towards the face and towards the ear, pinning back a little bit more if necessary, and once i get each section pinned back, i also go through and soften it with my fingers at The roots so that i don't lose that separation and that dimension, if you have smaller pieces that don't reach all the way to the back, you can always loop them through each other so that they hang nicely behind the ear. All right, i'm going to repeat this process on the opposite side loosely getting everything swept back and pinned in the center back. I find that with pieces. Framing the face less is definitely more. I try to have a lot of very small pieces left out so that everything looks very wispy. I don't want any pieces that are too chunky now, i'm going through with the kenra volume spray 25 and lifting up the roots a little bit more. To give her some nice volume around the face, which is very flattering for a center part, all right, the next look, we're going to do is a side part without any pieces out, i'm going to start on the top this time and i'm going to get the Roots back combed and sprayed with the kenra volume, spray, 25 and curled away from the face with the flat iron. If you're not comfortable, using a flat iron, you can also use a one to a one and a quarter inch curling iron. So i'm just working down the head towards the ear until i get all of the hair curled. Okay, as i get this pin back, it's going to be much less organic and a little bit more planned and structured than the first look that we created. I'M going to pin the hair row by row detailing and placing each row as i go. The reason i like to do this is because laying the hair row by row like this gives it a sort of layered dimensional pc, look and, as i work towards the top notice, how the top rows are getting directed more back rather than down something. That'S very unflattering on a side part without any pieces left out is all of the hair being swept down towards the ear. It tends to drag the face down and looks a little bit old-fashioned. So the best thing you can do is start at the ear drape. Those softly and then, as you, work up direct the hair back instead of down okay, now i'm going to repeat on the opposite side, starting at the ear once again notice how that's nice and soft around her ear, but then i'm layering working up! Okay! The third look we're going to create is a completely swept back. Look for this! Look i'm going to start by sectioning out the mohawk section and clipping that, aside for later so beginning on one side, i'm going to spray all of the hair with the kenra hot spray 20 from roots to ends. Okay, once i've worked that product in then i'm going to start curling with a one inch curling wand, curling everything away from the face and up as i'm doing this, i want to create tight, bouncy, crispy curls. I want my curls to sit on base and i want them to have a lot of volume. Okay, once everything's curled on this side, then i'm going to work it back with my fingers. Spraying the kenra perfect medium spray. 13.. This part of the process is very organic. If you have good curl and prep work in there, then this part should be very easy, so i'm just getting everything swept back and pinned to the center in the back. Okay, now i'm going to repeat that same process on the opposite side: okay, now i'm ready to begin with the mohawk section, so i'm going to start at the back of the mohawk spraying, the hot spray 20. But this time i'm going to saturate the hair a little bit more and make my curls even crispier and tighter taking my wand all the way to the root to get good volume and ensure that my curls are sitting on base right here. I'M adding a little bit of backcombing for extra volume and i'm just continuing to work my way towards the face notice as well, how i'm holding the wand going from front to back instead of from side to side. This is another key part of this process. Holding the wand this way, you want to be able to see your curl pattern from the front and if you hold your wand going from side to side, you won't get that texture and movement from the front. Okay, i've got everything curled, except for the very front piece, so i'm just going to work this back with the perfect medium spray, 13 again get that worked to the center in the back and bobby. Pin that in place, then i can move on to the last piece. The reason why i like to leave this for the very last is because it's the most important part - and i really like to take my time detailing this and making sure this front piece is perfectly placed. Some of these pieces are a little bit short. So i'm just securing them with the bobby pin near her crown in the back and then once everything's in place. I can go ahead and tuck up the ends and incorporate those into the updo. Okay. The last look: we're going to create is a classic side. Part with loose pieces framing the face, i'm going to begin by just getting some back combing through the entire section. On the side. I don't typically back comb right around the ear, because i want those pieces to drape softly. Once i have my back combing in i'll. Go ahead and get this curled with the flat iron once again away from the face, and i'm not as worried about creating texture or definition right at the roots. With this look because it is a little bit softer and because a side part is so flattering, especially with pieces left out around the face, you can get away with making this look a little bit smoother. So at this point, i'm just going in with my brush and smoothing out the frizz and the flyaways. So this part is very similar to the center part. Look that we created in the beginning, i'm just naturally combing the hair back, letting it fall, how it falls. But one thing that i do with nearly every client who wants this style is, i take their very front piece and i make it look like it's tucked behind their ear, so i softly drape it back and tuck it underneath a section of hair to secure in Place: okay, then, i'm just going to repeat that process with the opposite side, if you're ever wondering about how much hair to leave out around the face start with more and then pin back some if necessary, it's a lot easier to pin back more hair than it Is to take down hair, that's already been pinned back. Okay. There are four different ways that i generally frame the face and style the front of an updo


Comments
Braids by Ree: WoW absolutly amazing! Not going to lie I struggle to get the front of updos looking as good as the back. I'm definitly going to try all of these! Thank you for the amazing tutorial! :)
Molten Vanilla: Love ur tutorials so organized and well explained thanks Steph its so helpful for me as a starting makeup artist
Trae Howard Hair: Always love Stephanie’s tutorials
Marilyn: Oh my gosh, what a nice video! All the details that we have a hard time doing, you is just made them! Thank you so much,keep those videos coming!
Elzanne Nel: This must be one of the most helpful tutorials I've ever watched! Thank you so much!
elinor kent: Great video. Definitely helped me step up my hair styling game.
Jenna Curtindale: Beautiful, I’m a Cosmo student and this is super helpful!
Abbie Green: Would love to see Stephanie do updo with different bang styles and maybe on natural curly hair
Kristy Williams: This was really great, thanks so much!!
Ioannis Antiotis: Very nice! The third style is my favourite!
Jenna Ross: Love all the four looks!
Natalie Jaggi: I love these, you are always so detailed in explanation. I was wondering what comb you are using to tease?
Roya Fadai: Such a helpful video. Thank you
Laura Bikman: Stephanie where did you get your black back combing tool? I love your work!
Cher Jay Lee: Love these vids!
D D L: Omg! This is ALWZYS ON MY MIND!!! THANK YOU !!!!°!!!!
Kim Monkhouse: What is the brand of back combing tool you use please?
Rachel Snyder: What flat iron are you using !?
Tanya Curtis: Thank you for explaining the why!!!!
Maya Langitan: we tend to forget about the Front Face framing is important. thnks again steff.. Watching from Indonesia
D D L: Styling haitline section is KEY GAMECHANGER to emphasize soft elegant femininity for those of us with tall foreheafs AND high SQUZRE hairlines !!!!!@@!
Deanna Moore: The second to last I would do if an actress was staring on the titanic but it was done well. I guess you never know what someone will ask for
Mary Hipp: Could you please show how you did the back?