Easy Updo For Indian Wedding Guest And How To Place A Tikha | Gurp Dhaliwal
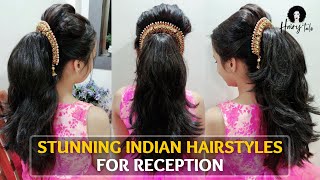
Hi everyone! Here is a video on a easy updo for a indian wedding guest, and I also show you how to place a tikha on yourself. It's very easy just make sure you double cross your bobby pins! This hair style is easy, even if its a bit 'messy' looking in the back. I personally feel like if the top is supportive for the chunni that's a huge plus!
For the wedding morning its nice to do a quick updo where you have some support for your chunni.
I created this using my jewelry from my March Bangle box.
I hope you guys enjoyed this hair tutorial!
Let's be friends!
www.instagram.com/captureyesstudio
Hey guys welcome back to another video, this one's much requested. It is how to do a quick up for an Indian wedding if you are a guest. The first thing you want to do is take a rat tail, comb and center part, your hair, so measure up from the middle of your nose all the way up and then go ahead and part that hair and just make sure it's clean, as can be check Where you want your dick got to go and if you want to do a side, part or a middle part, I prefer the middle part. So that's what I did. Then you are going to section your hair ear to ear, and this is just going to be the front part that you are going to work with later. I use a bobby pin because I have very thin hair. If you have thicker hair, try to use a bigger clip and if you kind of look a little crazy, that means you're doing it right, then you are going to create a Halfmoon shape and take that from the corner of your ears, all the way up, comb That section out and then the remaining section in the back, you are going to tie that off. So we don't get that incorporated into this section and then you are going to section your hair. I have very, very thin hair, so my sections aren't that clean and they're. Definitely not that big. So it's totally okay, but you want to make sure you leave a little bit of hair in the front. First, that's fun, tease then you're going to take a section behind it like this one and then start combing it down. This is called a back home or a tease, and it is just gon na create a little bit of extra volume and lift for you. Go ahead and hairspray that and do that to the section behind it as well. If you have thicker, hair you'll probably have more sections, I had very thin hair, so I only have two now I'm going to take a doughnut and cut it, and this is perfect. If you're going to a wedding as a guest, because the journey is what really lays down the top of the head, if this is how you create a extra support, especially if you have been here, I am going to take it one step further and put an Extension over that donut piece, because I want it to be covered up - and I know my hair won't cover that by its own. So that's what I did and then I flipped my hair over and smooth everything out and now everything is hidden and it's starting to give it that shape. So my chimney will sit nicely the front section that we didn't tease that's what this is. We are sectioning that down the middle as well placing our ticket in you take that longer pin and you put it into the middle and then you take two other bobby pins and cross them over that longer pin if that kind of made any sense so you're, Basically, creating an X - and it's not going to move from there and now this section that we left on T's, we're gon na tease you a little bit and cover up the chain as much as we can, and it's okay. If it still shows it's not a big deal, then you're gon na gather your hair backwards and start pinning. The trick is to always just double cross your pins. This way they don't move around so in the back. You should have something that looks like this undo. Your hair from the bottom and now we're just gon na start texturizing our hair. I am actually taking this section and moving it out of the way, so you guys could see a bit better. I am going to start off with the section right here and I'm going to hit it with some hairspray and then I'm using my bombay hair, curler and just going around at the barrel to create some texture for this particular hair style. You don't need to go a certain direction. I just wanted it to be somewhat wavy, so there is some shape going on in the back, so go ahead and do that all the way around and then, when you are done, you're just going to start lifting up some sections and pinning them it doesn't matter. Really, where you are taking these sections, but try to take them up towards that initial bobby pins that you had placed from this front sections. So it looks like it's just kind of like a waterfall creation, go ahead and pin and you should have something that looks like this. It'S very simple add as many pins as you need and then move on to the front section for the front section. I am making sure that I curl the hair underneath the barrel. This way, it's gon na create a little bit more of a lift, make sure you hairspray and then curl again, once you're done, both sides you're gon na, let it cool down and then brush out the sections and then pin them back and see. If you need a little bit more volume on one side, so you can leave some sections a little bit looser and make sure you double cross them again. I had short bangs here in the front, so I decided to leave those out. But if you want, you can pin those back as well now just look around and see if you have any extra hair pieces sticking out and just pin them in. So this is what you should have, and this is the final look if you feel like your tip cut, is falling down a little bit and you want it to be a little bit higher, just lift it and then stick in one more pin and that should Hold it and slip on your jewelry and we are done so that's the completed. Look guys. I hope you enjoyed this hair tutorial. Give this video a big thumbs up if you enjoyed it subscribe to my channel. If you haven't already and I'll catch you in my next one, these tights for watching

Comments
Aman K: This was very helpful. Thanks... I'm a new subscriber and would love to see more hair tutorials as I've got the same hair as yours ☺️ Thanks again
Simi kaur: Yyaaasss! I've been looking for a tutorial like this to do on myself and I also have really thin hair so the extension tip helps! Thank you! Maybe you could do a disputable setting video next cause I suck at those during weddings!
jas9233: Love it! Thanks so much for the video!
Superwoman: Thanks so much I have two wedding next year and will definitely have to try this!!
Manbit Sohi: Very informative!! Thanks!! :)
BeautyByT: Hey girl! Great video, I love your channel! You have a great personality and you are so pretty! I just subbed! :) can't wait to see more! I have a channel too and wud love it if you check it out! <3 stay in touch, XOXO!!!
meenu saini: U made it very simple thanks for lovely video.. can you do makeup tutorial too
charu kharbanda: you r so pretty. n tutorial is really helpful. was trying to find smthing since krwachauth is coming. trying ur look now. god bless ya
Ariana Montijo: Just subbed! Can't wait to see more videos ☺️
Deepika Gandhi: very nice hair do.....great video....
Quennie Marie: Love the hair so pretty. subbed.
Alka Lehal: vry helpful video.thnxx alot
Roop Dhanju: Wow u look super pretty
Mani Panesar: thanks.. can you bridal updo
Brownbeautysimor: just fabulous....