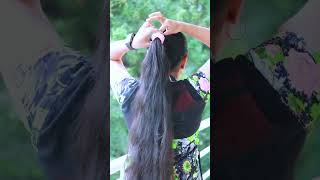
Coupe Sauvage Haircut - Long Hairstyle Tutorial
- Posted on 13 February, 2012
- Hot Topic
- By Anonymous
More haircutting videos and hairstyle ideas at http://www.scissorboy.com
In this haircutting tutorial, Stacey Broughton from MyHairDressers.com shows us a long style haircut.
Stacey is widely regarded as one of the best women's hairdressers. He was the Senior Art Director for the Vidal Sassoon Academy where he played an important role in creating the unique Vidal Sassoon 'look' for their seasonal collections.
This haircut is based on the Coupe Sauvage Haircut which results in a casual and loose shape. Yet, Stacey uses his creativity to make this haircut more modern and commercial so stylists can replicate it in their salons.
If you like this haircutting tutorial, share your love by hitting the 'Like' button.
Thanks for watching!
For more haircutting and hairstyle ideas visit http://www.scissorboy.com
You hello, hello, thank you for joining me, my name's and Rihanna, and this is scissor boy calm. I were the lovely Stacy he's, always lovely you hope, yeah! I try to yeah. You tried to be now um you'll want to take us through a long style, haircut right yeah. This is gon na, be something which is is great for in the salon, and it's based on around a haircut that he's doing were a lot younger, called the coop Suraj and the coop Savage basically is a very loose for a natural-looking shape, but the only difference Within this, is that there's a fringe section in there and the sectioning patterns that we actually put into the haircut now a more modern right than what it was. Then, okay, you can see where it sits, look see that's quite a heavy down there yeah. So that's just gon na be too long. So what I do now is I go down. Take these got a driver mad in her eyes, yeah it's just going to be just far too locket, but that shows you an example and that's what you do in the beginning to get the shape and you can see the amount of graduation that you're putting into It so you see that now sits just above the eyebrow and just onto the eye. So when I clean that fringe up felt probably just right now, each section is directed slightly towards the first. That way, it gets slightly longer towards the edges, but you're not going to notice that much different difference on this toe, because it's only a small section right. Okay, now I pull the hair slightly back towards the first section. Remember that yep, okay off and it's Delta, though you always have to keep your fingers set parallel to the section that you've been cutting you're, not twisting all right, lazy, okay, okay, so I suppose that's one thing: you really got to pay attention to yeah. I can imagine that's an easy mistake: yeah well, people have habits and they get a bit lazy and they'll. Go like this right. All right: okay, yeah, kiya, kiya, no yeah, keep your focus and keep tension on these sections and what that does is well. It instills. A good discipline into you. I need to see the angle because if it heads down, you know - and I can lift it up and I get the wrong angle - I don't want it to be too light so to be around here. So what I'll do? With the first section, just lift it up, remember what I did on the fringe. I left it a bit longer. Didn'T I? Yes, I do exactly the same airing on the side of caution. Yep drop it down. What I'm looking for now is where those layers, sick and those layers are sit opponent hair back, and what does I look for that line to become more solid mm-hmm and that's where I know it should be good okay, so this top section, basically what I'm going To do is I'm going to join to this section here. There'S a couple of things you need to pay attention to is if that point goes too low, and you put an angle like this in through here you're going to have a hard line in it right. So we need to have it looking up a bit of a curve in it. Okay, so I can gradually go to longer. So we go. We follow the angle. We'Ve got here, yep on that first section through there. So we follow that angle through there and then we gradually curve it out to the longer point through here. Okay, so I look at the nose and I look at the point there right take that section divide it off that. Yes, my first section it's all going to do is we're going to layer this through. Remember when I follow the guideline from the underneath, because there that angle comes in with slightly and then so that's going to happen to about there and then gradually we're going to come out longer. Okay, then each section is going to be pulled on to the first section. I'Ll do then, is I'll. Just move that section down I'm going to do is going to work on this side first and then that side. Okay, I'm going to be pushing this away from me, pulling out towards right, okay, so the same sort of technique as sections just sections that are horizontal to the floor, you can see the disconnected pieces. Yeah yeah they've worked well up in here, really work really well. I don't really want to cut this major shot, so I'm going to coming around this area through here, yeah and shipping it away. I know my disconnection is move the layers out of the way lightly free under in I'm gon na whack them. In bet, I'm just going to put a tiny bit head face down, there's just a light hairspray and I'll spray it into the the airstream of the dryer

Comments
Johnt72: Amazing !! Great update on a classic !
JMS 888: The overall effect is fantastic
Shelly Block: fabulous~
mimi ميمي: respect from algeria
imen bella: J adore la coupe sausage
carol bell: Loved the haircut but impossibke to see cleatly with the interviewer standing behind the model wearing a dark dress! And constantiy moving around. Gave up watching.