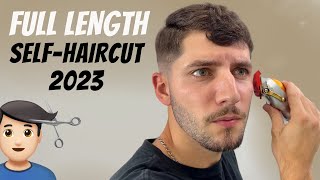
Worlds Cleanest Fade - Haircut Tutorial
- Posted on 20 May, 2022
- Hot Topic
- By Anonymous
In this video I walk you through how to do a fade step by step.
Tools:
Stylcraft Rebel -
https://www.stylecraftus.com/rebel-cli...
Andis Shaver -
https://www.amazon.com/Andis-Profoil-L...
Babyliss Trimmer - https://www.amazon.com/gp/product/B07T...
Marty Blendz Guards -
Dyson Blowdryer -
https://www.amazon.com/Dyson-Supersoni...
So in today's video i'm going to show you how to take someone from this to this, so let's get it jumping right into it. We'Re going to start off by creating our ball line with our trimmer. Now this fade is not going to drop um in the back. It'S going to go straight across, so i'm gon na start right at the top of his arch, and then i'm gon na follow this line straight back now after we establish that line, we'll go ahead and embold everything under it out with our trimmer and yes, these Trimmers are zero, gapped and you'll see as i'm boughting him out. I'M not you know, pressing against the skin too hard, i'm really letting the weight of the trimmer do the work um. That'S because i don't want to cause any irritation right. One of my pet peeves is making the client's skin red and that's because it just distracts from the entire haircut right. So i'm doing the same thing on the other side and as you can see man when you have your trimmer set well um. They just mow right through here. So it's getting the surface nice and clean and ready to come in with our shaver here. In a few moments, i'm just continuing to bottom out trying to get all those hairs as best as i can, and now we're going to follow it up with the shaver. This is our andes, foil, shaver, and, with this, what it's going to do is get it a lot closer to the skin. It'S going to make it. You know to the point where you can't feel any stubble at all for the most part, and i'm not going up too high with this. I'M stopping you know below that line. I don't want to cause myself any more trouble by creating another line so now to get into the fade. We'Re going to come in lever open with our rebels and we're going to go up about a fingers width here following that shape that we created with our ball line straight front to back, staying nice and clean, making, making sure that we're organized and don't get lost. In the process now i did, you know, change out the blue to the pink, as you can see, which i think looks super dope just trying to trying something new, not to start getting rid of this line. I'M going to close up that lever all the way and i'm just going to tap at that line right, not going up all the way to the top, but i'm in inching up slowly but surely and you'll see right here. I'M opening up that lever gradually, as we move up within this fade and we're gon na do that all throughout i'm gon na do one with the left side and then i'm gon na move to the other side um just for the sake of the video right. But if i was in the shop i'd, i do it all around the head at once and then you know go on to my next step, so i'm coming in close and then opening it little by little until we're fully open and my clippers are zero gap. As well so they blend right into that the trimmer line and we're just working at it trying to get as blended as we can, and now there still is a faint line in between that ball and open. So i'm going to use the corner of my trimmer here and kind of break at that line. I'M just trying to you, know soften it up and and make sure that this blend is seamless. Now, after the lever open we're gon na do lever open on our one guard and again we're going up with fingers, width and we're staying real, consistent following our process. Maintaining that that same front to back shape and i'm not being scared to make this line wider right. I feel like a lot of times the problem. A lot of people make when they're trying to fade is they make their guidelines really thin um and what happens? Is it makes it harder to blend that line out right so now between that one guard open and that lever open, we're gon na go ahead and close that one guard to lighten up this line just slightly? It'S not gon na get rid of it fully, but it's gon na lighten it up significantly and now to fully get rid of it. We'Re going to come in with our half guard lever, open and we're going to attack this line right and if we see that open isn't really doing the job, i'm going to go ahead and close up that lever as you'll see here in a sec. So i went ahead and closed it about halfway and still attacking that line, trying to get it as blended as we can and slowly but surely coming together. Now, i think we closed it even even more so we're almost all the way closed and at this point, i'm just playing with the lever seeing what works and what doesn't and now above that, we're gon na have our one and a half lever open and we're Going to inch up this line just a little bit we're not going up about that full inch. What we're doing going up just a little with that one and a half lever open, i would say about a quarter of an inch, is where we're going to put that one and a half open and now we're going to close that one and a half to Get rid of that faint line in between, but you'll see that it doesn't do the job. So we go back to our one guard open and we're going to detail that line. Then i want to enclose the even more and you'll see when i'm taking out a line. I always start off open and then close the lever as needed, because if you take, you can take more hair off, but you can't put hair back on. If you take off too much, you feel me and we're working with that one guard trying to get this section as blended as we can, and you can see it's coming together very nicely now. This is our two guard lever all the way open and we're gon na go up even a little more above that one and a half open. Now this will be the biggest guard that we use before we do clipper over comb and with this i'm just coming off the shape of his head, trying not to dig into that length on top and you can see that still created another line. So again i went back with my one guard open and it's really bringing everything together, so we're coming in lever open with our flat top comb. So i'm coming in with the comb and flaring out slightly and any hair sticking out of the comb. We'Re going to go ahead and get rid of now. Don'T judge me for the comb as you see that the tooth is broken um, but man barbara's side really eats away at combs, so you got ta. You know re-up on him. Often now we're gon na. Do the same exact steps on the right side of his head? So, as you guys, um would know we're gon na come in close with our clipper and then, as we move up we'll open up that lever slowly until this line is blended out. This transition point right here: the ball to the lever open, is so crucial um because it really determines the cleanliness of your blend. So you want to make sure that you get it as blended as you possibly can. Now we're going to come in lever, open uh on our clipper as well going up about that fingers width. What would you guys say? The width of this guideline is man, because every time i say a full inch, someone in the comments is like man. This dude doesn't know what he's talking about. That is definitely not an inch. So let me know in the comments man. What is the width of this guideline? I'M gon na say it fingers width, because if i put my thumb there it's about the same, but i'm gon na, let you guys choose now to get rid of the line in between we're gon na. Have our half guard lever open and we're just gon na blend this baby out, so we're just attacking that line now we're gon na close it we're not wasting any time right. If we come in with that lever open - and we see it's not doing the job go ahead and close it, because if you keep going it over and over and over, it's not going to change that instead not taking off anything. So you want to make sure that you get to the point as fast as you can, so i'm playing with that lever, opening and closing it as needed, and you can see it's starting to come together very nicely and working up helps me stay organized as well, Because i can make sure that it's clean um as i go up into the hair on top right. So now we're gon na. Have our one and a half lever open and we're just going up slightly here, not the full fingers width. But i would say about half of it and we're just inching up slowly but surely now you can really see that line in between i'm going to show you guys how to get rid of that here in a second. So i went ahead and closed that one and a half and it is not doing the job. So, as you guys would know, i'm gon na have my one guard lever all the way open. I'M gon na try to blend this line out, and this is a perfect example how you know: people's hair textures grow differently on both sides. To me, his left side was a lot easier to fade than his right side um, but we're still following the same steps right, but we're adjusting and pivoting as needed. So you want to make sure that you attack every hair, texture and problem um the same, but then you want to make sure that you're able to adjust in order to solve that problem and we're just working at it until we get it. Looking how we want now, this is going to be the biggest level that we use. This is the two guard open and we're going to go up just a little more just like we did on the other side coming off the shape of his head. I don't want to dig into the weight along the ridge. I want to keep it as full as possible, even though this is kind of a higher fade now to blend into the length on top same as the other side guys clip over comb lever. All the way open and we're just going to work right, any hair sticking out of the comb we're going to go ahead and get rid of, and i say this every time i do clipper over comb, the clipper with the lever all the way open against a Flat top comb is equivalent to a one guard and that could kind of give you something to to gauge off of when you're doing it. So if i left off with the two guard open, they should have no problem blending into the top - yes, sir, and that pretty much gets us to the fade other than detailing. Now we're going to go ahead and line up his front area now, with this line up in the front, we're not doing too much um, he just wants to make sure that it's a little more symmetrical, so we're going to get rid of his widow's peak and Clean up his corners - and this is really going to make um or structure his his face right. It'S going to give him a more masculine look instead of his hairline kind of being everywhere. He wants it to be a little straighter, so i'm cleaning up the corners here same with the other side. He has a really bad cowlick um that sticks up. If you don't line it up, so that's why it's sectioned off the way it is, and now we are going to enhance the corners just a little bit to get it looking a little crispier. This is a kiss semi-permanent mixed with alcohol. In my airbrush and that's just going to darken, it up really make that line up pop now same with the other side. Now we're going to get into the trim on top so for the trim on top we're not going to take off too much, i'm going to start off by connecting the top to the side which his hair is combed over to and now we're going to go Ahead and pull up the front - and i would say, we're taking off about half an inch and we're going to establish our line in the middle and then we're going to use that for the rest of his head. So we're gon na follow this half an inch. All the way back now, this is the most traditional way that barbers um use the scissors, we're just starting in the front and combing backwards. Um, usually i do the three sections, but his hair was fairly short um, so i didn't feel it was necessary, but now we're gon na use that middle guideline as our um. Our reference point right so now, i'm moving towards this left side and we're going to even everything out with the half inch that we took off the middle super simple guys. Now we're going to go ahead and dry his hair. Now he doesn't do a crazy style. He just likes a little volume in the front, so i'm gon na go ahead and blow dry. That and that thing is looking super clean. We don't use any product in this video and now we're gon na uh hit it with a razor to go ahead and clean up that lineup make it look a little sharper, really set it off and all right fam. This is the finished product. A nice mid fade, you could call it a high fade, but this is the finished product. If this video helped you in any way shape or form, make sure you hit that like and subscribe button, and as always, i will see you guys next time.


Comments
Benita Rodriguez: Enjoy your content! As a cosmetologist, we’re taught basic mens cuts and blending. I’ve always loved doing mens cuts, and now I’m doing them full time so I’m studying barbers and trying to learn as much as possible to make sure I give my clients the best cut I can give. I’ve invested in my clippers, trimmers and box shavers. Thank you for sharing your talent! Edit: when you asked the width of the subsection you were blending- looks like 3/4in.
kcald9891: I've watched tons of fading videos, and this is hands down the most clear, transparent, and helpful one I've found. Thanks for sharing!!
MELATONE VIBES: Definitely trying this tomorrow on my son. This cut is detailed with all the instructions. Appreciate you sharing this knowledge, stay blessed my brother
MELATONE VIBES: Did the cut on my son. It came out fire. Crazy what one can do when they believe it can be done. Keep that coming my brother. Stay blessed
Shawn Midkiff: Barber for 30 years here, and your tutorial is excellent. Thank you.
Milton Morales: Dope technique, I been cutting my hair for 25 yrs and I love learning new techniques. Yours is excellent and easy to follow very clear and precise instructions with excellent results ! Crispy fade !!!!!
Rick Oliver: Great video! Always wondered how these turn out so clean. Love the detail - thank you for making this.
Carlos Medina: Very nice my man. I understood your process (as a beginner here) and it came out clean. Thanks for the content!!
Sylvia Shufford: Awesome thank you so much for this detailed video I tried your techniques yesterday at my haircuts came out so clean
Gabby: I agree with you on taking a good inch it’s what makes it look blurry instead of compressed darkness because they do half an inch instead this is the same reason why I choose to watch your tutorials. That and the approach you take .. I did notice you change it for a while but I like this more, way less confusing.Thank you for your educational videos.
JffroEzze: Excellent work. I wish there were more barbors like you in my area of VA
Chad Bell: I cut my own hair. This is gonna be fun. Love the look. Love the fact you have a step by step. So awesome. Thanks dude!!
Sterling Sharp Kutz: Dope work! From one barber to another
Atk_Cloak: He never misses with the detailed vid
d c .pentru mesteri: I'm not a barber, but I know what a well-done professional haircut is. And this is among the first successful haircuts I've seen, health
MJ1980NL: Its a good fade no doubt. I find these vids very usefull man, i do my own hair and because of vids like this it always looks great. Saving alot of money on the barber because i went every 2 weeks so im saving 40 euros every month ♂️ and i do my girls son ♂️ so thats 20 every 3 weeks she is saving. Its a nice skill. So thanks to guys like u i can do this 2
Tango Man Tactical: Kudos! That is clean an tight! What an artist! Where i live we don't have anyone who can fade like that. I do my own fades for 20yrs now but, that is boss level.
GTV CLIPS: Congrats on a great job you don't know how many hair cutting videos I watch with people spend an hour giving somebody a fade and it looks no different than if they just went no guard the whole way ♂️♂️✌
Matthew J: That is a super great fade! I used to be in the military years ago and am actually bald now. Haven't been to a barber in awhile. Just curious how much you would charge for a fade like this today?
paul maloney: Very detailed in explaining the increments of the fading, very nice clean crisp result
Linda Pelletier: I really liked that you get rid of the lines as you make them!!! Great detailed work!! Thank you for sharing
Mihail Marcu: Man, I have long hair but I enjoyed this video. Did this on my dad. Turned out pretty good despite not having sophisticated hair cutting machine.
VPN: thank you for this gave Mr a new perspective on fading and over all cutting techniques respect
Penny Ahrens: Well done and very helpful video. Thank you
Supreme Trimmer: Great step by step and so detailed. MUCHO FLOWWW, killing the game.
LittleSparrow: This is absolutely magnificent mate
Speak The Truth: I can respect the patience needed to do a quality job.
A Kingi: My cousin is bald now, but great tutorial. Need to practice more!
MATH MOBLO: Wow Nice tuto man. The rebel and your lopro fx trimmer are really impressive. And of course yours skills, from another space... And thank you for this excellent video quality. You've got +1 sub.
Jon Anik: That blend process looked crazy easy, does Zero gapping your trimmers and clippers make it a lot easier to blend the 0-0.5?
Josue Sanchez: Bouta try this as my first cut to start learning! Good looking on the fire tutorial
GTV CLIPS: On the first side, with the first clippers you started with when you used the edge to soften the line it left a bunch of zigzag line's on that side especially towards the front but I noticed you didn't use them for that on the other is it because you noticed it ♂️ On camera inches can be deceptive, to me it looks anywhere from 5/8 to 7/8 and I've been cutting hair and doing carpentry for 25yrs + I'd just say anywhere from 5 to 7 8ths depending on your preference when explaining Again nice work
Joeski Chavez: Great cut, Dre. Do you prefer these guards over the Wahl and babyliss premium guards? Or do you use them for your videos only? Just curious brutha
Save Thyself: These videos are super helpful thanks bro. Your Rebel clippers have the included blade or did you swap them ?
IviSpark: Looks excellent! What is that semipermanent and the mix ratio you used in your airbrush on his edges? What airbrush you recommend?
Ronaldo Bezerra: .seus cursos me ajudaram muito mesmo sou referência no meu salão em São Paulo. ., Brasil
JessandFam: Going to try this on my man ! Thank you
G K: THATS IS AN AMAZING FADE. Good job
Nancy Garcia: So glad I found your channel!! Time to start practicing ☺️
Kuya AL the Barber: Very nice tutorial sir I salute you as a blogger also and thanks your tips and tricks.
J.C Vlogz: Did this and my cuts are looking fire
50stephanie: Thank you so much ...This video was the most comprehensive ...your narration and voice made it easy listening to follow instructions. Fades are new to me... what product is it you used for the edge up...Kiss?
Maria Lascaibar: Thank you. Great tutorial and hair cut.
Mark Colvin: Thank you so much for great video perfect work
Hakim Nelson: I'm investing in some good clippers,guards, straight razor, cleaning spray. I love to cut hair I have 2 boys age their haircuts were $25 each. These steps are boss all you have to do is pay attention so Thank you for this. I'd rather invest in the stuff I need then 2 haircuts a piece.
Lorena Gamero: Nice work looks easy the way you do it but is hard thanks
Virginia Prokop: Fabulous!!!!!!!!!! GREAT VIDEO!!!!!PERFECT CUT !!!!! INSPIRING TALENT
SLB_XiRamiXi 10: Bro this is the best Tutorial ive seen.
Princessa Monako: Wow ale piękna maszynka różowa jaka to jest ??❤
Ezequiel Diaz: Me suscribo porque yo tambien conrto pelo no soy profesional pero si la saco y pues mirando aprendo mas
Andy the barber: Amazing cut bro
Ronaldo Bezerra: Aq e from Brasil parabéns meu amigo muito obrigado pelo curso
Miguel Angel: Fire haircut bro I’m loving my rebel SC the pink looks sick
Krystal Hristov: When you say open, do you mean making it so the clippers are raised versus lowered? That was the only part I had a hard time grasping. Ive been doing fades on my husband since the pandemic after never touching clippers in my life lol
Jose B: “You can take more hair off but you can’t put hair back on if you take off to much you feel me” took that to heart bro that’s my problem sometimes
Max Perez Abreu: Nice work, question: if I can't eraser with the clipper line that I make with the trimmer, need to pass the corner of the trimmer?
Mo Toredo: Dope Fade always killing.....thank you
Lil Trz: Such clean fade..just one question; what brand clippers are you using?
G S: Dre your a beast your humbleness and passion keeps me coming back to your channel
vitagameplay: Is your rebel equipped with the stretch bracket?
BeautyByJohan: Great tutorial!! Will try it out today
Memphis: so clean
Jose Aguirre: What clippers are those? I like how it has all the lever positions visible in the side
tgskxzqhr: Excellent SUPER CLEAN FADE HAIRCUT
Claribel Padilla: Great video thanks
Zach Evans: What are the best trimmers to use for trimming & fading a beard??
B S: Looks great at 01:20. I think this is a great style.
Endi Caldera: Awesome video keep doin it!
Mariusz Czapski: Best fade tutorial i ever seen 4 real!
Cherios Numbers: Good job. Wouldn’t say it’s the best on earth or the cleanest. That’s a stretch fam.
Huascar Rarael Henriquez Martinez: What machines are you using for this cut? I want to know the brand od that nice bright pink one, if possible (please)
Chupapi: When doing clipper over comb in this video, is the comb touching the head at all or is it slightly away from the head?
Mike Gould: That is one superb haircut…suits him as well…
Demo Demo: Hey I noticed you used kiss express instead of tomb45 No Drip. And your air gun is different. Could u do a review on your enhancement products and why you use them?
Matthew Cain: I like the steps but it’s rare to find barbers on YouTube the could do a cut without using paint
Haris Rahmanovic: . Is the stretch bracket on your clipper? What do you like better? Stock or stretch opening ?
Cahhaya Channel: Perfect haircut tutorial
Ansu Seituah: Cleaned cut
Sky Salva: Can you do a vid tutorial on how to blend the top of the fade into the top of the hair using only guards?
Mike Dog: Very nice very clean fade
srsigmon25: Well done brother!! And people wonder why a good fade cost more than $20 hahahaha.
Ghuncho K: Could you comment each blade you used from the start of the fade till the end like put the blades you used to do the fade in order
Miau Melker: Can someone tell me the measurements of the 90 degree tool at 11:06
Typical Trapx: Does open to close also work as good?
Alex king: How does that clipper cut, do you recommend it?
Little Lamb - Gospel Artiste: I'm watching you from Jamaica. Love your work I learned alot and improve in my work
Chris Ortega: I noticed you have different blades listed than the ones you actually used. Was that by design?
Ed p: That’s 3/4” bro amazing fade
A day with Mark: Clean cut! I need me them MB guards also
Dirty Diaper Rash: This is a masterpiece..
Sad Rain: Me watching this so no one else has to touch him I’m def gonna do this on my man’s thanks for the help
TMS Entertainment : Please someone do a tutorial with starting with open lever and fade with 1 and 2 basically a non skin fade
Jose Anguiano: would this be considered a mid or low fade?
mofu: deze man maakt gruwelijke nummers hij stelt nooit teleur. goude gozer andere niveau. doet niet tof respect ga zo door broeder peace
Tom Harrington: will a one guard fully open which is a 1.5 take off more hair than a 1.5 guard fully closed???
Jesse Cruz: Very nice cut Dre,a finger’s with closer to a half inch,a thumbs with closer to tree quarter’s of an inch,but in the back goes for a full inch or more.
Oi Nathan: Then two weeks later, gotta go back and pay $100+ to get it redone lol
Francisco javier yeah: Dope , bro how u make it last the enhancement? I'm trying to get my customers use it but no body wants, they said what is the point to do it if they wash and is gone..
A_rami13: How do you like those clippers???? I read so many different reviews from good to bad… I’m a new barber or so called barber but want to invest in the right tools. I have some Amazon clippers right now with the Wahl blade but wanting to upgrade my tools
Marquis Williams: What liners are you using?