How To Cut A Wolf Cut Like A Pro
Hey everyone, I hope you are enjoying this HAIR channel, please hit the like button for me if you enjoyed the video and leave a comment with what you would like to see more of on this channel.
Check out todays video the BRAND NEW hair trend technique for 2022 version of the tiktok trend wolf cut
SUB TO MY CHANNEL
www.youtube.com/paulwattshair?sub_conf...
*My Salons*
www.paulwattshairdressing.co.uk
*The Products i use in all my videos*
*PWH Clothing *
https://www.merch1st.com/shop/pwh
*FREE Editing Software I use*
Vidiq code - http://www.vidiq.com/paulwattshair
*My Filming Set Up*
Camera - https://amzn.to/2R7X5H6
DJI Osmo Pocket - https://amzn.to/34bA9fq
Vlogging Lens - https://amzn.to/348lLnY
Joby Tripod - https://amzn.to/2wdeNBH
Studio Tripod - https://amzn.to/2X6hRue
Micro Mic - https://amzn.to/2wdqmZv
Studio Mic - https://amzn.to/32IH1Rz
Wireless Mic - https://amzn.to/3v2N7YW
Ring Light - https://amzn.to/3dRJzRv
Studio Lighting - https://amzn.to/34e2t0G
*get 25% off your first track from Lickd https://lickd.co/r/paulwattshair
*Follow on Instagram*
http://www.instagram.com/paulwattshair...
http://www.instagram.com/paulwatts.lif...
Business contact: [email protected]
Post to: Paul Watts Hair, 7 Market Place, Kettering, Northamptonshire, NN16 0AL
Music: @epidemicsounds & @lickd
Get Every Single Time by Bissett here https://t.lickd.co/E1ojEdLRQ5R
License ID: pv87N9y35Yn
Get this and other songs for your next YouTube video at https://lickd.co
DISCLAIMER: All opinions in our videos are our own. This description contains affiliate links. This means that if you click on one of the item links above, we will receive a small commission at no cost to you. This commission helps support and grow the channel and allows us to continue to produce videos. Thank you for the support, we really appreciate it.
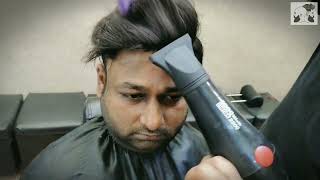
But there we go guys that is the wolf cut for 2022.. Hey everyone! Welcome back to the channel! Thank you so much for being here. If you are new hit that subscribe button, give it a thumbs up and don't forget, to comment down below on what you think of today's video. Today'S video is all about upgrading 2021's wolf cut, we're going to bring you a brand new version of 2022. biggest questions that i've faced with all my videos of the wolf cup so far is paul. How do you do it if you've got already got bangs how'd? You do it if you've got a fringe. How did you do it for already got layers? How do you do this? How to do that, so i'm going to be showing you exactly how to do it and go to your hairdresser and show them exactly what you want for 2022 as the biggest haircuts for 2022.. Let'S get into it so we'll be using this beautiful mannequin head that i colored for a joyco takeover. This is uh inspired by sex on the beach. The cocktail sex on the beach with the the dark red grenadine root into that real sort of oranged off yellow ends. So it's already got a little bit of a fringe in there. It'S already got a bit of texture in there, but we're going to be bringing you a brand new version of the wolf cup 2022.. Let me know in the comments right now what you think about this haircut are you excited? Is it something that you've wanted to rock for so long, but you didn't think you could because you've already got fringes. You'Ve already got layers uh, you don't know what to do. You don't know how to ask your hairdresser so i'll, be showing you exactly what you want to be going to the salon for for 2022.. I'Ve got a lot of other trend videos coming soon. We'Ve got another big c, which is a cross between a pixie and a bob. We'Ve got the chanel bob. The chanel bob is one of the hotly anticipated haircuts for 2022 also, but i do think the wolf cut has got its place. The shag, the mullet are sort of dying out, but the wolf cut is staying very, very strong and i want to just give it a bit of a facelift a bit of an upgrade to any 22.. So i basically want to do it in as little sections as possible, just so when over complicating things, i'm not one of those hairdressers that will put millions of sections into a haircut to get a similar result, as you could with two or three sections. So this section is going to have three sorry. This haircut is going to have three sections. That'S it three sections we've already got the fringe, so we're gon na be refining that, after we're gon na be disconnecting this top layer, this top uh piece of the hair. So it's really short we're gon na be looking at a lot more shortness in here. So we can really sort of get a lot of movement in there and get a lot of texture and and lift, and then we're going to be working through these sort of exterior parts where we're going to be taking off the old wispy ends that a lot Of us have got if you jump into a hair salon, pre-covered post covered you're gon na. Have these ends like my mannequins got that need taking off so we're gon na be taking off all of those i'm gon na be taking them off straight up. So a vertical section and a vertical cut, i'm going to be taking that off and it's what that's going to give us is. It will take off some length, but it's also going to take off the bulk of that haircut. So it's going to leave us with that piece will drop and you can see how they will drop in there. So it's going to give us a really shattered exterior perimeter, so i'm going to wet this down, i'm going to get it pre-sectioned and i'll be back. So i want to be starting off with just a middle section. Just on the top of the head high point of the head is where i've started from, and i just want to separate and isolate that fringe area. So it's already got a bit of a fringe. A bit of overhang here, but where i'm taking that to is about two inches back into into the head and then we're just taking that down. You can see where my cone is just the corner of that eye. That'S where we want that section to be same on this side. So if we aim for the corner of the eye again, we should know that we have our section or our fringe isolated perfectly. So again, two inches back that down there and you can see that just touches the corner of the eye, so that is going to be isolated through there, and this is one of the biggest questions that i get asked about. The wolf cut is what about if i've already got a fringe fear, not i'm here. So that's the fringe, just isolated, there's one section! Next section is going to be from that point there and we're going to come right back to just behind the crown. So if we bring that from there just twist that out of the way, so i've already drawn that section, i'm just going to just for ease, get a pin tail pop it right on the back of that crown finger there, and then this is easy! There we go straight through here's, our second section i'll, show you it's a bit like a mohawk. I do love this color. This is going to look so good because because the color is disconnected as well we're going to get a lot of movement in there. So just clipping that out of the way right, three sections - that's it we've got the fringe. We'Ve got the disconnected piece and then this bulk of the section underneath here so now where we want to start. We want to start on this underneath section. So we've got our fringe isolated. We'Ve got this top section through there, as you can see, and then we're going to start with this underneath section. So where make sure we start where that point comes to we'll draw a section straight down there and then just comb that to the side we're going to comb straight down again through there and then i'm going to use my length as my guide, because i don't Want to lose too much, i think wolf cuts, look great when they're still quite quite long, quite like sort of shoulder length but you're, creating loads of disconnection in between that's what we want to do today. 2021'S version was all about sort of bulkiness and that wolf sort of uh main, where it's sort of come quite triangular. This is this is going to be on those lines, but we're going to create a lot more texture on the bulk of the hair. So what we're going to do i'm going to pull straight out if you see my length actually, let's go a little bit shorter because that's not going to take too much off then, but it will at the sides yeah stick to your game plan. Paul we're going to stick to that game plan where i'm going to use the length as my guide we're going to pull straight out so there's my length and then we're just going to cut straight up to the ceiling. There'S my guide we're taking a fair bit of hair off there as well, and this is going to be a moving guide. So what that means is i take my next section and our previous section, which is now our guide, is then going to be pulled over to this section, but we're still gon na be pulling straight out from the head, so we're gon na see our guide. We'Ve. Also got our length as our guide, but there's our nice strong guide there there's our next section again next section, our first section now we can forget about it, because our second section is now going to be our guide, and that is what we're going to work On around all of the head, so let's pull it straight out from the head. So each section new section is coming straight out from the head, but our previous guide is sort of just over directing slightly so it gives us a guide to cut to now. You can see that guide travels down slightly. That is why i then sort of get my fingers in a position again where we can have the tension and we're just lifting it up, but you can see that nice square line there again. Our second section we throw out - and our third section becomes our guide - these sections are getting quite big now, so you'll probably have to do it in two i'm just going to grab all of the hair. We want to make sure we're getting that because there's our length guide, there's our guide there and then again, because that hair was traveling down slightly. We want to readjust, find our guide and make sure that's coming straight out from the head. There we go now we're creating a lot more texture in there next section we're gon na do exactly the same. Get rid of section number three now section number four is our guide and so on and so on. So i'm gon na fly through this and we'll reconvene when we get to the other side. So now we'll come to the sides, we're doing exactly the same. So i'm just forgetting the previous got a previous guide, sorry and we're bringing in that fresh guide into where we're cutting so still straight from the head. We should see our guide appear, got a nice strong guide there straight out from the head, and then we get up into this sort of where the parietal ridge is we're sort of taking about an inch off. So this is going to give us a nice bit of texture through that that bottom now we're on the front part of the head around the temples got a nice strong guide there. Taking that off, you can already see there's a lot more sort of lifting texture through there. Now, let's start on the other side, so we're just going to follow through, as we did we're going to take our first section, which was our guide. We'Re then going to throw all of this left hand side out of the way and bring in our new section, throw that out of the way there. Now we used our length as our guide, but we've also got a really good guide in the previous section that we put in so i'm just going to comb that there and also the 2022 wolf cut. I think they need to be worn. These sort of colors the vivids, i think we need to be uh, upgrading everything. I think the colors need to change right, where's our guide, there's our guide, nice strong guide, there's our length and remember, because that hair is traveling down slightly we're just going to pull that out, see our guide and take that off. So exactly how we did the other side, i'm going to follow this all the way through and i'll i'll reconvene when we get to this top. So apologies if the uh audio was poor for the first half of this um. This kept on getting caught in my pocket, so i've just popped it there. What we've done is we've just done around both sides, which is coming straight out from the head moving guide, all the way around to give this sort of freedom texture. That'S that's living in this hair lifting texture and the reason i want to do that is. I want to just sort of bring the wolf cut up to date. I want this to be a lot more texture in there around the sort of perimeter with wolf cut. She found a lot of the heaviness sort of sitting there and there was a bit of freedom around here, but i wanted just to bring it bang up to date with 2022 and give us something a little bit different, a little bit more lived in texture. But where it's gon na really change is is on here as well, because this is where all of this textures live in now we're gon na disconnect this completely, and when we talk about disconnecting this completely, i want there still to be some texture around this front, But i'm going to take away a lot of this bulk around the back, so i could, if i was looking at just wanting to cut it in in one. I could bring this all back here over direct and we could take that so then this will stay longer, but we're not going to do that today. If you want to see that in another video, where i can just be taking sections and over directing back and elevating and taking off, to show you what it does, let me know in the comments down below, but what we are going to do. I am just going to clip these underneath sections out of the way, so i don't pull any of them up and then what we are going to do. We are going to find a length that we are happy with and it's going to be all over directed back, but what we we're going to do so, if you've seen me, do the long grad recipe normally from the the fringe we'll work up that way. So this would be like the nose we'd find a point at the nose and then we'd cut up. But what i'm going to do? I'M going to find the occipital bone, which is that bump on the back of our heads and i'm going to pull that down to the occipital bone, and you can see how disconnected that's going to be with the shortest layer. There is there this one's going to sit there, but then what we're going to do is we're going to have this through here as our original guide, i'm going to cut from short to long. So let's pull this down, find the occipital bone. Let'S just find that again there, so that's how much we've cut off and there's our layer there, so i'm just going to soften it off, because i cut that quite hard there and then what i'm going to do. So, i'm going to run a middle section straight. The way through this top piece just to open it up and then we're going to put in a central guide, so here's our guide that is literally running through that sort of mohawk section. I started with we're gon na find our guide that we just put in there we're putting the occipital bone. So you can see that guide. Just at my thumb, what we're going to do is we're going to use a 45 degree angle that way, but then also a 45 degree angle there and i'm just going to cut from short to long, because what this is going to do because we've angled it Backwards and i'm just going to soften off through there we're going to have shortness through here, but then, as we get to the front like the wolf cuts, we have a lot more length around the face and then all we're going to do is we're going to Pick up either side of this section that we put in so we say here and then this is going to just follow that same length. So 45 degree angle, 45, degree, fingers and then this is just come over to meet that section or that guide that we just put in, and i'm just point cutting that because it will just soften it off through there. So we're not left with a sort of a hard layer sitting over the head and then there's a little bit more here to bring in and then again you can see that long bit there i'm going to create that 45 degree and just soften that off and That'S going to sit over the top of this, and then we grab this side of that sort of mohawk section that we put in that top section like that v and then this we'll just take our section again. Our first guide, sorry and then we'll push this over so similar to what we did at the back, where we had that 45 degree angle. So i'm just going to pull a middle guide down. I'M just going to section that out there and pull this down just section that out there and then you guys all ready with a fringe. How is this going to be cut we're going to use the fringe as our guide, so the shortest part of our fringe? That you can see there by my thumb, we're then going to have that 45 degree and we're just going to go back to there now the rest of the fringe or the rest of the front, like we did at the back. We'Re just going to push that up into the middle and we're going to use the guide point cutting in. So you can see what i've done. There is just push that up into the middle. Take that middle section again and then we're going to push or pull sorry pull this up into the middle. Just to give you a view, so you can see where that's over directing to so we're going to elevate and over direct up into that middle and we'll just find the guide, which is there there again done so then, what you'll see from that you'll see? It'S shorter in that middle as it gets longer towards the sides, and this is also what's going to blend in with those layers that we put in that disconnected layer on the top that's going to sit around there. So it's going to create a lot of weight around that face, but that's what we want from the wolf cup, but we've also just upgraded it by adding a lot more disconnection around that crown. So i'm gon na get this dry, get it styled and then you better see the finished result of the wolf cut. 20. 22.. So here it is unrefined unstraightened. This is just a bit of a wrap dry on the root. I want to show you this sort of texture: that's been left in there i'll. What i'll do is i'll smooth it through? I just want to show you also that disconnected layer that we put in there completely disconnected almost hidden just adds that that sort of look. I mean look at all that volume we're able to create. I mean look at that. I know the color adds to it as well, but what i love about this is this added dimension to this shortness through here it does look really sort of rock and roll, but then we've kept all of the bulk through this, this sort of mid laps and Ends where we can either curl we can straighten. We can straighten this and add curl or diffuse, but look at that right. Let'S get some straighteners through there i'll refine it uh, just which will just blend in a little bit more because i know this is disconnected, so i think we will want a little bit of connection, but not too much i mean once i've once i've smoothed it. I might not want any uh any connection, because i really like how that root, that sort of root area is lifted up through there and it sort of gives you the ability just to work your hands through and create loads of texture. I mean i love that and you still get all of that length in there cool right, i'll, smooth through and then we'll refine and then i'll give you the finished result right guys, so there it is, that is all smooth and what we've got to do now Is just got to refine and you can see hopefully so we've got to refine all of the perimeter, so that was just taken straight over actually put the length in yet which we're going to do in a minute, but that layer, that's completely disconnected. You can't really see it only because of the the disconnection in color, but that adds a whole new dimension to it. You can see that texture, it gives you up there. So, let's start so, let's start refining and what we're going to do is i'm not going to bang in a sort of like a square line at the bottom, i'm just basically going to refine and just soften it all off, because the wolf cup is a soft Haircut there's a lot of texture in there um so where we'll start is we'll start with our layer that we put in and i'm just going to chip in. I know we cut this point cut, so there won't be much needed, but i'll just chip into that, and then what that will do is just soften off. You can see there i'm not going to touch this, i'm just going to soften off all in there and that will also give a little bit of sort of scaffolding a little bit more deeper uh point cutting and then what that will do is it will just Soften but also add a bit more texture in there, so you can see the disconnection there through there. So i'm just going to work through this top section softening all off, but also giving it a bit more lift as well and wherever these long pieces i'm just going to leave. I'M just working through just lifting up fine little pieces of this top section. Because what i want to do see there's disconnection there drop that really deep point get into there just to remove any sort of bulk but to soften, and it will just add a little sort of plumpness as well to it i'll work on the fringe after. But what i want to do now is: i want to work from this front section there. You can see that square line stand here. Let'S see get that square line there and what i want to do is i'm just going to really open all of that up, because it was cut blunt, just let it fall. It just sits a lot softer again. It'S a really hard blunt line there not affecting the length, but wherever i see sort of thickness and and bulkyness to the hair like in there i'll just deep point it into there. Because what that will do is just loosen it all off and you won't be left with sort of heavy lines in the hair again, and this is one of the things that i find with refining it's one of the things you don't really get taught at college. Unless you're doing an apprenticeship in a salon, refining is where people class themselves as like a creative cutter. I think that's the refining process and i think that's why creative cutting courses are so sought after, because you see these sort of bobs and all of these haircuts that are sitting pristine and you've got all these learners like. Why doesn't mine sit like that? And it's because never been taught it, but you can see there now still nice and frayed, but we want it to be, but just a bit more blending when we come to this back section you'll still see that blunt line through there. So the bottom is already frayed enough, but there's a bit of sort of fullness in there. I want to soften off and again just at this top, so i'm just going to go into there and i'm just going to follow that all the way around the head. Finding these weight points that we want to soften off and if we wanted to blend in that layer that we've put in there that disconnection we could. We could just soften that off that way or we could work the other way. But i want to leave it because i think disconnection you can see all that weight in there, not so much down this bottom area, but right in the bulk of that hair. There we really soften that off and and going really deep into. There is also going to give a bit of a a bit of a lift in there as well again looking for a square line which is there it's not actually too bad there again square line a bit bulky up there, i'm just going in sort of horizontal With the section i don't want to be going in at any angle, because i don't want to be removing length i just want to be. I just want to be creating texture and softness, and the last section at this front if we pull it out, it's not too bad a little bit, weighty just there, so i've just gone in there and softened all of that off now. What i'm going to do is i'm just going to freehand just this bottom off, just to take off any unevenness to it and then, where we have, you can see, got the length there and it just follows through there so i'll, just freehand that into there. So there's a bit of connection and again on this side, so you can see the length there just freehand, that in so now i've got that wolf cut, sitting nice and symmetrical i've just loosened it all up, and you can see how that layer just melts in To the rest of it, but as soon as we get some product in there or a bit of movement, we can start creating volume right the fringe, so we're going to pull it out where we were, i'm just going to really deep point cut this. I want to really shatter it. Don'T want to take off length where we don't where we're not working from, but remember you do, want to be sort of pushing it across slightly or pulling it across if we're working this side, because you want to be taking off that shape that you put into The into the fringe, let's just get rid of that long piece - doesn't lift there okay there. So there is the uprated upgraded, uh, wolf cup 2022, really nice and smooth sort of tapering out a little bit thinner down here. So if you guys got thinner hair, this is something you can do to create that volume as well. By disconnecting this top piece, not too much, but your hairdresser will sort of give you some advice on how much to disconnect it might just be like a little diamond through this top piece to get you that that lift, but we've got that shape and if we Just get our fingers in there and start to expose that shorter layer and all i'm doing is sort of massaging the scalp, and it just starts to open up to give you that texture in that hair. I think that fringe is sitting banging. We can open up this a little bit, it's all just fingers and thumbs when it comes to sort of placing there's no product really in it. I'Ve put some joyco lustre lock in there just to protect from with the blow drying for heat protection, but look at that. You can see from that back angle. It does just it just blends in that that layer that we took shorter, just blends in perfectly it gives that bit of texture, but there we go. What do we think to the wolf cut for 2022? So the reason it's different is the colour for one. I think we should be embracing a big big colour change for 2022. I think we should be disconnecting a lot more to create volume and texture and sort of lived in sort of looked uh and then smoother. The the wolf cut for 2021 was all about sort of big and like natural texture in the hair and and a lot of sort of bulkiness. I'Ve just streamlined it just to give people who have got finer, hair, medium, hair, uh, just a bit of a chance to sort of bang jump on this bang on trend. But i absolutely love that i love how that that sort of top layer just sits there and adds that bulkiness to it without actually having to do too much. What do we think? Are we loving it then look. Let'S have a look at that back section, just exposing that there keeping all that length but we're adding that texture and volume through there. I just love that, but there we go guys, that is the wolf cut for 2022. So, thank you so much for watching these videos. Uh 2022 is going to be going off when it comes to content. I have all behind me if you want to see a studio tour. Let me know because i've i've done this up. This is a whole new sort of backdrop that i put up last week. I'Ve got multiple cameras running now, so i'm hopefully bringing you some really engaging content when it comes to my content, my videos, my education, videos, um, but yeah. Let me know if you want to see a studio, tour i'll, show you a studio tour. If you want me to carry on with these these videos to show you how haircut trends, how you can do them, let me know, but yeah 2022, just so you know as well. You can book me in salon for cut and color training. Uh colour training go through joyco europe, uh cutting training. You can come through me, direct i'll, be coming i'll, be going to salons. I'Ve already got a lot of bookings for 2022 already all over the country to show off some some some trend, cuts and colour work got a lot of joyco stuff coming soon and something else which is in the pipeline uh, which will be coming soon so yeah. I look forward to sharing it all with you, but yeah. I hope you've enjoyed this video. Thank you so much for joining me. But again, if you're new hit the subscribe button, give the video a thumb up and uh comment down below what you think. This look, love it right. I'Ll, see you guys on the next video
Comments
lisa leyman: I'm doin it. I loved the first wolf cut and haven't had a styled cut in a really long time. Where I live if a stylist knows what you mean when you say I want a shag your lucky so this video will help greatly ty
Milly Tremblay: Loved this one. Just so you know when you are showing the ends of the hair to show the cutting you don't have to move out of the way when you are wearing a darker shirt. It shows up better against that darker color of your shirt. Happy New Year. Hope you stay on here educating us all. I would love to see how to cut quite curly hair in a shag like Zendaya. Love that cut but they always look at me like I'm crazy to think they can do it. Oh!!! Great shirt by the way.
Shellpthatsme: I asked my husband to help do the back of my head so he tried, but it made him so nervous he, “…felt nauseous.” Lol. But, it was explained so well by you that he gets the “idea” of how to do it. Bravo! ☺️
Ded Kat: Its like after the 70s all hairdressers got amnesia and forgot what this cut was. Ive always loved a shag but no one knew how to do it anymore. I guess it morphed into the mullet and the technique was lost. So glad it's made a comeback.
Cleo Harper: This was awesome, thanks for sharing -- and Happy New Year, Paul! So I have a question (of course): My hair is fine but a lot of it, brown but scattered through with a lot of (sometimes wiry) grays (48 y/o), currently one length, and naturally wavy. Meaning, naturally wavy in that hard-to-control-but-won't-hold-a-curl sort of way. I'm dying to try both versions of this and so I'm torn. Which do you think would be better for my hair type? I feel the 2022 looks just a little too sleek to pull off with my hair texture. I feel like 2021 would be a lot more forgiving on a daily basis. What do you suggest?
Lesley Graham: Can feel the excitement coming off you,Paul. Love your no nonsense approach
Marie Conforti: Love this cut! Thanks for all your videos Paul and Happy New Year!
Noëlle Myrthe: My inner emo/scene kid is very happy with the comeback of this hairstyle.
Barbie D: Welll it’s official, I’m jealous of a mannequin !! Looks beautiful and I love the color!
aikanae1: My attraction to the wolf cut was because it was diy and still looked like it was styled.
jamzy: Would love to see the fringe done on a widows peak. That section won’t work for me
Chelsea Noto: I’m obsessing over this sex on the beach look! What would this style of dye be called, an could you do a tutorial at all?
Jessie Diane Ryan: I went and asked this at the hairdresser she didn’t know what I was talking about. Her coworker had to tell her.
Natasha Eccles: This was so good!! We’re lovin’ it!
Leigh Ann Hunter: I used to have a similar haircut in the 80’s. We called it the Gypsy shag.
Kristina Baker: I’m in loooove!!!!!!! Getting this cut and no one can stop me even if looks not that flattering with my round face and double chin
Ronda Meier: Work smarter not harder the color is stunning.... I really like how this looks.... And clearly can work for curly hair.... Thank you.. Btw. It reminds me of Goldie Hawn back in younger days...
Rootatoot07: Do you think this cut would be ok for people with tape in extensions?
Orange Tiger Lily Lane: Was that a picture of a hyena? I know that will be the next big trend! Every girl wants to look like a wild animal ;)
Jen Greenhalgh: I like this one. I think it would look like on my with my fine wavy hair tho
Toni,s hair styles: Looks beautiful Paul
Rootatoot07: And yes!! Show us everything!
Manila S Samek: Beautiful love thank you.
Frunze42: I wouldn't be able to see anything with those bangs in my eyes
Toni,s hair styles: You taught us refining at college
Caroline Brown: Thanks
Toni,s hair styles: Hi and thankyou for everything and happy new year Paul
Toni Doyle: fantastic
Vivían Mozart🤣: Me parece que sos fans de Jake Thompson..por los cortes rockeros.. Jake es pionero..y creo que le admiras..no se porque percibo eso. Feliz 2022 Paul
Suzanne Watts: Looks lovely Paul, the colour is stunning. X
Toni,s hair styles: Let me know if you come to builth wells salon I'll pop in
Toni,s hair styles: Your camera says November 1992