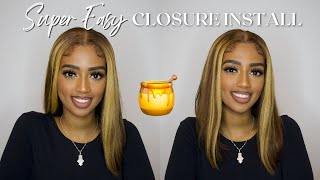
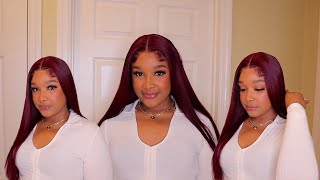
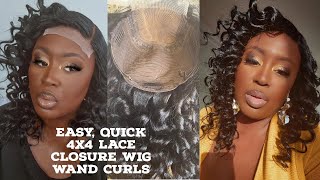
How To Make A Diy Removable Quick Weave Wig With Closure Fast Beginners Closure Wig Tutorial
✩JOIN The MILE HIGH CLUB✩ SUBSCRIBE NOW
Learn How to make a removable quick weave wig with a closure in this beginner friendly step by step tutorial. This closure wig tutorial is perfect for anyone who wants to find styles they can do quickly and with very little effort.
This is the easiest way to make a quick weave wig that you know will fit your head! In the video today I am using Organique synthetic blend hair at 28, 26, and 24 inches honey... INCHES! The way I fix up this cheap closure is very beginner friendly and looks natural when you finish!
Beginner Box braid tutorial: https://youtu.be/WELIVU-Qsvg
CHECK OUT MY OTHER VIDEOS!
Eyebrow Tutorial: https://youtu.be/__Gtwfp-a2k
Lash Tutorial: https://youtu.be/iODPOfZBXG8
Lace Frontal for beginners Tutorial: https://youtu.be/bxcabd3_Yvo
20 Creative Ways to style your box braids: https://youtu.be/IBSq1kC0P8I
Find out about and follow my Smile Direct Club Smile Journey Here: https://youtu.be/f4b-86t51s8
Instagram: @hey_mrsjones
Business Inquiries: [email protected]
Family Youtube channel: https://www.youtube.com/channel/UC-gwp...
*
*
*
*
*
*
Video Inspiration:
Hello, everyone and welcome, or welcome back to a mile in my stilettos, you guys i'm so excited because i'm gon na be doing this removable, quick, weave, wig situation for y'all today, beginners. I want you to know this. Is the video that's about to change everything, so i'm about to show you just how easy this is now you already know what i say if this is your second video go ahead, hit that subscribe button. If it's your first video subscribe in good faith, because i'm about to have all the tips for y'all okay, today, i'm going to be using this organic little situation. 28. 26. 24 inches honey inches. So the first thing that you want to do is get your closure. Prep, i'm just using a translucent powder that i have or you could use any type of like powder foundation that you have that matches your skin tone and you're just going to go ahead. You'Re going to dust that onto whatever closure you have the hair. I got the closure came in the pack with it, so that was convenient for me, but you can use whatever little cheap closure or expensive closure whatever you have use your closure and go ahead and dust on your translucent powder. So this is basically the color that you want it to be. Once you get finished and you're going to make sure you put it all over the closure. Okay, so that's the finished desired. Look then you're going to put on your plastic cap. This plastic cap is to keep the glue from getting on your hair and so that's important and then you're going to get your wig cap and you're going to put that on. I normally use a little darker wig cap, but i couldn't find one so this one. I end up getting it's better to get lighter and make it darker than to get one. That'S too dark, but i put it on nice and snug and then again with my translucent powder, because it's not the perfect brown that i wanted. So i'm just gon na dust that on there and get it nice and colorified okay alrighty. So this is pretty good. So what i'm doing now is i'm feeling around for my edges. So i know where to put my closure for your closure you're going to get your glue and you are going to put the glue around the edge parts. Don'T put it in the middle, put it around the edge part of your closure. Okay, see. I have it right there and then i also don't put it at the very top where the lace is going to be cut. So you'll know where that part is because there's no hair there. That'S for your edges. So then, i'm going to swing this around very carefully and i'm going to just lay this down again, putting it right where my edge would be see, lay it down where the edge would be where your hairline starts, and then let your baby hairs be the thing That is kind of peeking over where there's no glue and then i'm going to go around and i'm going to pull it to make sure it's not going to buckle anywhere and i'm going to just mush it down and get the glue nice and set all the Way around the closure and, if you're wanting to know how to lay your closure again, the part where the glue stops is where you want to put the edge of your closure. I hope that makes sense. If not, i hope you saw it and it made sense and then you're going to put the hair dryer just to seal everything in place, and now we start the fun part, the inches y'all. So with this, i'm starting with the 28 inches and i'm just gon na unwrap it, take it out. I'M gon na put it around the back of my hair so that i can measure it and you just basically you're doing it blindly and that's okay, but you're. Just seeing from one end to the other you'll notice, i'm not starting at the bottom and that's also. Okay, you're gon na put the glue on the edge of the track and then you're going to swing it around and you're, going to put it onto your hair and i'm going to show you what that looks like if you want to put a mirror in the Back so you can see what you're doing you can i've done this so many times. I just go for it, but you can also do that to help you see what you're doing okay. So when i'm putting the track on there, i try to space them closely together, and this is just basically what that looks like i make sure i lay it down, and then i use my fingers my index fingers to just kind of press the track into place. So that i make sure it's going to be nice and secure for any beginners out there. This is what the track looks like you're, going to put the glue right along the edge, try not to let it touch the hair. After that, i blow dry it after i've done a little bit of a section. I just get my blow dryer and again that should just help seal the tracks into place. It'S a little bit gappy, but that's okay for the back after i finish one whole pack or one whole bundle. I look at it just to make sure everything's going well. I'M gon na be going to 26 next, but first i'm going to spray this with the blast, freezing freezing spray and that's just again to make sure these tracks are secure and then i'm going to blow dry it again - and these are all just extra measures to Make sure the tracks don't be slipping off? Okay, okay! So now i finished with the 26 inch bundle just doing that same process, and now i'm going to 24. once you get up to the edge of your closure you're going to start laying the tracks basically across. Like this to close everything up, okay, so i did finish getting everything done. I did fill in this little gap that you see it was bothering me but spray. It blow dry it same process as before, and then we are going to get to lay in this closure. Ladies, so this is the fun part, so you're going to take off your now wig that has been made you're going to take the plastic out from the shower cap. Mine had a little wet area, so i did let that dry before putting it back on my head, then you're going to pull back the edges and you're going to pin them out of the way because you're about to get ready to cut this cap. Now, when first you're going to cut the lace side, you're going to cut the lace, i'm not cutting this like trying to be super straight. You want it to be jaggedy. So just like cut it just jump in and cut it. I'M just trying not to cut the hair that you pulled back and then i'm making sure it's going to lay nicely on my hairline and now i'm going to go in and i'm going to be cutting the cap. So just pull the hair kind of back out out of the way and get your scissors you don't want to cut the whole cap only cut the front like part off. As you see i'm doing, or else your cap going to end up being too small. You have to double cap it it's a whole thing, there's a way to fix that, but why fix it? Just don't do it in the first place, so only cut off a little bit and cut to a point. You want to keep some of that band on. That'S really what you're doing keeping some of that band on and so then you're going to start pulling it forward to see how it looks laying it into place next you're going to get your got to be. You could use ghost spawn. Sometimes i use ghost spawn if it's a more quality way, but since this is, you know just like cheap blue wig um, i'm just using this got to be because it's not gon na make it stick as long. You could say, and you're gon na put a thin layer and then you're going to blow dry it if you want to help the drying process, if you do blow dry it or cool, but you're just going to try to get that nice and dry once it Starts getting clear, you're going to put a little freezing spray yeah. I was trying to put this like just in this one little spot. I don't got this spray everywhere, but that's all right, don't worry about it. It'S still gon na turn out cute, but yep again. You'Re just gon na let that go ahead and dry. So i got my hair dryer again letting that dry and anywhere that you see like thick spots. That'S where you want to kind of smooth it out, because that's going to make the drying process go faster, but yeah just wait for it to dry, wait for it to dry. This is like the annoying part of doing a closure or a lace when it starts to feel sticky and tacky. That'S when you know it's ready, so that's what you see me doing with my finger sign is trying to see if it's like tacky, once it's tacky you're, going to put that lace on it, honey and then you're going to hold it down and you're gon na Get you a scarf and you're gon na tie it down, so i'm just making sure it's in place where i want it to be, even though i still laid it a little off center. But i don't know if i'm gon na get my scarf and i'm gon na tie it up, and i would say you want to try to leave it tied up for at least 20 to 30 minutes um, that's my preference! So sometimes i just do my hair before i'm about to go to bed, but i was about to leave this time, but anyways just tie it up. So it'll be nice and secure all right. Next, you don't get your got to be again or edge control whatever, and it is edge time. This is not a tutorial on how to lay edges. I am not the best at this, but imma work through it, because you know you got to do what you got to do to get these closures and all this looking late. So that's what i'm gon na do i'm gon na smooth it down all that type of stuff? Just just do that and let's go to the next process already then i'm going to get that same foundation powder i used earlier and i'm gon na put it in the place where my part is now i'm gon na get this wax stick and i'm going to Smooth this hair down - and this is basically going to be like the last step - i think i might have tied it up again but yep talking to my son and now i'm smoothing it down just getting it nice and laid and right - and you know this is Basically, the finished: look, it's the wig y'all inches honey inches. But yes, don't forget to like comment and subscribe to my channel. Thank you so much for watching this video, i'm gon na have some tips on how to maintain your synthetic wig coming up so yeah go ahead, subscribe to the channel and i'll see y'all next time, peace. You


Comments
Nova: You made this look so easy and it turned out really cute!