Round Line Haircut Tutorial - Round One Length Haircut
Round Line Haircut Tutorial: Learn how to cut a round line haircut. This tutorial is a step by step guide to cutting a precision one length haircut.
This haircut is also known as a Round One Length Haircut, Halo haircut and Page boy haircut.
This haircut will teach you how the process to master this shape on short hair. The same principal can be used at any length.
//WATCH NEXT:
Learn All Three Line / One Length Haircuts :
list=PLoKpyUVU2PO6PvZxvyWM_97CTdXIXRLas
00:00 Introduction
00:25 Zoning The Haircut
00:38 Cutting The Front Zone
05:32 Cutting The Side Zones
07:11 Nape + Crown Zones
10:22 Refining + Personalising
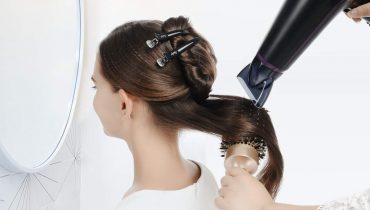
Welcome all welcome back to my channel in today's tutorial. We will be cutting a short round line. The focus of this tutorial is learning technique. This is definitely not a popular haircut for the salon floor. However, this tutorial will help grow your technical skills. This is a very strong classic shape called the halo one day. This haircut may come back into fashion or you may have a client request. This look. We start this haircut sectioning from the top of the crown to above the ear crown to the recession on both sides and then from the crown to the mastoid process on both sides. We now take our first section. We take a fine, clean section that mirrors your client's hairline. If your client has a deep recession, you will need to take a thicker section to avoid any gaps or holes in your shape. We take our first cutting section. This section's width will be from center eye to opposite eye. This will allow us to cut our round shape around the eye socket into the sides with zero elevation. We work back towards our first section, cutting a curved line over the eye socket if you would like your line to sit, lower, simply use your comb and continue your cutting line to the corner of the eye. We continue to cut small sections, continuing our curved line around the eye socket. We now join the bottom corner and side section into the previous fringe zone, using zero elevation and cutting in natural fall working up towards the previous section, as we have more control over our cutting line, then cutting down towards the corner use your scissors to elevate the Hair off of the skin into your comb, whilst the comb directs the hair into natural fall, we simply tap our scissor to lower the elevation before cutting. This first section becomes our guide for the front zone of this haircut. We continue to take fine, clean sections or sections that are appropriate for your client's hair thickness. As long as you can clearly see your guideline, we continue the same process following our guideline. Combing, the hair into natural fall and cutting with zero elevation. You can control your cutting section with your comb or cut freehand if you're in control of your section as we work up the head shape utilize, your client's head position to help control your cutting section. Cutting your curved line from both directions will help you to cut a perfect curved line. You could complete this front zone using the same process as all previous sections. If you would like a very heavy solid result, i have chosen to bevel or soften the line using elevation. I am using a fingers width in elevation. Elevating the last few sections will create a subtle bevel that will create softness in the perimeter of the haircut. The ideal length for this haircut is just above or on the eyes for a longer softer result and any length shorter will create a stronger edgier result. I am completing this zone with the same fingers width in elevation. If you would like to increase the softness in the perimeter simply elevate the section with two fingers in width, you can use this process when cutting fringes or cutting one length line. Haircuts elevation is our tool that controls how heavy or soft our haircut will be higher. The elevation will result in a softer result as it reduces weight and low, or no elevation will result in a heavy shape. As this process builds weight in the perimeter we have now completed the front zone. We will now be connecting the front zone into the side zones working from above the ear down to the mastoid process. We now take a fine, clean diagonal back section. We use our comb as a ruler using the length in the front zone as our guide cutting a line that mirrors our section. We complete this zone, taking parallel sections cutting through your comb or between your fingers with low or no elevation. When cutting a line. It'S important your eye is level with your cutting line when cutting any round shape. Our body position moves around the head, shape, standing in front of each cutting section. We now repeat the same process on the opposite side. Here are some tips to consider when cutting any line haircut, we need to maintain even hair distribution directing the hair into natural fall. We need to maintain even elevation, follow our guide and be in a position to see our guide, maintaining appropriate body position, our body position and our client's body position has massive influence over our end result. We have now completed the front and side zones. We now move to the back zone to complete the first stage of this haircut. I am sectioning the crown zone up out of the way splitting the nape into two, whilst leaving guides out from both side sections. We now cut a flat horizontal line that mirrors our sectioning using the guide from the side zones, as our guides directing your clients head position down will help to cut your precision line in the back nape zone. If you would like to see more tutorials dedicated to cutting a one-length line, check out my playlist above dedicated to all three line, haircuts round square and triangular link is above and also in the description below once we complete the nape zone. We continue the same process in the crown zone, maintaining even hair hydration tension, elevation and hair distribution continue to direct your client's head, the opposite direction to where you're cutting this will help you to have complete control over your cutting line. You will notice how i am using my scissors to direct the hair into position, lowering the elevation and also controlling the distribution. We have now completed the back zone. We now flat wrap blow dry, the hair into natural fall, preparing the haircut for the refining and personalizing process to refine the line, i'm using two different techniques club cutting to remove larger amounts of unwanted hair, and i am using point cutting to soften and collapse. The line point cutting is an amazing tool that will help in creating a really clean precision line collapsing. The line by chipping away at any unwanted graduation will help the line to sit flat on the skin, helping to club cut the line with precision. As i said in the intro, this haircut may not be something you cut on the salon floor. However, there are so many techniques in this shape that will definitely help you to gain better knowledge and skills that will help you to advance your cutting skills and knowledge. Thank you so much for making it to the end of my tutorial. If you learned something new or if you value my work, please hit the like and subscribe icons, and let me know if you learned something new in the comments below this. Is my one length round line haircut, make sure you hit the subscribe and bell icons. If you don't want to miss any future free hair cutting tutorials


Comments
T Lannan: Amazing line haircut. This tutorial really helps to simplify every step. Thank you
Cea: My mum sometimes cut my hair like this until I was 10 in 80s and 90s. It was her favorite cut to do on me lol I thought it suit me as a kid. I think she mentioned it was a Vidal Sassoon cut?
INDIRA Chettri: Wonderful sir nice hair cut