360 Lace Front Wig Install (2018 Newest Hair Style) Ft Beautyhairwigs Black Friday
- Posted on 12 November, 2018
- 360 Lace Wig
- By Anonymous
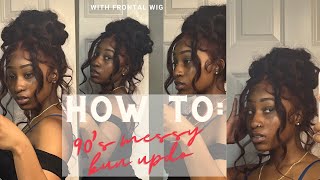
How to get 2018 NEWEST hair style from a natural wave 360 lace front wig, so gorgeous and easy!
Which look do you prefer,the original look or the new one,please leave your comments and don’t forget to subscribe,have a good day.
The wig in the video is from https://www.beautyhairwigs.com/
Beautyhairwigs is US trademark!
*****2018 Maximum Discount *****
$5 off over $99, coupon code: beautyhairwigs5
Everyone will get $20 discount with coupon code “beautysworld” if total amount is $189 or more.
It means if you order 20 inch 150% density wig in the following link, it's only $169!
Link to the wig:
https://www.beautyhairwigs.com/natural...
More 360 Lace Wigs:
https://www.beautyhairwigs.com/360-lac...
Product Title: Pre Plucked Natural Wave 360 Lace Frontal Wigs 180% Density Indian Remy Hair
4.5 Inches Lace in the Front for Deep Parting
1.75 Inches Lace in the Back for High Ponytail & Updos & Bun
Hair Color: Natural Color
Hair Length: 20 inch
Hair Type: Indian Remy Hair
Hair Style: Natural Wave
Hair Density: 180% Density on whole head,not only added extra hair on the weft.
Cap Construction: Adjustable Cap with Combs and Adjustable Straps
Hey everybody and welcome back to beauty's world. So today I'm gon na be showing you guys how to get the most out of your curly wig. This wig did come naturally curly and I did do a curling style to it to make it look more textured. So I can mimic more of an african-american type of texture or a mixed hair woman of color. Definitely so, if you want to see how I did this, please make sure you stay tuned, but before we get into it, make sure you click that thumbs up. Show you go, some love make sure you do subscribe to the channel click that bills and get notified whenever I upload a new video and let's go ahead and dive right in so today's hair is from beauty, hair, wigs and the packaging did come like this. It came with a wig cap inside here is how the wig is wrapped very nicely secured. It did send some clips and a comb inside also, so you do get these nice little accessories when you do order from them. Here is the wig. Here is more on the specs of the hair. The inside you have the combs, the drawstring, all the good stuff that you're supposed to have. It did come pre plucked, but of course I did go in and pluck some more and I bleach the knots here is what the hair looks like after I've done everything I was supposed to do to it. You see the curls. Do look a little bit worn out at the top, but I'm not too much concerned about that, because I'm gon na be curling this hair up with a curling iron and doing it this way, it's gon na give you a natural type of texture to the hair. If you do like to have, you know a natural texture other than a silky straight type of texture, so right now, I'm doing my part on my left side. Well, actually, my right side, I, like my part on my right and I'm just doing up the hairline. I'M using my hot comb and my got to be glue spray. To do my little. You know the front of my head. Like always, I'm gon na do more of a bang in the front, so I did leave that hair going towards my face a little bit more, just like that. So right now I'm gon na go ahead and add a few layers to the hair all around the head and I'm gon na just beat right through this all right, so I'm done doing all the layers. So this is what it should look like. You see the front is actually way shorter than the you know, the back and the sides, because I want my bangs be shorter, so that you can lay in a nice layer, type of style. So that's what we have here so now: I'm sectioning off the hair because I'm gon na go ahead and curl up the back of the head and now I'm using my hot curler here and then after I'm done, I'm gon na just you know, keep it in My hand, let it cool down a little bit and then release it, and I just left it in for a short amount of time. It sprayed something got to be glue spray on it and that curl came out so beautifully. I'M gon na just pin it up and let it cool down, as I do the rest of the head now. I love to do this method because, with curly hair, the curls are gon na stay like ten times longer than a straight hair, or even you know, a body wave texture, curly hair is gon na, make that curl last basically forever almost way longer than the average Type of hair, textures - okay, so I'm gon na just go ahead and curl that front part the same way that I did the rest of the hair pin it up. So you want this to sit for at least twenty to thirty minutes as long as you want. After that, actually, but at least twenty to thirty minutes so that the hair can cool down and actually hold the curl longer so right now I'm gon na go ahead and take everything down, because I did let it sit for a good twenty thirty minutes, and now I'M taking all the pins out, then we're gon na go ahead and mess around with the head. I'M gon na just you know comb it out with my fingers and then I'm gon na go back in with a little wig brush and I'm gon na brush through it. You guys just like that, and I love the way this looks. It looks so natural. The texture is so natural and beautiful. You don't have to get that Italian yaki every time to get this texture you guys. If you have curly hair at home, you can definitely mimic the Italian yaki type of texture. You see there all the little texture in the hair - oh I'm so in love with it. So yeah I'm gon na go ahead and apply this to my head. Using the got ta be glue spray yeah, just showing you guys how beautiful this hair looks. So she is on and I am definitely feeling her you guys. Lately I haven't been tinting my lace and you can kind of see that my lace has been light on my head recently. But I do six that by going in with my um concealer, not concealer, always second sealant, when it's contour shade my contour shade and I put that all over the lace, so that actually helps out a lot because sometimes I'm just too lazy to go and tint. My hair yeah, sometimes they'd, be like that, so I'm just playing around with the hair doing little things. I love the way that is dropping right now, but I thought I wanted to curl it up a little bit more, which was kind of a mistake on mine, because I really really love the way. It looks right now, but I'm going to show you guys how it looks if you go in and curl that bang part a little bit tighter with the curling iron. So here it is it's a beautiful nice little curl though, but like I said that made that crow way too tight from me. I like the way it was before I was trying my best to get it to fall really quickly, but it was just taking this good old time honey and I have that much time that night. So I was looking at it. That'S actually a cute little star right there, but I still wanted it to be a little bit looser. So I had to go back in with my curling iron and kind of you know stretch it out, and this is how I did it. I just you know, went on through it just like that one time one pass and yeah play it around with it, and now it looks just like before basically perfect to me. How do you guys like this? Would you try this with your curly hair? Alright, you guys let's go ahead and dive right into this later. Oh all, right! You guys you made it to the end, make sure you click that, like button, if you did enjoy the video, don't forget to subscribe to the channel click that bills and get notified. Whenever I upload a new video check out my latest videos here - and I will see you in my next one -


Comments
Beautyhairwigs: *****2018 Maximum Discount ***** $5 off over $99, coupon code: beautyhairwigs5 Everyone will get $20 discount with coupon code “beautysworld” if total amount is $189 or more. It means if you order 20 inch 150% density wig in the following link, it's only $169!