Tired Of Lace Ripples: Easy Fix! 3D Frontal Detailed Wig Install Without Glue
- Posted on 20 December, 2022
- 360 Lace Wig
- By Anonymous
In today's video, I share an easy method to fix lace ripples in frontal lace wigs when installing them. This new technique will help lay the lace on your wig flat without rippling.
WIG IN VIDEO: https://www.afsisterwig.com/products/1...
✨ DISCOUNT: MARIE
LENGTH: 18
DENSITY:150 (GO WITH A THICKER DENSITY IF YOU WANT FULLNESS)
DESCRIPTION: 13X6 3D FULL FRONTAL SKIN MELT LACE PRE-PLUCKED HUMAN HAIR LACE FRONT WIG | BROWN
♡ USED WIG SALE https://bit.ly/3CL2pbl
SHOP EVERY TOOL AND PRODUCT I USE: https://www.amazon.com/shop/msprecious...
Every product and tool I use will be in this link.
FYI VIDEOS:
HOW TO CUT EAR TAB ON WIGS https://bit.ly/3AkkyL1
HOW TO CUSTOMIZE A LACE WIG https://bit.ly/3QrGuKM
CUTTING EAR TAB AREA 360 LACE WIG https://bit.ly/3w8zYAp
HOW TO MEASURE WIG TO FIT HEAD https://bit.ly/3A41UXg
NO BABY HAIR BEGINNER WIG INSTALL https://bit.ly/3CdZLuX
TIPS FOR APPLYING WIG ON NATURAL HAIRLINE https://bit.ly/3CcyCZy
SECURE NO GLUE WIG INSTALL https://bit.ly/3c00y8e
8 TIPS TO MAKE YOUR WIG LOOK BETTER https://bit.ly/3w94quf
HOW TO BLEACH KNOTS ON A WIG https://bit.ly/3w7zASY
HOW TO REMOVE WIG & WASH PROPERLY https://bit.ly/3SWCLq8
HOW TO SEW FAKE SCALP MATERIAL https://bit.ly/3PP5MBH
___________________
Get the SCALP Material:
Fake Scalp Material https://bit.ly/3mp7qwU
___________________
FOLLOW ME ON MY OTHER SOCIAL SITES:
♡Instagram: https://www.instagram.com/mspreciousma...
♡My Website: https://mspreciousmarie.com/
♡ Tik Tok https://vm.tiktok.com/ZMRwbmjdu/
Business Collaborations Email: [email protected]
________________________
TIMESTAMPS:
00:00 INTRO
00:10 WIG INFORMATION
00:52 HAIRLINE PREP FOR WIG INSTALL
1:38 PRODUCT FOR FAKE SCALP
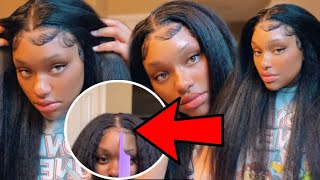
1:53 WHY LACE RIPPLES ON FRONTAL
2:24 CUT EAR TAB AREA ON WIG
2:48 LACE REMOVAL
3:09 PREVENT LACE FROM RIPPLING METHOD + WIG INSTALL
4:44 RESULTS & CREATING EDGES ON WIG
6:18 FINAL THOUGHTS
*Hair or products shared are my OWN personal and honest experience. This video may contain sponsored content and affiliate links which I get a small percentage that helps invest back in my channel to continue to bring great content! Thank you for your support!*
If I remember sharing with you guys the other 3D cap a couple weeks ago - and I told you I would come back and show you all um if I found any ways or techniques to apply it, because the cap is a bit different from the 13x6. So this is a 3D lace cap, meaning that you get more parting space on the sides, which is also great. So this whole front area is more like a frontal and not like a wig cap. If that makes sense, 13 by 6, you get less parting on the size, but with the 3D cap, of course, you get more parting as we go through. The install I'll show you techniques and ways to blend the lace, but we're going to focus mostly on how to apply this 3D cap without you know any ripples on the lace. So of course, as always, I'm going to start by pushing that hairline back now. If you are new here be sure to click that subscribe button, sure you turn on that Bell, so that you can get notifications for when I upload, I don't have a set schedule anymore, but I do try to upload at least three times a week. So make sure to turn on that Bell so that you can get a notification once I upload and you won't miss any of my videos now with this wig. This is a straight style, the ease of not having to do so much with the hair. You can wear it straight. It has a great density. So if you wanted this to be your everyday wig, you can, if I have mine in the color brown, but you can get it in the natural color if you prefer it. So I'm just going to push this hairline back and, as you guys can see it comes with a beautiful hairline. I didn't bleach the knots but I did use. I use this lace, not concealer in the inside of the cap, so I will have this Linked In My Amazon storefront every product that I use will be linked in that Amazon storefront, so that you all can easily find everything that I like to use. Last time. My issue with applying the 3D cap was trying to get the lace to lay flat, because this is more like a frontal, because the cap is made differently when you adjust those straps in the back you're going to find that - and this may depends on hair size. Also a lot of times I find that with this cap it ripples when I go to apply, because there is so much space on the side. So the first thing I'm going to do, of course, is to measure from ear to ear and cut away what I don't need, laces even on both sides. I'M just going to cut away any extra cap, and I may go into the hair with this. If you need to that's the best way, to get it to fit properly and cut straight around the ear about that, much fall perfectly right over the ear. I'M going to position the hairline where I want it to be I'll, make sure my wig cap is not showing through go ahead and just cut off this extra lace. First, let's do that, let's cut off the extra lace. I think I left the lace on last time. I did this, so this is what the hairline looked like and, like I said I didn't bleach the knot, so I'm gon na fix all of this as we go. So if you have not already go ahead and thumbs up the video leave me a comment, and let me know what you think about the 3D caps: do you like them better than the 13x6 lace Cap all right, so this may sound a bit weird. I think it'll really help with preventing ripples around the lace. The most annoying thing is to have your wig application set in place, and then you get ripples in the lace and then you can't go back and fix it, because it's already glued down - and you know that taking up your lace can cause residue. It can cause. You know just a mess that you don't want to deal with, what I'm going to do, and this is different for me too. I'Ve never done this um and this may work for other wigs as far as full lace, wigs it may work for the 13x6 cap. I'M not sure, but I'm doing it today, on the 3D lace, take my scissors now, I'm going to just put a SM just the tiniest slit here and just one on this side here: small, because it goes into that hairline a bit trust the process. Okay, trust. The process, it's focused back spray, this section first and, as you can see, you can see like the slits. There do the same thing with this area. Now, if you want more tips on how to use the wig adhesive sprays without white residue or without it, turning you know into a mess check out yesterday's video click, the comb and press that lace down and because I'm working Section by section there should be absolutely No ripples in the center part just press that down like so my Edge band and tie this down instantly just to lay everything flat and let it sit and I'll be back. Okay, so, as you can see, there's no ripples so that tip definitely works. Get this hairline together because it's a mess right now, foreign! Thank you. So I did go back and add some curls just to give it a bit more volume. I actually like this style, curl, so much better um. As you can see, the lace looks really good. So far, so I think that technique definitely worked, give it a try, come back and let me know if it works out for you um and let me know what you do to apply your 3D lace. I absolutely love this style again. This wig will be linked Below in the description box. For you all. If you want it, the link will be below also I'm having to use wig cell, so I will be adding you know a lot of wigs that I have that, I'm not wearing anymore. To that wig cell, the link will also be down there and every product that I used in today's video will also be in that description box so be sure to check below um but yeah. Let me know what you all think about today's style and I will see you back in my next video Happy Holidays.


Comments
verrell hanley-moncree: Turned out beautiful and so natural looking!
Beauty by Jay Morris: Great tip Marie, can’t wait to try it, thank you
Holla At The KI D: I love the 3d cap and 13x6 and 13x7 too. 5x5 are bomb too. Those are all faves.
Vivian Gines Tanner: I think because of my chemo/radiation hair loss, the 3D would be more natural look for me. Thank you for sharing.
Lusher Manuel: I definitely love that idea!!!
Zariyah Nicole: Yes, I’m loving the 3D!
Crystal Amos: THIS TEA IS HOT MAMA THE HAIR LOOKS BEAUTIFUL, LOVE THIS COLOR ON YOU.
kelly mcleod: Yes! I learned this about a year ago, it absolutely works! Great install!
Mammie Summers: So beautiful! That hair line is so natural looking. Thanks for the tip!
Andy Edwards: Amazing video like always. I love the tips. You make your videos easy to follow and understand. Thank you for sharing .
Respect My Opinion: I love 13x6. A 13x4 could neva lol
Monebyrd: Beautiful
Deborah McElroy: Gorgeous! I couldn't find the link for the wig sale.