Amazon Healthair 360 Lace Front Wig Install
- Posted on 24 October, 2022
- 360 Lace Wig
- By Anonymous
Hey guys!!!!! I hope you enjoyed this video on how to secure
your 360 lace wigs. This was my first time and def will not be
my last. Give me a LIKE if you enjoyed this video and make
sure to SUBSCRIBE and COMMENT down below!!!!
Whether you're looking for exotic, classic, or playful hairstyles,
360 lace wigs are a great way to show your best looks.
Wig in the video: https://www.amazon.com/Healthair-Front...
Hair length: 32"
Hair density: 150%
Cap construction: 360 lace front
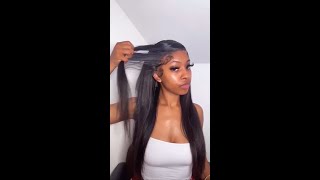
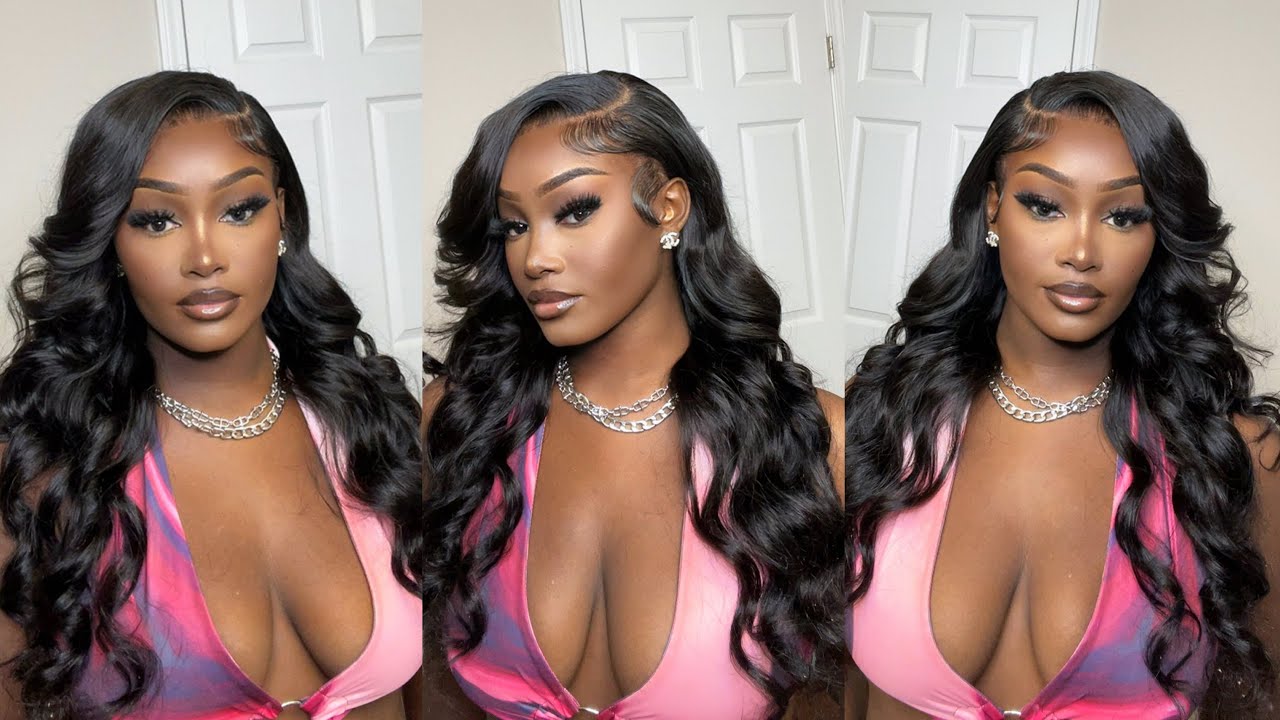
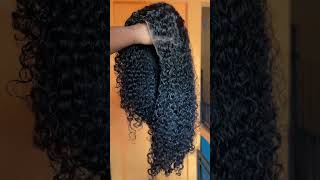
Hey guys welcome back to my Channel today, we'll be doing a 360 wig install. I believe this was a 32 inch wig um, I forgot the name of the company, but y'all will see it. It'S coming up, um, so yeah we're just gon na hop into it. This is the wig that I am doing today, as you can see a 360 lace um. I showed you guys the inside because it has that band and that band is what we're going to be cutting out. It'S my first time ever doing this. So if I didn't do it right, it worked good enough for me because the wig lasted, and it was perfect so right here, as you can see, I'm showing you guys just around the whole wig. Now I I've cut off the band already and let's get straight into it, you know: okay, we mixing. We mixing um guys. This video was supposed to be posted months ago, months, months and months ago. I'M just getting to it. So excuse it for being late and I'm also doing a voice over because I was around my son at the time I was doing it and it was just too much noise in the background, but yeah. So, as you can see, I am bleaching all the knots that I can bleach and I put my wig inside out because I intended to go around completely now. You guys see how I have my least. The lace is bent backwards on my hair, so for that exact reason I did not press too hard. I am literally laying that bleach on, like a butter y'all, it's just gliding across just so beautifully um as y'all, can see, I'm not putting any bleach at the bottom of the lace, because that is obviously the lace part that you cut off around your head, and I showed you guys the top on the floor, because you will probably see bleach falling. That'S what it is um. I saw a few pieces tumble as I recorded the video. So if I saw I'm just like you, guys might see it, but here we are just still. I think I'm gon na fast forward some of this and um to get past, but right now we just bleaching the knots. Thank you, okay, you guys so now here we are at the sink just wrenching off all of this bleach. I think I let it sit for about 15 to 20 minutes, and then I proceeded to rinse off the bleach now y'all. I was really disappointed right here because I'm trying to show y'all how that part looks a little good bleached, but then certain areas were not bleached enough. So what I did was um. I went over and I re-bleached it and I let it sit a little longer, but I actually did not record that part because I just felt like that was going to be too much longer until this video of the same thing. I just showed you guys, but now what you're saying is me putting on mousse and curling products. I let that air dry no blow dryer, and then I was showing you guys how much better the knots and stuff came out after I bleached it. For the second time now here I am wetting. The frontal part like right, the front Lace where my edges, baby hairs will be, and I will start plucking that area and that's all I'm about to be doing - is sectioning off plucking to create that perfect baby hair. Look and I feel like I got it as close - really really good. Actually, that's a lot of hair, but it's really really good to my um, my hairline, and this is the bottom you guys this is the back, which should be even thinner, and that is the back when I finish which looks great to me so after I finish Those that's when I started applying my wig cap now you guys there is a mirror in front of me and there is a mirror in back of me and you guys will see that pretty soon I um brings out my hair the best. I could because you guys know what the 360 lace you have to put that hair glue at the back of your head and I absolutely hate when my hair sticks down below that wig cap or when the you know the that ghost Bond getting stuck to your Hair is no joke, you guys, so I was super careful about that. I'M slitting up my little face mask so like I'm about to go, rob somebody. So I got my eyes my mouth and my ears are next and I'm just gon na. Do this cut all my hoes lay down this ball cap with some ghost bond cover it probably with some dotsity. Even though ghost bond is enough and yeah, it was coming out really good foreign guys. So now what you're seeing is me putting my lace tints on my lace, so it is close to my skin color as I can get um. As you guys can see. There are a few holes from me taking out that band, but when I tell y'all I had no problems with them. Hoes like, like, I said this. Video is months old and I still wear this wig. I had no problems with that place. At all I mean none now, I'm spraying the back in the front of the wig cap, where the lace will be the most so, as you guys can see, I'm spraying around the edges not too much really not at all in the middle. It'S really only happening around the edges, where the lace will be okay, you guys here we are cutting this ball cap or this wig cap, whatever you call it or cutting off all the excess cap, and you know just making sure that this thing is laid as Late as it can lay okay y'all so now I am just making sure everything fits right. Everything looks right that the edges of this lace are plucked enough, and here we go to The Cutting. So I am cutting around the ear tabs right now, um, just making sure that they're comfortable behind my ear and that it looks right when I decide to pull it up as far as sideburns and everything else and making sure that it actually really comfortably fits and That it's not just just there by my ears feeling like it's cutting the back of my ear because I hate when that happens. So take your time. Um make sure you cut make sure you do everything you need to do and make sure it is comfortable. Do not do anything you do not feel comfortable doing and, if need be, watch a few YouTube videos or you know whatever. You need to watch before, actually attempting to cut any of the leaves, especially when there's hair coming off with it. Just because you want to make sure that you get this right, you do not want to take off too much. You will ruin everything by taking off too much leaves. So, as you can see, I am now dabbing down my ghost spawn. I have slipped my frontal into different sections to place it down. One part at a time, I'm not really good with 360s, and this is the best way for me. It'S dry and I will be pressing down. I have to check just to make sure how clear it is, and you guys just look at that pre-melt now I never seen nobody use a brush like this, but if you know what you don't, you know what you're doing um. It'S definitely just beautiful. Looking to me, I'm constantly checking for where I put it at when I say it's I mean my glue and then I am brushing the hair down now y'all. That kind of, like a bald spot to me, but y'all, will see the Finesse you guys will see the Finesse. I am doing it the right way now and I'm taking a small tooth comb and I am getting in to the lace making sure I'm pressing it into my glue, really good, just making sure it's holding for now, at least because we still have to lay down Those two corners as you can see, but I'm just making sure I didn't waste my time laying down the top that no oil got into it and that it is still sticky as can be. I am I'm plucking that front a little more because, like I said y'all, I wanted it to look as close to my hairline as possible, and I think I did a pretty good job achieving the look of naturalism all right, you guys. So what I did was. I put a little extra on the corners simply because those right there just be the first part to come up, and I added it more so on my ball. Cap too, instead of just around the edge just to give the um the corner more of a hold. Just so I feel like it wouldn't come up and I waited for that to dry before I laid it down, and I did the same thing to both sides: foreign foreign, guys, I'm officially done with the boho process. Now all I'm going to do is slip on my um, my band or my. I don't even know what they call it, but the band that you put on your lace to make sure it holds extra tight. You want to slip that around my head and I'm going to put it on the top, but before I do that, I'm going to spray it with some got to be around the edge of the lace just to get that liquid hold and I'm going to put It all around the front Lace and then I'm going to place on my band to make sure that it's holding it tighter than our mother holding her newborn baby in a hospital, and you want to do this for at least 10 minutes for a good hold. Now here we are: I've laid my on my lace for 10 minutes in the front, as you can see, that melts is just gorgeous like you guys what lace like I have to have the lace attached to the corner of my face and for a second, you Can'T even tell it was there, that is how good that bold hold and that got to be together will hold down your lace. So now I am um putting the glue on the back, and I am also cutting the lace in the front. You know in front of my ear just to make sure it's as comfortable as can be, and that's how I applied it around the back. The whole perimeter of the back, because I did not want to put the bottle to my head and put it in the wrong place and have glue in places where it didn't need to be, especially on my natural hair. You do not want this glue to get on your hair, so just be very careful when you're putting it around the back now. I also did the back section by section so that that band was just holding down the last part that you saw me glue down in the back. I still have to do the middle and the side when I do the back, I start side to side, and then I do the middle so that way it's being held right, but all I'm doing right now is now putting the glue y'all see that little wig Cap is messed up, but I'm trying to make sure it fits comfortably and it's not just scratching behind my ear and if it was just you can see, I cut it a little but um yes. Now all I'm doing is cutting that excess lace that I felt like was in the way, and I am now adding the ghost bond to the tip of that lace. As close as I can to make sure that when I lay the back of my 360, it looks as natural as possible, I'm now starting to cut off the lace in the front um. I don't know about you guys and your frontals, but that looks pretty natural to me. I love the look, and, oh, my goodness, it's just so beautiful. I it's making me want another one of those things right now, but yes, as you can see, I'm cutting the um the front Lace. It has a little bit of that Ash. Look but y'all already know I'm going to get rid of that. Like just look. Look at the look at how it is laying into my skin you guys it is just beautiful. I have my band on because, while I'm cutting the front, I am making sure there we go, I'm making sure the back is being held down bright and I'm doing everything I need to do still cutting off excess lace in the back making sure it fits comfortable. Don'T be afraid to do this be afraid to do this. If you don't know what you're doing that is it, you do not want to mess that up, but just take a sneak peek at the back of this corner pause now, y'all don't be discouraged. If this happens, if it dries and it dries up white as y'all can see, that side came out perfectly fine, it's good um. Now I am getting to the back like I said I do this part last and, as you can see, it's still digging on my hair a little bit and I hate that. But now I'm doing the back part where it will lay down now, when you're doing this, you wonder how I'm doing you want to hold your head down just so when you hold your head down, it's comfortable, you don't want to do it with your hands sitting Up and then you go to hold your head down and then your wigs start sliding, because it's not used to that tension yet so, when applying the wig and the glue make sure you're holding your head down already, like I said you guys, I have a mirror In front of me, but I'm not just placing this on, there's also a mirror behind me that I'm looking straight through to to make sure that it is. You know angled correctly, okay, so now that we have the back in the front put on properly, I just go over my hair again with the mousse, brushing it through making sure that every part of this hair is getting some type of mousse and some type of Moisturizer just to make sure it's curly, as can be in let this air dry guys let the air dry happen. That'S that's key that is so key to a good lace to a good hairstyle everything but yeah. So, as you can see, I'm now parting out my edges, sideburns, whatever you want to call them. That was the first part I took out was my little sideburns um Lord Jesus, trying to make that precise as I can get them. I guess, and I still see little people but hey this is me, I'm going to be tweaking it, so I cannot tweak it no more. I like to get it to its closest perfect as possible and that's dinner impossible. So do like I said, do not be discouraged if it does not come out like this. It'S perfectly fine. You don't know how many times I had to go through this to get my hair right, but um. So now what I'm doing is laying that part down. I don't think I cut those um sideburns just yet, but I did move them out of the way, and this is one of my favorite parts of this. I used a little bit of mousse and I think I went over it with a little bit of um. Got to be now, I take the mousse down just so I can curl that up, I put it in place and I had to use the got to be and I go over it just so it can hold it and yeah. This is me just doing my front right now: foreign natural looking hairline that bald spot is not getting bald spot to me. It'S just giving beautiful. Now, if you look at the back look at that, you guys I did cut the back some to try to give it its own little um baby hairs, look, and I would fix that too. But just look at this: you guys it's giving scalp all the way around that white tint is gone, just use some alcohol and scrub it a little bit not too much a little bit that white tint is gone. Just look all around how it's it looks like it's got. It looks like yeah. This is the finished product you guys it is giving very natural very much so I went to a hair stylist and I did this right at home. Here'S some pictures. This is the Finish. Look. I hope you guys enjoyed this video stay tuned for more videos coming soon. Thank you guys again.
Comments
Jaime Gill: ρ尺oΜᔕᗰ ☺️