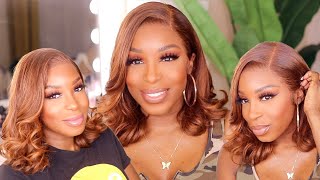
Detailed: Plucking And Styling How To Feat Quinlux Hair (Amazon)
- Posted on 21 August, 2020
- 360 Lace Wig
- By Anonymous
Hi loves today I’m back again to show you how I pluck and style my wigs! The products I used are from L’Oréal (the mousse and hairspray) I also used a bit of style edge factor on the edges! Xoxo!
Keep up with me!
Instagram:@brittanychwhe
Cashapp: $brittanychwhe
SNAPCHAT: brittanychwhe
Business inquires? Email [email protected]
I'M praying for patience but got ta, be patient. I'M building my chances. You guys welcome back to my channel, so today i'm going to be showing you about how i pluck my units and style them for my wig heads and stuff to show them off so starting off with water, and you want to go ahead and part. First thing: parting away: the part that's already been plucked, it's gon na be really really detailed. I didn't speed up anything for this video, i'm just showing you so i used some tweezerman tweezers and i just go ahead and thin out that first part of the hairline, so this part that we parted will technically be your baby, hair and now we're just going In we're thinning out the perimeter of the hairline also, so you just want to keep doing that and then go through that first row. So this is the first row and we're just going to keep on plucking this whole time. Plucking is definitely a time consuming process. You have to not be in a rush because you will make holes in the legs if you do just that so right now, i'm just going straight across that first row and i'm just plucking anyway. So then you want to also comb it periodically. So you can see exactly how much hair you're taking out and what it looks like. So now, i'm parting out the second row again and once you do that you do the same thing. I i go about down once and then come right back up again and then normally it's about ready for me to change to the next row or just be done plucking. So with that being said, you just want to keep doing it. So i'm plugging out this third row now i stop about just as soon as i feel like i'm comfortable with how it's gon na look on me. As far as my hairline for more natural hair lines, it's way more plucking like extremely natural, but this unit kind of came pre-plucked. So with that being said, i didn't really have to pluck a lot and you can see it looks like i'm plucking a whole lot, but since this unit was pre-plugged, i barely had to really pluck a lot at all. Normally this process process would take me a lot longer, so i'm just plugging along and doing this repeating that same step of parting out a row and doing it so now. This is when things get different. This is when you want to part off on the side, and you pluck away so if you can see what i'm doing in this i'm trying to like pluck away from the hairline and in the beginning i start off. I don't pluck the very first row yet i do that and i wait till i'm done so i can see 100 how it's going to look not too bald and not too spacey. You want it to look natural like a hairline, but not there's no holes in the hairline. So then you just want to go ahead. Part see what you look see, what it looks like and then keep going from there. So i'm just parting it sideways now and i'm plucking away. This just creates that more, not precise. Look. It just makes it look more. Like a hairline, i mean literally, this is the basis plucking you can do more. You can do less honestly um when i first got this wig. It was almost ready to be worn. This is a quinlux, 360 wig and their wigs are pretty nice. They always come pretty decently, plucked that red wig i had on is also from them, so definitely check them out on instagram and not instagram, but amazon i'll put everything below for them. Also so now i'm just showing you exactly what it looks like as far as how much food plugs and i'm going and i'm plucking that very first layer that i was talking about that i normally leave alone, but now i can see it better. So i'm going to go ahead and pluck that out and thin it out and get it ready to be slayed y'all. So this is the before this is that hasn't been touched at all no plucking, and this is the parts that have been collected a little bit. So you can see it's definitely different. Now i'm going to go ahead and show you guys the complete way, i style and get ready for my pictures on top of my wig units. You know when i sell them and stuff, and also this is what i do before i apply to myself now what i will say one of the key things you will need if you wear wigs or frontals you're, going to need a hot phone period because, as You can see right now. This is all the plugging we've done. It doesn't look like we've really plugged much at all, because we haven't yet even put the hot comb on there. Yet. So i'm just parting out my edges about what i want it to look like how much i want for baby hair and just getting it completely ready for styling. So now i took some that was some revlon uh heat hairspray and i'm just going in and i'm pushing back that hairline with my hot comb, so we're like laying it down, so you can really see something. This is what it looks like after you do. All of that which you can see is way more natural. You can see all that you've plucked and it looks good so now, i'm just defining that part and parting it out and then taking my hot comb again and i'm going to do the size of the part and then the top of the part. Also. So we can get that to lay a little bit more flatter. Now i'm cutting my baby hair and i'm just going to go ahead and show you guys how i style them. First, i put on some revlon. I believe this is revlon some mousse and i'm going again and just kind of you know doing my baby hair. I would if i was wearing the wig on my head just doing little swoops. Yes, girl is getting them edges together, okay and then i'm going with my uh popcorn and pressing them down. So this is just basically getting ready for pictures and images, and then this is your final product. When you're done thanks for watching guys love you bye,


Comments
XoxoChaquala: You always slaying
Seara. S: Where can I find this ?