Another Wig Transformation
- Posted on 12 July, 2020
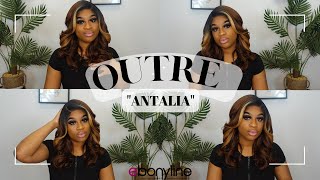
- 360 Lace Wig
- By Anonymous
Follow Me
∙∙Instagram: @hairkilla_dre
∙∙SnapChat: @hairkilla_dre
∙∙Facebook: Hair Killa Dre
Music By
::::::::::::::::::::
Music: Fun - Vibe Tracks
Support by RFM - NCM: https://bit.ly/2xGHypM
::::::::::::::::::::
Hey guys welcome back it's dry, I do want to go ahead and thank you so much for tuning in to another video, if you're new, make sure that you go ahead and like comment and subscribe and sort of the notification bill so that you won't miss out On any of the videos here on this channel and welcome to the family, so today we're gon na go ahead and customize a full lace wig for one of my clients, I'm just showing you here how the full lace wigs front hairline will be when you do Order from the hair killer collection - I don't forget, the website is still being customized and it will be published. So thank you so much for bearing with me, but you can always hit me up with my social media platforms, especially on instagram at hair killer underscore dre. So place an order with me directly or you can email me. The email is also in my Instagram bio. So I just wanted to show you exactly how the hairline is in the front, extremely extremely natural I've been working with my vendor very closely to get a free, plus hairline, and I cannot be more pleased. I have not plucked anything. I know it may be hard to believe, but this is exactly how the front hairline will be and you can customize the back hairline if necessary, and next I'm gon na go ahead and show you the inside of the wig and which has three combs by one On each side left and right, and one in the middle and an adjustable band in the back with the hooks to go ahead and latch that it's a place in there, I'm sorry is a fourth comb in the nape as well. The combs in the strap can be removed. You just go ahead and have to request that from me directly and you can see, the knots are not bleached either, but we can go ahead and do that as well. If you request it, so let's go ahead and get into this video so per my clients, request she's, actually getting an installed by another stylist, but she wanted me to go ahead and remove four combs and the band in the back because she wanted a 360 install. Not a 360 frontal, but a 360 install meaning she wants the entire width glued down all around so you're gon na either. Take you a razor comb, as I did show you or you can take a straight razor if you're gon na be using a straight razor. Please be extremely careful. I'M gon na go ahead. I think I used both but either way you want to be extremely careful. You just pull the comb and then you'll snag the string and they just pop right off when it comes to that strap in the back. He wants to be extremely extremely careful. Take your time all right. So when it comes to the fact you're gon na struggle, just a little bit is what its gon na want to fight. I'M against you, because there's an actual elastic band in there. What the hooks on there, but if you work with it, it'll work with you, I'm I think I may have a nick the lace in the back, like a very like maybe a centimeter size, a hole, but it won't make a difference once they go in and Install the week, would you want it very much take your time because you can lose a finger, honey and ain't. Nobody got time for that. So the next thing I'm gon na be doing here is police chief in knives. I'M gon na bleach the knots in the I think I started in the back. You'Re gon na want to bleach the knocks in the back first, because those hairs are more dense, meaning they were ventilated with more hairs into each hole which is speaking reference to ventilate ventilating in a moment. But you want to go ahead and make sure that your bleach consistency is like a paste me personally. I found that smoothing the bleach on with a plastic spoon and starting our plastic spoon as plastic knife is a lot easier. I mean to each their own. You can spread it with a brush, a spoon for it, whatever you've got but don't be afraid. I just go ahead and make sure you've got the wig in good hands and keep a steady hand, because you don't want to press too heavily into the lace. You want to go ahead and make sure that the bleach is covering the knot. That'S the entire purpose of this is to make the knots lighter so that they look more of a flesh tone once the climb is parting through their hair. There'S plenty of videos on how to bleach the knots of a lace, wig or lace, front, o or even a closure. If you want me to make a specific video on bleaching, the knife comment down below and if I get enough requests now, I'm going to make a video all right. So now that you went ahead and bleach the knots on the back of the week, you're gon na go ahead and proceed to do the same to the front of the wig. You want to lay that on some aluminum foil, because the foil is going to go ahead and help conduct that bleach and make everything process just how we need it to be alright, once you've went ahead and it rinse the bleach off the wig and use your Neutralizing shampoo to stop the bleaching process. This is what you should be left with. I don't go in heavily and bleach the knives, because the most girls do not even part all over the wig with their full lace. Wigs. They usually just do maybe half up half down part down the middle. You know left right little part, something like that. So I don't bleach heavily thoroughly through you know my night, but you want to make sure that you focus on the main parts that they do as well as the hairline, and I promise you look at that. Look at that and I have a not plucked anything but look how immaculate this hair hair line is and how natural that is. So you, ladies, will be definitely pleased so now what we're gon na go ahead and do is call the front pair. My clients request we're gon na go ahead and split the wig into four main quadrants, and then we are going to go ahead and dye the front part the front two quadrants we're going to do sort of a nothing really what's the word. Nothing dramatic, basically just like a cool brown. We'Re gon na use, H wine, which is coolest Brown by laurio high color, highlights for dark, color, hair, and it is it offers multi lift you know, so we can go in with a nice 30 volume developing cream. I'M unique I'm gon na use blonde meat, of course, and that's just what I had on hand. You can use any Development cream that you have and we're gon na go ahead and apply that in a poly Oz format and you'll see but yeah go ahead and you know enjoy the video the next nominee I did go in, as you saw in a middle Part format - and this is the de variation of the natural black versus the hair - that we colored so nothing dramatic, but just a pop of color in the front for her request. She wanted a deep side part, and this is what the hair looks like after its you know, been freshly washed and conditioned, and you know air dried of course, and then I'm gon na go ahead and press the hair out with a pressing comb and flat iron And she'll be all done. Nothing too dramatic, like I said, just very simple: sleek beat side part style, and here comes these final results, thanks again guys for watching the video. Don'T forget to go ahead and like comment and subscribe share this video with everybody, you know so that we can go ahead and hit a thousand subscribers so that I can give away a wig gosh come on. You guys share this video. Thank you. So much for tuning in and don't talk about her eyelash she's been through some fangs.


Comments
Jasmine: Hey dre