*Extremely Detailed* Bleaching, Plucking, Install, & Styling Water Wave Highlight Wig Ft Sunber Hair
- Posted on 10 March, 2023
- 360 Lace Wig
- By Anonymous
Hello my beautiful subscribers (and non subs) ☺️
Wig sales page - @CAwigss
Personal instagram- @holaa_caro
EMAIL- [email protected]
Using My Special Code to get EXTRA 18% OFF: YTB18
●▬▬▬▬▬♛ #SUNBERHAIR ♛ ▬▬▬▬▬●
♛All Wigs can be paid in 4 installments interest-free, buy now, pay later!
Direct link: ➤ https://st.sunberhair.com/fpipq
Hair info: 150% density 24in
Color: Piano brown Highlight
Texture: Big Curly
Skin Melted Well Kinky Curly Wig with 4C Edges ➤ https://st.sunberhair.com/fpiqa
Soft & Easy Applied Kinky Straight Wig with 4C Edges ➤ https://st.sunberhair.com/fpiqb
Pre-cut Lace & Wear and Go Reddish Brown Jerry Curly Wig➤ https://st.sunberhair.com/fpiqd
Top Selling In Sunber Hair➤ https://st.sunberhair.com/fpiqe
Pre-cut Lace Wigs Down to $99 ➤ https://st.sunberhair.com/fpiqf
Super Flash Sale Only Today➤ https://st.sunberhair.com/fpiqh
Best selling on Aliexpress store➤https://st.sunberhair.com/fjr45
Amazon Sunber Hair➤ https://amzn.to/3nG61TE
Social Media:
SunberHair YouTube Channel: http://bit.ly/3cB8r0d
SunberHair Instagram: @sunberhair: http://bit.ly/30lZfp8
#sunberhair#lacefront#kinkystraight
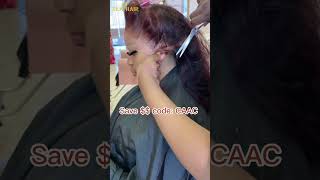
You'Re, 22. 00. Hello, everyone what's good with poppy and sugar. I can't like this me and welcome to another hair and style. I don't know I'm just so excited to be back during my start to finish: hair installs, because not a lot of y'all. I have been my wigs, maybe to y'all they feel like they've been hitting. But to me I don't know this is having it's like. I'Ve lost touch with the technique, because it's all about the technique technique. I know what does it mean about me? This is a SpongeBob thing, but yes, as I'm teaching y'all stuff, I'm also learning things we're learning together, anyways. How are you guys doing today, it's currently Friday for me that I'm filming this and I wonder what day it is regardless what day it is. How are you doing, I hope, you're doing well me. I'M trying to do well just broke my finger, but it's okay, because nothing makes me feel like a brand new girl than a brand new wig. You know, okay, let's get into today's install. So today I've been working with this wig from somber hair company. Is it the hair? I love her hair. It comes in these little satin bags, perfect for storing your hair long term. I hate the boxes. They'Re bulky cut the cardboard brace okay, so I don't be noticing that your girl I've been doing a lot of color. I feel like color, I used to be a jet black or just black girl, but color. I'M telling you colored. Wigs are my favorite thing, especially pre-colored. I don't know how to color hair, so I love pre-colored wigs, it's something new, okay. I also think it's gon na be blonde. I'M kind of surprised by this color, it's kind of like a like a number four yeah. I feel like a number four with some ginger when I say ginger light brown y'all. I'Ve said every color under this side, but y'all see the color whatever what color would y'all call this I'll look in the description, but it's like a not blonde but like a dirty blonde girl. I don't know it's cute. It'S cute! That'S what I meant. I do know this is a water wave texture, so this is something new for me. I remember back in like old school Hair reviews when you like smell they'll, be like how'd, the hair smell, it doesn't smell fishy. You just smell a little weird, though just saying just saying this is a 13 by four frontal and it has nice deep spacing in the middle. I feel like companies have stopped doing this. It'S 2022. give me my full parting space, like all that middle parting space should go all around, but whatever, let's run down the customization checklist. If you're new to this are you in here? Don'T worry, I'm here, for you babes, I'm going to walk you through the process of customizing this wig, since this wig is more of like a brown and not fully blonde. I feel comfortable going ahead and bleaching the knots if your wig is blonde, do not bleach those knots. The whole point of bleaching. Your knots on your wig is to turn them blonde. If your wig, it's already blonde and you bleach them, you're gon na damage the heck out of those knots so yeah, but since this hair is still in the brown stage, if it was more a little, it was like a little knots were a little bit lighter. I would leave them alone, but they are kind of brown. Honestly, I'm going to say do I have to believe she's nuts - hmm since they're, not that dark. I feel like if you're a beginner and you get this wig. You can go ahead and probably skip this. If you're not trying to like, if you're scared for bleaching, you can just use concealer and skip this and you're wondering what the heck, what is she talking about? What or not you still look like black things at the bottom of the lace like at the base of the lace? Those little like dots, you see, those are little not literal knots that are tied into the lace, because this part each strand is hand tied into the lace to give it that, like hairline effect, so those knots that are tied. Sometimes it can be a little bit visible and like get a very like Wiggy grid. Look to your install, so we like to so. We want to bleach them turn them blonde, so they don't they're not as noticeable um. So that is why we like to bleach or not, but these knots are not like super dark because they have like a dark colored, wig they're more noticeable, and your knots are really big like they did like they did like really big fat thick knots, they're more Noticeable - these not just small enough for us to not have to bleach it, but you know I like to strive for Perfection. I always like to get a scalpy on it as possible, so I'm gon na go ahead and bleach it and plus just for like teaching purposes and for me I remember, I said I'm trying to get into the technique. So, first and first, let's bleach our knots, I'm just gon na make it look more like it's coming out of our scalp. You know it's gon na make it look more realistic. Okay, let's get into the bleaching. Those are bleaching supplies. I really like using this powder for bleaching my knots. You can use any powder. I used to use the regular, regular BW powder, I'm sure, if you've been doing wigs, you've probably seen them before, but I like this one, a lot better, because the formula is just easier to work with it's more mess free, I can make less mistakes with it Mix in the bleach, I'm using a 20 volume developer, I'm using a 20 volume developer, mainly because of the brand that I'm using requires nothing over 25 volume if you're using something like the BW bleaching powder or just the standard bleaching powder, nothing special, I would say, Use something around 30 volumes. The thing with bleaching is you want to get the right consistency when you're pouring your developer, pour it in in small batches like I pour a little bit mix pour a little bit mix because you don't want it to get runny because it can get runny way Faster than you think so just take your time because you want to get the right consistency uh. I thought I just put way too much, but that's something I like about this. For me, this brand of bleaching powder, like it doesn't get runny easily, like I thought just over spilled that the developer is gon na become so watery, but, like it's still pretty like nice and thick like I don't know, this formula is just like really good. That'S like I want it a little bit. Runny I've been learning, sometimes the more comfortable you get with bleaching your knots, it's okay, to make it just a little bit runnier because letting it be a little bit runny little we'll. Let it hit the knots a bit better because sometimes if it's too thick, it won't even like get onto the top of the knots where you can actually see it, and then that kind of like defeats the whole purpose. But then, if you make it too runny it's going to start like bleeding into the hairline. So it's a it's a little sensitive dance and balance of finding the good consistency between not too thick, not too runny, where it's going to ruin the frontal. But at the same time, not too thick where it doesn't even like hit the knots and it doesn't make a difference, you know, so it's a delicate dance. Like trust me, if you be bleaching your knots and you feel, like you, don't see a difference or your knots are not bleaching. It'S not you babes, it's a really difficult technique to get down like me. I'Ve been doing it for a minute and I'm still trying to find a good sweet spot. You know what I always be on the safe side, so um, it's like that before I make it to runny. This is creamy enough, like it's nice and soft and smooth, but at the same time it's not thick and chalky, but it's not runny real, quick spray. The hairline back with some hairspray this is just to help push all that hair back. You don't want the hair like to be falling in front of the lace, like this be sure to bleach the knots, because you'll definitely get the bleach all over it. And then now you have bleach on this and that's gon na just ruin your whole day, because it'd be ruining my day. Trust me! No, the hairline is nice and pushed back just you know giving us less mistakes. For me, when it comes to getting a good bleaching position, because getting your wig in a good position where, like the hair is not touching, the bleach is really important too. I like to just flip it like this delicately, though, and make sure I'm being aware of where the hair underneath the wig is is at all times. I don't mistakenly like bleach and, like you know, get this hair touching. The lace got ta be mindful of what you're doing this is my knots actually like apply the bleach I like using a wooden popsicle stick versus this actual brush. I used to mix it. I feel like I have more like control of how much pressure I'm applying because, like I said it's about finding a good balance between getting the bleach to touch the knots when I say touch the knots y'all I'm talking about, because you can see the knots from The top you need to be able to push the bleach further enough for it to come up to the top up here, for it to look like you're bleaching, something but the same time. You don't want it to start coming. The bleach itself, like you, know, come all the way out here. It'S really a delicate dance, so how much pressure you're applying to is important, and I like to use this Popsicle stick, because I can actually like control the amount of pressure. It'S like the thing of it, like I'm buttering, my toast, you know like I'm trying to get the butter on there, but I'm not trying to drench it with butter. That'S how I try to think about it and I go light-handed at first and just you know, apply the bleaching. I can start from the back and the reason why I like starting from the back is because um just like when you're doing like a relaxer. If you used to relax your hair, remember back, then the back is usually takes like a longer time to process and typically in wigs, because the back, you don't see it that much. The knots are bigger or tied bigger in the back, so they take a longer time to process. So I just same same concept. The back does take a longer time. Let'S take a moment to pause. Like I said, spatial awareness, it's gon na, stop you from making a mistake to pause, flip your wig inside out back to the front and just check to make sure you haven't like pushed the bleach too far, you see what I'm saying like you want the lace Like right now, I don't know if that's gon na show the camera, but you see how you can still see those dots poking through at the bottom. That'S not what I want. I want the bleach to push through enough where you don't see those knots because we're trying to bleach them, they should be covered up. That'S the whole point, but you also don't want the bleach to start like coming up into the hair itself. So I know now. I should apply a little bit more pressure just a little bit. It'S a very dangerous dance. Don'T be too scared of over bleaching. Your knots, it's okay, sometimes over bleaching. The knots actually low-key is a look. Oh, I know see what I mean got some of the hairs in the front, but yeah now I've applied a lot more pressure. You see now you can hardly see those dots because I really went back into push that bleach like it's like. Really. The lace is saturated. All I see is just bleach, you know, and that is what we want, but I'm telling you getting. This far is a little bit scary. That'S why I really like this this brand, because it doesn't like get runny easily this. This thing that came with the wig packaging - I just like to fold it yeah like this. That way, it's like the exact shape of the frontal honestly I'm going to take this elastic band off because I just want it to lay. I don't want to like start to drip, and I take this with the toilet paper. The foil paper, just kind of helps it like add heat to the chemical reaction we got going on, so everything kind of was like processed evenly and a little bit faster. Okay, I just put that in there nice and then I let it like I like to let it sit upwards like this. So that way, you know gravity does this thing and the bleach is dripping downwards, not having it laying the other way and then it's dripping into the hairline, because we don't want that and as far as processing time, like I always say, processing time really varies on A lot of factors one what type of bleach you're using what developer you're using what type of hair it is. But for my conditions for me, whenever I use this one in particular because in instructions it says, give it about 30 to 15 minutes 30 to 50 minutes. Depending on what developer you use and developers do also vary, but I always say, as a beginner just set yourself a good 10 minute Interval Timer like just come back every 10 minutes and keep an eye on it. So I usually just be like Alexa. Send me a 10 minute timer here we are 30 minutes into the bleaching process, and usually I wait minimum for this bleach brand exactly 30 minutes. Sometimes I can have it on for an hour like I said it varies on a lot of things, but now that I see the knots have turned to a more lighter blonde shade. That is a good indication for me to know that it's ready to be washed out once you see those knots go to like a yellow, orangey, copper, Shade. That'S how you know you have bleached a knot. Another good indication of you, bleaching, your knots properly is that under the wig like right here, you will see that all the knots have turned orange like if you turn your wig upside down and you wash off those bleach and you don't see any like oranginess yellowness Under the cap and probably didn't bleach, the knots properly or something else is going on. Sometimes some hair itself is just really stubborn and cannot be bleached, or it's like a synthetic blend of hair and can't even be bleached in the first place and has something to do with you with that said now, I'm just going in and trying to properly just Scrub off all that bleach to just stop the reaction, and whenever you wash off the bleach at first, you might notice that the scalp portion or the knots I use bleach, has like more like an orange yellow undertone. In this case, it was very more orange than yellow, so I like to use a blue and purple pigmented shampoo. This is going to really help correct. The yellow, slash orange tones, blue and purple are great for canceling out those undertones. Sometimes you might have yellow you. Might have purple sometimes I don't know what undertone I'm looking at. So that's why I just I learned that mixing these two colors together will help cancel out both of the possible undertones, so I'll just go ahead and squeeze them a little like try to do like an equal parts amount of each and squeeze it into my mixing Bowl and I use my little spatula same mixing brush to just Wix it all up to get one congruent, Blended, color, and then I just paint that on like I would the bleach or any hair dye onto the underside of the wig and make sure I'm pushing It and I like using my brush instead of just doing it the old way where you just like, put the shampoo onto the lace brushing it on. I feel like it's really helping me, make sure I'm getting the color onto those knots. This whole little process, something I just started doing. It has made a difference in my whole bleaching knots and like changing the under color process. I just let this sit for another 10 ish minutes and let it sit I don't like letting it sit for too long. I notice it does sometimes can like tint the lace a little bit so 10 minutes is my Max and I'm going to come back and wash it fully out. I also do take this time to go ahead and wash the hair itself and shampoo through it, because one the bleach is probably still like sitting around in the hair. I don't want the hair to start shedding because of reminiscent of the bleach and two. It'S always good to just wash your hair, it's coming from all across the world and, lastly, you can always tell the true condition of your hair by washing it. Sometimes the hair comes fully processed and packaged cute and pretty for you, but for you to really tell how great the quality is, how thick it is. All that washing it giving it a good deep condition as well is how you can get the best quality out of your hair, okay, hello, my dudes and dudettes. Now that we've bleached our hair, it's time to pluck the hairline to give us that coming out of our hairline effect, you're, probably wondering Caroline. Why are we looking at you from this angle like what's going on here, yeah y'all um, my wig head recently just broke. Not recently not my wig head, my wig stand just broke actually because bad things happen for a good reason. Okay, I was putting on a different wig head. I already threw it away, but a different wig head. I was putting it onto my wig stand and I put it on there and then the wig stand itself just like broke like I was so irritated and then tell me why I picked up my wig, my my canvas head, not this one but the one. I was using in particular, I picked it up, I'm over here like looking at it, I'm like something smells funny and I smelled it and bruh. I realized this. Wig, head is moldy, you know it's like a cork head and my wigs usually they're like stopping dripping wet, and you know wetness, humidity, moisture and I've had them for like probably two years I was so disgusted. I was like ew. I'Ve been plucking on a moldy wig head, but in case you ain't, no change out your canvas heads, especially if you like, do wet hairstyles on them or maybe make sure you dry, your canvas heads out or your wig head. So you don't get mold because that's disgusting. I realize this whole time so yeah God told me it was time to change it out. That'S why I had to stand, had a break because there had never broke. I would never have taken a closer look at my wig to realize is that molded anyways with that said? No wig stand no wig headstand, no problem we're gon na do it old school weight is how I used to pluck back when I was in college and like I couldn't afford to get myself fancy a wig stand. I just would pluck with the wig on my lap her hair, like you know, as you would braid somebody's hair. So the first thing, I'm gon na do this little tissue paper, the little tissue paper that comes with your wig head, that comes with your wig, make sure you keep that because it can be helpful. I like to put that over my wig, I like to put this over my wig head, so I have something white to pluck over which just makes the knots a lot more visible than this, like neutral beige color. So, let's see I'm just trying to find the middle on top. I forgot there's an elastic band. Oh my God. It'S already hard enough with the lid stand. So now it's just harder without it anyways. Okay, cool now she's on there, I'm gon na use some t-pins to just pin everything in place and I get my teeth pins. I just buy me a big bulk on Amazon. Now, I'm just going in with the t-pins and just making sure I'm going to lace. Nice and pulled and taut you want to have your lace laying as flat as possible, like it shouldn't, be bunched up on the mannequin head for the having some like tension with the legs being pulled out. Nice and taunt like this is gon na help. The knots pull out kind of like when you need like some when you're waxing you ever waxed yourself until you like, apply tension like pull the skin before you wax, because the hair comes out easier kind of the same thing kinda. I personally don't like plucking. My wigs soaking wet I like to pluck them kind of in this, like it's like a good like I'll, say it. I would call this it's like 70 dry, but the roots are definitely not soaking wet. I do like to pluck it a little bit more drier than this there's advantages of plucking, your wigs wet versus dry. If you pluck your wig, when it's dry, you get to see the since, like the hairline is dry, you can see the full density because sometimes when you plug wet it looks like it's thinned out, because you know it's wet, but once it dries out, you realize I didn't even pluck anything and I got ta do more plucking or on the flip side. Sometimes when you pluck when it's wet the hairline. The good thing about plucking wet is that the hair will come out a lot easier because, like I guess it just has more slip to it when it's wet, but at the same time, if you're a beginner, you can definitely overplug like try. One time I was plucking this one wig when I first started doing hair - and I was like: oh yes, I'm eating it up not to realize I literally plucked a fat bald spot like not like a low boss like it was a Bolding patch. I even realized how bad it was so the hair dried so so to each his own. Try both some people are comfortable with plucking When you sweat, plucking is dry, I'm okay with both. I just prefer plucking when it's dry, because that way I can tell exactly how thick the hairline is. What I just did, I just went ahead and one I parted my hair down in the middle reason. Why I like parting, my wigs down in the middle, I feel like the only part that gets affected by over plucking is the middle part really like once you start like mistakenly plucking in the middle, the middle part is gon na look so janky and wonky, like I only pluck the middle part intentionally when I'm trying to like widen out the part like every other part like a side part. Whatever part, I feel you can you're more likely to get away with plucking over plucking on, doesn't really show you can finesse it, but the middle part once you do it, it's really hard for you to fix yourself and then the next thing I just did was. I went ahead and I pulled out the front hairline of hair. This wig does come a little slightly pre-plucked, even if my waist don't come pre-plucked I always like to make. I always say I never start plucking right directly up here in the front of the hairline. I realize for me if I start plucking up here: first, I'm more likely to create bald spots into whenever I want to like install my baby, hairs and stuff. It'S just like. I realize I plug too much in the front and I barely have any baby hair. So whenever I pluck, I always like to just go in and pull out the front hairline. If the wig is a little pre-plugged like this, I will pull out the hairline starting from when it starts to get the thickest. If your wig is soaking wet. I suggest using mousse for this stuff. What I'm doing right now is I'm just going in and I'm pressing back the hairline like when I say press I mean like pressing it taking my time real nice and slow using this back part of the hot comb. To really flatten down the knots, this step is really crucial. You can use a hot comb if you're poking your wig wet, you can use mousse. You just want something to help. You push back all the hairs standing up straight, so you can see exactly what you are plucking and to pluck I'm using my Revlon Diamond Revlon Diamond Series, slab tip tweezer. You can use any tweezer. You want whatever you're comfortable with I've played around with lots of tweezers, but this one is one that I feel like works best for me. One. It lasts as long. It'S 12, it's a very expensive tweezer. Sometimes it's 20 inflation. It'S a very expensive tweezer, but this one lasts me long. It doesn't dull because your tweezers can dull out by the way, if your cheeses aren't working that well, they're, probably just old, you need new ones and these work. They have enough for me that I have enough grip to pull the hair out without plucking a hole, because some tweezers can be a little bit too much grip and you end up pulling the hole out. Some are too dull and doesn't even be effective to pull out the hair. You want something that's going to be strong enough to pull the hair out from the Roots, but also not too strong, where it's going to pluck a hole in it. But the same time, if you are getting holes when you're plucking, probably not a bigger tweezer or you than not to probably just too big and tied in too strongly, when that happens, you notice, you're, plucking holes and you've tried everything stop wire head before you rip The wig just do some finessing and install the weight without plucking, without ripping your lace in half, because trust me, I have ripped wigs in half like literally yeah, because I was I I was being stubborn and wanting to go for the most plugged hairline. Now, let's get into the actual plucking, if you're thinking - oh my God, this video she's talking way too much. That'S the point, my guy, you clicked on the very extremely detailed video. This is the details. Y'All need to know, shoot anyways. So I like to get my hand and get a good grip. You know so, whatever you can, I like to use my hand to just get a nice tight grip on the hair on both ways. Like I said, adding tension is going to make those knots pull out a lot better skipping. This front place right here. Tweezer pointy part facing the front, and I just go in a back tracking motion skipping the middle right. So there's the middle skip and then I just pull in a back dragging motion, so I plugged here skipped that place. I plugged right here skip that place, skip the middle pluck skip, pluck skip plug skip going down. I want to get my talking points out now. So I can just let y'all watch so I'm gon na just listen to me real quick when I'm plucking I like to make make sure I'm pulling trying my best to pull those knots out from the root like I'm trying to pull that actual little dot out. That we're bleaching earlier I'm trying to pull that dot. It'S not really like. Yes, it's the hair because, like the hair is attached to them not, but it's the knots that you want to make sure you're pulling that's how you get a clean plug like if you notice, you're plucking in it and like there's like little like fuzzy stuff or The the lace looks kind of funny or doesn't look like you even plucked you're, probably not actually removing those knots from The Roots. Removing the knot from the root is how you know you have properly it's how you know you've plucked the hair, the right way. You should see a little little knot make sure you're pulling his hair from the roots. Second note I like to do a back dragging motion, so I'm not plucking up like I'm plucking a chin here, you know, like you plug downwards, like you're pulling I'm doing back drags like I'm like grabbing the hair and dragging back grab, drag back, grab drag drag Back uh some questions, I guess sometime is like how much hair am I pulling out when I'm plucking um? It'S really like. I can't tell you how much hair is like five three strands. I just try to do like keep this the gapage between each Place, very. Like hairline and thin, because you don't want it to be creating too many fat ass fat gaps now that I've plucked down here in the front on this area, let me just put the hair back, so I can see none of plucked down like up here. I'M gon na go back, but this time I'm taking my tweezer higher because I'm trying to thin out the hairline more in the back some wigs depending on how thick they are, you might have to go like really deep into the back of the hairline. Okay. Now that I've plucked it through push all the hair back to the front and depending on how plucked pre-plucked your hairline is in the front, sometimes I won't even pluck at all in the front if it's super pre-pucked and it's looking thin already. When I push everything back, but I can do a little bit of plucking up here like it's, not that pretty plugged and now for the front, I'm gon na go in lightly and just pluck these hairs in the front just create a little bit of gappage. But very so lightly because, like I said, I don't like messing with the front too much unless there's like a post-production plug so literally just trying to see little places that look really dense and I'm just creating little gaps in that area. Okay, now I'm gon na go ahead and pluck this side of camera and come back to you guys, hello, hi, now recap. Finally, the wig is ready to be installed just a little recap in case you missed it. We bleached our knots. We went ahead and bleached our knots, so whenever we part the hair, it can look like a scalp and we also went ahead and pulled our hairline, so our wig is ready to be installed. Jk. Actually, last preparation step, I'm going to do I'm going to go ahead and tint the lace, meaning I'm going to use Foundation a liquid foundation. Specifically, you can use something thicker you can use concealer, but anything that is your exact shade match. I like to use is Maybelline Fit Me like this brand in general because they have like a very they're, very affordable and they have a large range of colors. So it's easier to find your own match with this, and my color is 356.. I never do this on camera by the way I like to make sure my Foundation matches my skin the way I want it. I just like tapped on my forehead, because it's really my forehead that has to match the best and and whatever thing that blends the most into my forehead. That is what I use like this literally disappears into my forehead. So, like I feel like it's, my perfect shade match, no matter what kind of lace I got going on, HD transparent, I always tip my lace. I will say now: if you're dealing with a lace, that's darker than you it's better to use a shade a little bit lighter because you know Color Math, if you're using since the lace is darker, something a little lighter, can help lighten it up. My main focus is getting that tint to the front of the lace, because it's the front of the lace that has to blend in with you know the front of your hairline, since this has like a built-in elastic band, I'm not going to use these elastic straps! You feel like your wigs, don't fit. You sometimes sometimes just like skip this part and just install you a standard elastic band like this on the sides that can probably help it fit better or you just need to get a different wig cap or you have a little hairline, there's a lot of reasons. Why your wig cannot fit if you want a video on that and why your wig isn't fitting comment down below at least it's nice and tinted, so it's definitely going to blend in see that versus The Edge where it's not tinted versus here it is so I'm Just going to adjust these straps and elastic band better, so here's what we're working with very old my cornrows are always old. You will hardly ever catch the fresh like you, don't have to have cornrows, but you just got ta have something that's like semi-flat like don't have a hump going on like a big old. You know you know I'm talking about this, make sure it's flat enough, since I plan on doing a glueless install I'm not going to be wearing a wig cap, I feel like wig. Caps are mainly for, if you're trying to use actual hair glue like the whole ball cap method and wig caps. I feel like especially bald cap method. I feel like it's unnecessary unless you're doing like a glued install like actual, like lace glue like old hold ghost Bond like glue glue where, like the wig, is supposed to be stuck for a minute. I can see the purpose because it protects your edges from the glue, but for like regular installs like I'm doing, I honestly prefer just I really don't be wearing wig caps. Sometimes I wear it just to protect my braids from getting caught in the clips, but um to wig cap or not to wig cap that is up to you got ta, make sure it's like it's even on my head as possible. It'S okay! If your lace like goes over your ears like this, because we're gon na definitely be cutting that, but just try to get it as evenly and well fitted, don't forget to secure all the clips and make sure the wig is like sitting fully on your head. Now, to cut the lace around my ear, I just like to take my comb and I just literally just try to like trace the shape. Usually it's a good end kind of shape just around my ear, because you just want that lace to fit nice and snug around your ears. Sometimes I won't have lace that's sitting over my ear, but most of the times I usually always cut off the lace. It just kind of depends on how little wig manufactures it. So sometimes you know you will have to cut some hair off, don't be alarmed it's normal. This one is just lace, isn't actually any hair over it's just now. We are in business like you're, able to see your ears over your wig. Lay my legs down. I'M going to be using my standard. Evan Wonder, lay spray. This is my glueless spray. It'S literally just like a hairspray. Just like a hairspray, it's safe on your edges. They have different types, they have a sensitive one whole line. I like using this, I'm good, so first, I'm gon na do is cut. My sections, like I said, sections, just make everything so much easier to work with. When I first started with doing my wigs, I would like cut like even smaller sections, because the smallest sections, the more able you are to pay attention to each piece of the lace. That'S the thing about frontals frontals are just so much lace to focus on that. It can get a bit overwhelming so cut your lacing sections and working sections. Once I have cut my section, I like to go in with a face razor to cut off my lace, and I like using face razors to cut my lace versus like actual Scissors, because something about the razor helps it just like give you like a more Jagged Raw Edge to the lace - and that's just going to lay a lot better than having a straight cut line across your head. There won't be a line of demarcation from the lace and it was you know skin. So I just try to cut, follow the natural shape of the hairline and just let my and release, and for me I don't. I could cut off as much slices as possible. I don't like leaving too much extra lace out, but I will leave just like the tiniest bit like literally so little. I don't want to cut the lace right for this section I go in with the spring and I like to spray it under like. So let me get them out and I use my fingers to just spread it out if you're gon na make sure for your sides you're pushing the spray to the back too, because delay. There is lace all the way back here and my synthesize can be a little bit funny, a little tough to get. I like to pull down the side tabs with the side baby hairs, and I have to pull those out during this step and that just kind of helps me have something to like yank and hold on to the really get those sides to come down. And now to just lock everything in I'm going in with my blow dryer on a it's still a warm setting, but it's low power. So I got the highest more like a like a lower power, and I just use that plus this rat tail comb and just push everything in nice and flat until it feels stuck. So it didn't stick so now I'm gon na go in and sometimes for the sides I have to spray Under and Over. So I'm just gon na go ahead and spray on top again slightly use my fingers to spread that product out and make sure I'm gon na spray right here in the corner of my ear, where you listen the most tap that out and then again now. For the top part, I can't spray under because you know I can't pull it up. That'S fine! I just go ahead, see and just spray on top, I'm really trying my best to make sure I'm spring mainly on the lace and not really on the hair. Just to help prevent it from the hair itself getting crunchy and hard, it does get crunchy and hard, but I'll show you how to fix that later, once I've sprayed and tapped everywhere same thing and before I turn the blow dryer on when I'm using this little Comb right here, I'm literally staring in my mirror that I have down here and trying to like press down every little line like I'm trying to like seal the edges. Now that our lace is nice and has been sprayed down all around to make sure it's like really stuck and I'm gon na get lifting I like to take my elastic band and just put that over the lace, so yeah, I'm just gon na. Let this sit for like 10 minutes, just to really give it a moment to sit before I start doing my baby hair swooping, because cooking the baby hairs does cause a lifting, and while I was spraying this, I realize it says Let It allow it to sit For 10 to 15 minutes, which makes sense so I'm gon na, let it sit for 10 to 15 minutes before I have super baby ears. Okay, it's been 10 minutes. Even this. Take this part off gently. I'Ve like taken it off too aggressively. Oh there's some residue uh if you do end up getting some like white residue on your head from the oven spray. What I like to do this part very carefully: I'd get some water on napkin and I say carefully because, like I said you know it does come off with water, so you want to be really careful with this and I just try to like you know: gently Scrape off that white stuff and like if the lace itself is white, it's probably just like I'll go ahead and spray. It like gently. Try to like wipe it off with this too, and check pull back to see if it's lifting and most of the time it probably is Lifting and I'll just use my finger and spray some ebbing back and just repeat the process. Okay, now, let's get into this baby here and for baby hairs, I'm just gon na let voiceover Caroline take that part, because that's one thing baby hairs can be a hit or miss. For me like, like these days, I even love doing no baby hair installs, not for the fact I mean no baby installs do eat, but they're so convenient like the stress of getting baby hairs unless you're good at them is too much for me. Like I'm glad, we are now normalizing, no baby hair wigging stalls, but but at the same time, whenever the baby hairs do hit, I love how they look, especially with curly hair, if, like curly hair, just needs a good little baby hair, but I've been eating. But I need all my focus, so I'm gon na let voiceover camera explain what's going on, while I play some music to calm my nerves. While I focus because this needs Focus when it comes to doing my baby hairs, I like to have them a little bit. Dramatic but still simple, so they'll be bigger than some people might like, but I do a few amounts of them. That'S my little medium happy right there. So I'm just going ahead and sectioning out the baby, the hairs I want to use for my baby hairs, and it just saw me I like to spray that ebb and spray in between where I just parted. This kind of just helps keep the baby hairs flat on my head, because the flattered is easier to swoop some people use their hot comb and just press them down. Not me. I will burn my whole head trying to do that. I already burned my head. My hot comb on a regular basis, so the ebb and spray is a good alternative to keep them flat. Only thing is sometimes your hair might get a little bit crunchy from the spray, as you see right here, but I'm just using that same little edge. Control. Comb to just brush through the hair, to kind of help soften them back up or you can add a little bit of water, but be careful with that water, because it can cause the lace to lift to help me curl my baby hairs, I'm using this mini Flat iron, I got from Amazon curling your baby hair, something I just started doing. Curling them before you actually lay them down, really helps them just swoop easier and gives a more natural effect to it. You don't have to do this. You don't have a mini flat iron, but if you can get your hands on one, it is gon na just make the process a little bit more easier and then, lastly, to actually lay the baby hairs down. I am using Eco Styler gel. I like using Eco Styler, because it's a light holding gel it's not going to be too hard and too crunchy you can use mousse. Some people use hairspray use whatever works best for you, hairspray and mousse will give you more of a lighter hold. If you're going for a very fluffy light natural Airy, baby, hair, look then hairspray and boost is the way to go. I like to use the ego Styler to just help me lay them down, so I can get control of everything set it down and then, once I swoop the baby hairs where I like it, I will use my elastic band to lay them down. Let them set, and once the hair is set after, like styling everything. If I want a fluffy non-laid down, look I'll just brush out those baby hairs to give it that fluffy. Look so yeah, I'm just going to go ahead and finish the other side off camera and come back to you guys for the actual styling portion. My camera died in the midst of the baby hairs but yeah all I did. I went ahead and finished baby hairs and I just put my elastic band back on elastic van is cheap for melted. Now, let's get into styling, I'm just gon na go to standard and middle part, keep it easy breezy and go with a stamped in the middle, and I'm just gon na try my best to get as straight as possible, the middle parts and never that straight. But it's cool and now we're gon na go ahead and press it out so for styling and I'm just going to define the curls. I'M gon na go with the spray bottle of just water and just drench the hair. When I say drench I mean trench like don't be shy now: okay, that's how we're gon na get these cute little waves to pop, so we're just water, the spray bottle, and then I'm gon na go through with this little white tooth comb just to detangle everything. First and then we're gon na go through and brush through. It keep brushing until we see little ringlets form on the ends and when I brush, I make sure I'm like scooping it up with my brush like that. To make it like really curl the ends, and then I'm gon na just scrunch it all up like this French scrunch and Lily. Leave it just like this to air dry. Don'T like bring your fingers through it, leave it just like this and that's how you get it to look very defined, so I'm gon na do the other side I like to make sure for it, because it's a certain way, like my middle part, hair to fall On my face, so I like the hot comb, this part up right like upwards to the back, and this part upwards too. So that way, it like all kind of Falls down this way. It'S like the hair falls down this way to the side versus like to the front, and that makes sense cool and we repeat: Okay, so not the hair. I can't see it. I'M gon na come back once it's fully air dry, so y'all can see the final look. It took the hair about two hours to fully air dry. I went ahead and started getting dressed guys. I was going out earlier I'm just going in with my hot comb. Now to just press down the top, because I don't want it to be bumpy, but like a really nice flat top, even if it is Curly or wavy hair and the key for a really flat middle part. I like to get that hot comb that thick back place and just place it right there right in the middle, that's kind of really plus press that part nice and flat. If you don't have a hot comb, but you have like a curling wand, use that curling wand to press down in the middle of the part to get the hair nice and voluminous, like I said, remember, don't separate the hair when it was wet. Now the hair is dry, you can go ahead and separate it. So I just like to run my fingers through the hair gently and to separate those curls to create some volume and last finishing touches, I'm going in with a very light shade: mascara, not mascara concealer, and I'm just popping that in the middle of the part, especially Since I didn't pluck the part wide this time, I kept, the part kind of thinner out of this concealer is going to really help it. One look more wider than it is, and just kind of give it a more natural, not natural, but just kind of gives. Like a seamless look to everything but yeah, that is it for the look here we are at the final result. When I did my makeup, oh she's, giving I love the way the color looks like it's like. It complements my skin tone so nicely. I have a soft spot for like wavy hair with colored highlights it's just something about highlights, and wavy hair just always eats and the baby hairs see dramatic, but still not doing too much. That'S what I like to go for, but that is all I have for you guys. I hope you enjoyed this video. I hope you learned something because I sure just enjoyed filming and making this for you guys. Like always, I hope you comment like And subscribe and I hope to see you in another one: peace out, Girl Scouts, goodbye, okay,


Comments
Xiomara Jeffreys: I know we should be focused on the wig but girllll your skin looks so good!!!! So pretty
Sapphy R: I love this! Color everything. Your skin always looks so healthy
Jackie Davis: I LOVE THAT COLOR!!! Goes really well with your skin tone ❤
Dee Marie: Thank you for this video! Going on vacation in a few days and your videos have helped me over the past few months in having better installs. You’re truly the best!
Whitney R.: I love a good detailed tutorial very beautiful outcome I really like the color
Tashanda Myers: YOU DID THAT ONCE AGAIN as ALWAYS
Main Social: This was so helpful!
Luashern: Girl I missed you lol. I pray for you because I feel like you’re my cyber friend. ❤ you always slay per usual!
mercythedoll: It's giving real life Malibu Barbie and I'm living for it!! x
Deeva Ellis: Love it ❤
Nina Negedu: Caroline came to slayyyy purr
renaeè: Omg we have almost the exact same nail set ♥️
Naomi Landombo: Hey Caroline I hope you're doing well. Did you also wash the hair with the blue and purple shampoo?
sothatschy: Can you do a video on the best wig companies you recommend we order from?
Meka: Carolineeeee slay everytimeeee
Stephanie:
OhhThatsJay: I love the fact that I’m early
Brittany Pernell: @caroline when you pluck do you part out any other rows or do you just keep going backwards
Raven Smith-Parris:
Tori time: Early
Tori time: Hey Bae
Ronika Carter: Is there a wig company you prefer? I’m so over unice hair