How To Turn A 14" Full Lace Wig To 24" High Ponytail & How To Install Front And Back Lace
- Posted on 14 November, 2018
- 360 Lace Wig
- By Anonymous
Hey babe!
** INFO, LINKS & FAQs BELOW *
Hair Appointments Booking
https://shopfreelocs.com/pages/dallas-...
Full Lace Curly Wig
https://www.wynnejean.com/collections/...
----MUSIC
----FAQ:
Ethnicity: African American
Height: 5'7
Age: 23
Measurements: Bust 36'' Waist 26'' Hip 38''
Shoe Size: 8
----CONNECT WITH ME
Instagram @WynneJean
https://www.instagram.com/wynnejean/
Facebook @WynneJean
https://m.facebook.com/WynneJean/?ref=...
Twitter @WynneJeann
https://twitter.com/WynneJeann?s=09
For business inquiries [email protected]
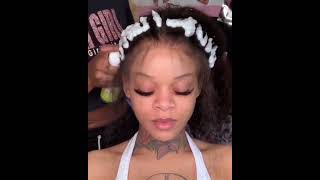
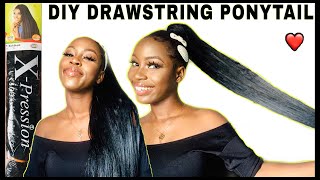
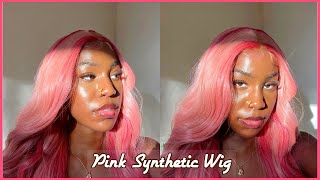
Hey babes, so today, I'm gon na show you how I got this super cute long ponytail on a short full lace week. If you want to see how I got the look, then keep watching so I'm starting off by pressing the edges all the way around on this full lace, wig that can be found on my website. The details are down below the reason why I'm pressing out the edges is that it makes it lay a bit flatter and it just looks very natural, especially for the sleek ponytail look pressing it out a bit just kind of helps. Lay it with the gel and stuff later now, I'm separating away where I want the baby hairs to be also my little sideburn pieces just so when I slicked everything back. This hair will already be separated out and I'm just pressing through the hair, to make it a bit more sleek at the root so that I can slick it into a nice ponytail and start to really get it like together. I'M also section about the baby hair is in the back, and this is gon na make it to where we don't have to be so precise, with our install now using some edge wax. I'M gon na put this around the hairline of the hair and then I'm gon na press it in and kind of melts it with my pressing comb, and this is gon na, make the ponytail super slick and lay like perfectly so now that it's all slicked out. I'M redoing the ponytail, and this time it should be perfect and I'm using a bristle brush and a paddle brush just to make sure it's not only detangle but super slick spraying it with a little bit of hairspray and then I'm gon na braid, the actual ponytail Into like a long braid and then double it, this wig is only twelve inches, but I wanted a really long ponytail and I'm gon na show you guys how to get a super long ponytail on a short wig. It'S like super easy and it's a lot cheaper than buying a super, long wig. So now I'm just using some wrap strips and making sure to cover up that braid. So we don't get any glue on our wig, because these are still expensive and I'm using some foam and lotion to make it stick and again, some hairspray just to make sure everything is going to stay in place. The last thing you want to do is all of this work and then have it be for nothing, so I'm taking down that braid for the baby hair and then I've just hit it with my razor comb so that the hairs were short but not too jagged And I'm using some foam and mousse to go ahead and lay those baby hairs down into the ponytail you and another rap strip, just to make sure you lay it down and let it cook now using a bit of glue and 2 bundles of 18-inch body wave Hair I'm going to glue the hair around this base, starting at the bottom and going all the way up, and I used about 1 and 3/4 of a bundle slip honestly, basically, two bundles for this ponytail. For me, it's easier to lay a bunch of glue down and then just wrap it around as opposed to adding glue onto the track, but you can do it. Whichever way is easiest for you doing it. This way only took me about 10 20 minutes and, as you can see, I'm starting my second bundle now and I'm starting to put it a little bit closer together and once you get to the top, you want to just trim it and then lay down your Last piece and make sure to brush through your ponytail so that none of the hair is trapped in the glue. So this is what we have so far and I want to start to style the front. So I'm going to take these braids down and I'm also gon na go through and add some curls to the ponytail in the back. I wanted to go for more of a fluffy big look, so I'm not doing too precise of curls but towards the top. I want to do small sections and then at the bottom I just kind of grabbed big chunks and curl the ends fluff it out of it and then I'm gon na go to the front. This is a curly wig, so just to get it a little bit more definition, I'm going to go through and wet it, and then I dry it a bit and grab a piece of the ponytail and wrap it around to create a base to cover the track. At the top of the ponytail we're just adding in all of the finishing touches, so we can start to apply the wig here, I'm pressing out the roots of those little sideburn pieces just so we can make sure they lay properly and now I've clipped everything back. So that I can trim the lace off of the wig and start to apply, I like to have mine style before I apply them. It just makes it a little bit easier, especially for a ponytail and I'm gluing mine down, but if you're not gluing, it down is way easier to do it off of your head. Okay, she's roughly on here and it's time to start figuring out where we want it to lay, and once you have that figured out, we can go ahead and start to lay down the glue by just sliding the wig back and I'm using some bold hole glue. I put a thin layer down and then spread it out with a little wooden spatula and wait for it to dry before you put on your next layer. That is the most important tip I can give you with this glue, starting in the middle and working my way to the sighs. I'M just gon na lay down the edges of the wig, and then we have this super. Pretty wavy ponytail look and it looks kind of messy and undone, even though we totally tried. I hope you guys really enjoyed this tutorial. Let me know if you have any suggestions and make sure to check out my booking links for Dallas, Los Angeles, London and Paris. I can't wait to meet you guys, see you tomorrow, bye
Comments
AmoreAmore: I wonder if this would work for synthetic hair too