How To Secure The Back Of A 360 Lace Front Wig | Step By Step Tutorial
- Posted on 07 December, 2018
- 360 Lace Wig
- By Anonymous
Watch this step by step tutorial to secure the back of 360 wig for the high ponytail!
Special thanks to our babe SIMONESHARICE making the great video, watch her video and subscribe her: https://www.youtube.com/watch?v=9RHSyr...
Wig info:
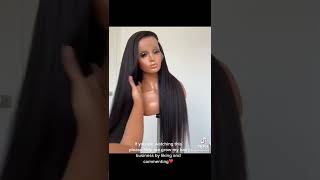
360 Frontal Wig Milan Curl 150% Density Virgin Brazilian Hair [TLW24]
Link to the wig: http://bit.ly/2lyW4tP
Hair Color: Natural black
Hair Length:20in
Wig Density: 150%
Cap size: Average (22in)
Hairline: Pre-plucked
Baby hair: Around
Cap Construction: 360 lace around, front 4in lace ,back 2 in lace & wefts at crown
Free Shipping World Wide over $89. WowAfrican Black Christmas sale Up to $60 OFF!
*** $60 OFF $379 orders, coupon C60 ***
*** $40 OFF $269 orders, coupon C40 ***
*** $20 OFF $159 orders, coupon C20 ***
12.6-12.25.
WowAfrican Popular Affordable 360 frontal wigs, pls check here:
http://www.wowafrican.com/360-frontal-...
More beautiful Lace Wigs pls check this page:
https://www.wowafrican.com/lace-wigs.h...
JOIN WowAfrican Social Channels:
Youtube: https://www.youtube.com/user/wowafrica...
Instagram:@wowafrican http://instagram.com/wowafrican
Facebook: https://www.facebook.com/wowafrican
What'S up guys, it's mone Charisse, it's been a minute, so let's go ahead and get straight into this video, I'm gon na be using a unit from Wow African. It is a 360 comes with all these amazing features combs in more so I wanted to start off by just simply placing the unit on the wig head and guys for the tools the wig canvas head and a tripod stand. I will have that all down below in the description box so to get started. I wanted to go ahead and customize the hair line. Customizing the hair line, makes your unit look so much more natural and more realistic. You want your ponytail to appear as if it's growing out of your scalp, so really focusing on getting your hair line to look like it's yours. It'S really really a really important. Next, I'm gon na use this toothbrush looking an edge control brush and I'm gon na use some mousse and kind of just set the front of the hair. My end result: I didn't really have much baby hairs, but for me to keep the hair just slick and back until we get to the back, I like to go ahead and use some mousse just to keep everything in place. So I'm gon na go ahead and pull the wig down a little bit more because we're gon na go ahead and start working on the back of the hairline make sure it is tightly placed down and tightly T pinned. So if at the back, lift it up a little bit, make it comfortable for you. That part is where your ears are gon na be, and this is the back of your hairline - it's just kind of mapped out for you already get some water and you're gon na spray. This because we want to kind of pluck it a little bit so that the line isn't as straight, and it's a little bit jagged like how the back of your hair really looks. Myelin about jolly back of my head look a little bit jagged, the only con that I came across when it came to trying to plug this is with this unit. The adjustable band that already is on the wig is kind of slightly lower, so I couldn't really go in on the pluck and I couldn't really make it look as realistic and kind of mimic my own as I wanted to, because I was kind of restricted. I would kind of restrict it with how far up I can go with the plugging just got a little bit of baby hairs because I just wanted to set the baby here is in the back. I didn't take out a lot. I took out a little bit and I did this for a more natural and realistic, look go ahead and cut them. You don't want these long baby hairs in the back, because you know it just won't. Look as realistic and they'll give you that Wiggy. Look that everyone kind of usually gravitates towards that. I don't like so now it's time to set my role here. I use some got to be glued and I use some holding spray to kind of just set. My hair, because you can see the braids in the front, are very fuzzy in the back, make sure you're combing up all the little naps and kinks in the back and make sure you're getting it to stick because we're going to be using glue. So after I revealed my braids, I went ahead and I use some alcohol. Do not put the alcohol on your actual hair line. Put it on your skin, that's where the glue will be going for the adjustable bands in the back make sure you tighten that when you're doing your hair, these dotted lines look out for these, because that's where your ears are gon na be, and you want to Cut around that so that it fits perfectly just like this. Now, I'm gon na be using a brown pencil just to kind of map out my hairline and I could have used white. But I didn't have white on hands and I'm just putting small dots, because I don't want my lip to pass those dots. When I put the glue down, I want to keep my forehead not really minimize it too much. I don't want my width to be centimeter away from my eyebrows. I want space in between. I went ahead and I use a ghost bond glue now. If you follow me on Instagram, you know I was very upset about this. I spent a lot of time on this video and the glue just decided to not stay so it throughout the video. You will see that the glue did stay in place, but but I recommend this glue for wigs as far as longevity and really keeping it on your head. I would not recommend it and I've used this cool in the past and it's worked for me, but lately I'm finding that whenever I use this ghost bond of glue, it is not sticking, it is not staying. So do I recommend this glue as far as holding down your wig in place, especially for a ponytail, especially if you're going on vacation. I do not recommend this glue for you, I'm just saying that for me it did not stay as long as I thought it should have stayed so right now. It'S sticking very well, but it listed within the next 20 minutes and it was completely dry guys completely dry. Next, I went ahead and I put my hair in a ponytail and the back. We'Re gon na go straight to the back. Okay, it's very hard to really get the glue on the back of your hairline when you're doing things by yourself, so it will look very messy, extremely messy. If you have somebody that can help you do this process, I definitely recommend reaching out to them and asking them for help. But this part was very hard. I kept the lace on the back so that I could pull it down and kind of press the wig into my skin by using my hands and I blow-dried it to make it dry. Next I went ahead and I tied my hair, for I want to say a good 30 minutes to an hour to really make it dry afterwards. I went straight into cutting the lace and I kind of did it in portions, so I did the first part part by my forehead and a very jagged motion and don't worry what you're gon na have to go back. Probably, to really get those little pieces really make sure it is flat and there's no lifting part or you can either go back and put glue underneath those lifting parts totally up to you with some alcohol. I had some glue in places that made it look a little bit messy and unkept, so I used a q-tip to kind of wipe away the excess glue that was around the hairline. So now was time for the back. I had to go ahead and reach out for help, so my cousin, I went ahead and cut the excess part of the lace in the back, which is very important, and then I went ahead and used some alcohol to wipe away anything that was there any glue Pieces cut very close to the hairline on the back. You don't want any extra pieces of lace just hanging around because you can see it. I do wish my hairline in the back. Looked a little bit more natural, I'm my own hardest critic, but, like I said I was restricted because of where they placed the actual band for a more natural and realistic back of this back of head. I would go ahead and use a full lace. Wig full lace, we will definitely get you to be able to pluck more and really get it to look like it could be sculpted into your hair and match your hairline, but I think the results came out amazing. I am gon na give myself some props, because this is the second time I'm doing this video, and I think I have gotten better from the last time. If you follow me on instagram, you guys would have known that. I was really really really really upset about this video because I spent all day and what you guys don't see on Instagram. Is you guys don't see? I mean it used to, but you guys don't see that we put so much work in and it takes a lot of time to do these videos. So you can only imagine that when I finish this video the glue lifted - and I was just so upset that was all my hard work that literally just went straight out the window because the glue decided to not really do its job and I'm yes, I'm gon Na blame the glue, because I did go ahead out on two layers of it and it just said no girl. I want to stay. However, I do think um. The hair did come out good again. This is from about African. I think I was able to lay it really flat, usually when I do ponytails or any updos, because there is a lot of tugging and a lot of pulling. I always usually do it on the canvas head so that it's already set - and all I have to do - is um it's just placing on my head this time. I didn't do that and that's where I guess I also went wrong, but I think my hair looks flawless like this. I'M not gon na give a lot, but a ponytail is very hard guys. I'M gon na keep doing this until I get it right. I'M gon na keep doing it if you're at home, watching this video and you're just like gosh. I can't do it right girl I struggle to so we launched struggle to get, though until we figure this out, and I think my result came out good, but I ended up just putting the hair down, because I wanted you guys to see how the hair looked When it was down as well, I had really a lot of fun making this video. It was very challenging for me, but YouTube is about tutorials challenges and not everything is perfect. Things happen guys and I was still able to get the best out of my look. I love this hair again. This hair is from Lao African and I hope you guys really appreciate this video. This is some real honesty in this video. So thank you guys for watching this video, please be sure to follow me on Instagram and Simone dot Charisse. You know I love, but just letting you guys in on behind the scenes and how things is going don't forget. Tomorrow starts my 7 days of fun. You know sponsored content, just fun, fun, fun, prints and everything cooking, so make sure you guys are deaf, oh and a home tour make sure you got to definitely subscribe to my channel. Follow me on Instagram, smooth Charice. Follow me on snapchat SimCity, 1 to 4. Follow me on Facebook, Simone sharise, and I will see you guys in my next video. Thank you guys so much for watching this. I love you all and dials


Comments
Nicole Mejia: Thank you for your blunt honesty it is very refreshing and appreciated I just got a full lace wig that also had the adjustable strap in the back and watching your video has renewed my confidence in wearing this wig with a very natural appearance... thanks so much!!
Francy knowledge: Pretty hair! GREAT JOB! THANKS FOR VIDEO!☺
Christian Divens: Heyy I use ghost bond for all my full lace wigs .. I suggest doing the glue by sections .. and using three layers on each section .. when I do this my wigs last for minimum a week and a half .. I also tie my hair down every single night . Hopefully that helps love ❤️
Yasnay Navarrete: Great video, thanks so much for the tips. I have a question, if I want to use a wig like this everyday do I have to glue it in and take all this glue off daily?
PhoenixXx: I cannot get ANY glue/gel to hold down the ear tabs. I’ve watched so many tutorials on YouTube and it just doesn’t work.