How To Make A Bob Wig With Bangs (No Closure) Diy Fringe
- Posted on 15 August, 2022
- Bob Wig
- By Anonymous
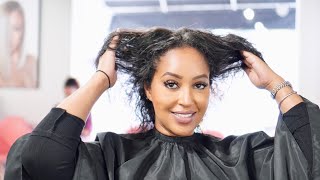
This is a detailed beginner friendly video about how to achieve a bob wig with bangs.
Hello, beautiful people you're welcome back to my channel. If this is your first time here, i say a big welcome to you be sure to hit the subscribe button, so you get notified every time. I drop a video in this video, i'm going to be showing you how to achieve a beautiful bob wig with bangs, i'm going to making use of a scissors a needle and thread blade brush and, of course, the hair bundles we'll be using four bundles. For this week, i'll go ahead and read wig cap on the mannequin head, i'm going to be using an adjustable, strap mesh, wig cap, and i'm also going to be making sure that the right side of the wig cap stays inward. While the wrong side is turned upward, so that way, when i'm done with the wig, it will give it a beautiful finish, look put inward and outward so. The wrong side will face up. So i'm going ahead to start sewing in the hair and guys please anytime, you're sewing in a wig, always make sure you go in twice even twice at the beginning. You hold it. You stitch it twice at the beginning to give it this firm grip i'll make it last longer, because we can't have our hair losing wow. So i would not be using the turnover method for this week. Instead i'll be using the cut and stitch method, the turnover method always leaves the wig bumpy at the end, and we don't want that. We'Re trying to achieve a flat and beautiful finish. Look so i'll be cutting and stitching at every end point and guys. I can't stress this enough always remember to double so double stitch at every endpoint or beginning point now i will stop using the cut and stitch method and i'll go in using this circular sewing method, but i'll only be sewing. The circular method twice after which i will apply another technique that will give it a flat scanty banks, finish, look truck like i said i won't be cutting it here. Instead, i will take it round and guys. Please please, you really have to pad on the stains on my mannequin. I don't know, okay, i think i use it in dying away a couple of in between so for the back. When i was when i see you in the back, i left two fingers facing at the back. So as i cut to the front gradually i reduced it to just a finger spacing. I don't know if you understand just the finger spacing so right now i'll be going ahead to cut out the remaining part of the hair, and what i'll be doing now is to split the hair into two. The two wefts that we sewn together i'll go ahead to split it into two to give it a flat and scanty look. So i'm going to have to split it into two and i'll be sewing that splitted here on the line that i marked out earlier. So i'm going ahead to mark it out again to make it clearer, so i'll start swinging the hair straight following the markings that i made on it already this time around, using a cut and stitch method, no more the circular the horse shape and the cut and Stitch method, so i'll keep sewing straight until i get to the marking i made before the midpoint, the marking before the midpoint. When i get to that point i'll start sewing in a circular motion. I was assuming a circular motion until i achieve a very small circle. So what i'll be doing now is to roll a piece of splitted hair from earlier i'll roll it into it very tight circle and see if it fits the little circle that was left behind then i'll sew. It tightly now start to attach it to the little circle i'm going to go ahead and comb the hair out, and i will take my tape, rule and mark out the point at which i'm supposed to cut the bangs, which is 7 inches. I also mark out where my bang is supposed to stop, also cut the back and make it a blunt cuts and i'll also be going ahead to flatten it with my straightener and also give it. This bulb, look and finally i'll be going in with the elastic band. It is advisable you always sew in an elastic band when dealing with an adjustable wig cap because, as time goes on, it tends to slack guys. This is the finished look. I am really loving. The way the hair turned out honestly, i'm really loving it and the best part about this haze that i only used three bundles guys just three bundles and it's looking this gorgeous, i mean look at it now. That is all for today guys. Thank you so much for watching my video and please like and subscribe. If you haven't, you can also leave a comment. Let me know what you think about this video and i'll say about this beautiful bob wig man this week is looking so gorgeous. Thank you. So much for staying tuned. Thank you so much for taking time out to watch this video. I really appreciate you see you in my next video bye. You

Comments
goodnessadebo: Really love your detailed explanation. Thanks for this.
janet boluwatife: Thank you, I found this really helpful
BlessingAdebo: That was a great tutorial .
ADESINA DEBORAH: So beautiful to watch
Maryann Oluchukwu: So lovely please wht is the name of the weavon I will try my own