Amazon Prime Bob Wig | 13X6" Lace Front | Yakayu Wig | Install & Review
- Posted on 23 October, 2019
- Bob Wig
- By Anonymous
Don't forget to SUBSCRIBE!!!
Follow on Instagram @TheSCotton
LINK TO WIG: https://www.amazon.com/gp/aw/d/B07VNCH...
Check out my other hair videos:
Pattern Review: https://youtu.be/guehBbm_phc
Rulinda Bob Wig: https://youtu.be/W0g0BQeVIuI
Easy Natural Hairstyles: https://youtu.be/fDTfZyfIXcQ
DIY curly clip-ins: https://youtu.be/bwcUJtM2A8w
For inquiries email [email protected]
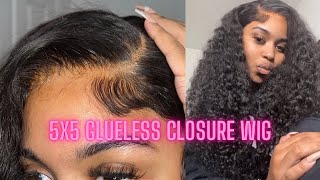
Hi and welcome back to cotton creation, so today I am bringing another Amazon lace front, wig unit to you, this company reached out to me and asked me to do a review on their wig. I have not opened it yet. I wanted to do it on camera. So here it is still in the package. We got this nice Amazon gold packaging. So let's go ahead and open it. It'S another bob unit. I love bobs you're, like super fun, professional edgy, and so this is the company name and I'll put the information down in the description box below. So you guys can have all this and then here are some of the company's information. So this unit, I actually told them - I wanted a side part. So it's supposed to be the side part, and this is their 10-inch lace front bob, and it is a 13 by 6 inch lace front so gives us plenty of parking space. So I'm just gon na go ahead and open this up all right, so we have the wig cap which, like I said, is not my color but, like I said before, what you could do is take some of your powder or foundation and just dab all over The wake at once, it's on your head to color it your way I mean it, took match the color that you need it to be. It does come with some handy instructions and care tips, so that's nice and then we have the wig laughs, see what we're working with here is nice and soft. Pretty straight already, so it's things I could have proudly straighten out pretty easily. So, let's take a look at the inside of this unit. It comes with four combs two on the side, one in the center, which I probably won't use. I don't, I rarely use the center cone, so I may just take that out and one in the back and then it has a little bit of lace in the back as well, and this one also comes with some adjustable straps. So I'm gon na have to bleach these nuts or maybe I'll, just see. If I, what happens if because these knots are not that big they're, not the big ones, so maybe I'll just do the foundation trick powder trick and see how that works out and then, if it doesn't work out I'll, go back and bleach it so yeah. If you're interested in seeing how I customized this unit, please stay tuned and make sure you hit that subscribe button, so you don't miss out on the next video that I have coming your way all right, let's hop into the video! So the first thing that I'm gon na do to get started is I'm gon na bleach the knots and if you want to see the full process and method that I use I'll link that video up above so you can take a look at that. I will say with this particular unit I didn't feel like the knots bleached easily. I did have to keep it on pretty long almost since to the point where the hair was starting to bleach. So, if you're looking for a unit that doesn't require a whole lot of time to bleach the knots, then this may not be the unit for you, but with some work and some patience, you can definitely get them to bleach. So next, what I'm gon na do is I'm going to check out the parting space as well as the hairline, to see if anything needs to be plucked the hairline or excuse me, the parting space looks pretty good to me. I'M just going to go in and make sure it's like nice and straight and as far as the hairline goes like, they really did a great job with pre plucking this unit. Of course you can always go in and customize it to your liking. But for me I knew I was gon na wear the hair to the side and it was gon na fall over the hairline. So I didn't need to necessarily go in and pluck any more out. But besides the fact I mean they did a pretty darn good job with plucking the hairline, so I'm gon na leave it as is and move on to the next step, which is going in and placing some mousse on that parting space and just getting a nice And flat and some of those flyaways down so next, I'm just gon na go ahead and cut the lace. I'M actually gon na use a razor to do this and I've seen. I think her name is Oh J beige. Do this method - and I really like it so I think I may actually use it moving forward. So yeah, that's pretty much. What I'm doing here so now, I'm just going to flat iron, the hair it does straighten very well like gives you that so pressed, look and feel it's nice and soft. It doesn't require a lot of passes of the flatiron to get straight so yeah. I love that about it, so I did it in pretty short amount of time, so in terms of size and fit of this unit, I would say it definitely is good for medium and larger size heads I have a smaller sized head and I did have to Adjust it so that it was on the snug and tightest option in terms of the elastic band, and I did so in an elastic band too, to make it even more snug on me like I said it was a little bit big for me after our flat Iron to hair, I noticed that there were some flyaways, so I'm just going in with some loose to lay those down now, it's time to take a look and see what she's looking like once she is on. So one thing I want to note is that I did not tent the lace on this. I wanted to see how it would look with just a medium brown wig cap on underneath, and it actually looked really good. You can always take the lace, of course, to get an even more natural look, but I just wanted to show you guys how this look when you don't tent the lace and you only bleach the knot. So, let's see what she's looking like now that I have her completely on and styled, I am loving her. She looks amazing. So if you're, looking for a nice bob unit that you can wear side, part middle part straight, you know with a nice little soft Beach wave or anything like that. This would definitely be a great option and of course you can have her in two days because they do offer Amazon. Prime on this item so yeah, I love her I'll, put the link to this wig down in the description box below for anyone that is interested in getting more details. So please, let me know what you guys think of this wig tutorial down in the comment section down below. If you have any questions, you can put them down there and I'll answer those for you. I'Ll also put the information for the wig down in the description box as well, so you guys can go check it out and all the pricing is very affordable. The quality is great and amazing and, as you can see, it didn't take very much to customize this unit, so I'm excited for you guys to you know. Let me know what you think and possibly check them out yourself. If you like this video, please give me a thumbs up and if you haven't already done so hit that subscribe button, so that you don't miss out on the next video thanks for watching

Comments
Lots of glitter And shiii: Love it, looks thick and full!
Dionne Jones: That's pretty. Lace front wing..
Kenyana Savage: How long did you leave the bleach on ?
Deco Ideas: Hello! here I also subscribe to your channel to support you and I congratulate you it is a very beautiful channel ❤
ladynefertitibk: Looks good.
Promoting Jesus I Veronica Armstrong: Your natural hair!!
House of farts: Link pls