How To: Blunt Bob Cut Tutorial | Amazon Wig | Cutting With Clippers | Very Detailed
- Posted on 14 February, 2021
- Bob Wig
- By Anonymous
Hi, thanks so much for clicking on this video! This is my first attempt at a blunt bob cut on a wig. I think it turned out pretty good but let me know what you think below, I'd love to hear your thoughts.
Wig Install Video Coming Soon!
Products/Details:
Wig Deets:
13x6 Amazon Lace Front Wig, 16in. - body wave
https://www.amazon.com/gp/product/B08N...
Styling Products:
BaBylissPRO Nano Titanium-Plated Ionic Straightening Iron
Silk Elements Coconut Strength 'n Silk Heat Protection Spray
L'Oreal Quick Blue Bleach
Divina 40 Volume Developer
Thanks for watching! Follow me on IG/Twitter: Lexxsum_
email: [email protected]
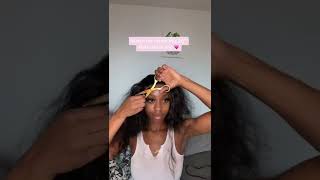
Hey everyone welcome to my channel. My name is alexis if you're new here. Thank you so much for clicking on this video. I hope you enjoy it and, if you're coming back. Thank you so much for the support like i. I really appreciate it. You have no idea um today, i'm going to attempt to cut a blunt bob in this wig that i got from amazon, so we shall see how it goes and we're going to sit here and work through this together. So let's go ahead and get right into the video y'all already know. I got this hair from amazon and um. I got this from a seller called yz grace and honestly they're slowly becoming one of my favorite hair vendors on amazon but um. This is a 13 by 6 16 inch body, wave, lace, front wig, and this wig is bomb. The hair is shiny, it's bouncy adds a lot of body right out of the pack and it doesn't have any smell, which i really appreciate it. So i'm going to go ahead and pop that onto my wig head and i'm going to straighten this out, i'm going to try to get this as straight as possible so that i can prepare the wig for the cutting i'm going to be taking my baby bliss Pro flat iron and my silk elements, heat protectant spray, because it adds shine and it also helps to silk out the hair, and it also smells pretty good. So i'm just going to go ahead and straighten out that hair and prepare that for the cut all right. So i'm just going to start parting off the hair and flat ironing to get that as straight as possible. But i did just want to note. This is the first time that i'm attempting to cut a blunt bob in a wig and also the first time that i'm trying out a black wig so we'll see how that goes. Um. I think it'll turn out fine um, so yeah, so just stay tuned and work through it with me here and also. Let me know if there's anything in particular that you'd like to see for my upcoming videos or any type of content that you'd like to see. I'M really open to ideas and suggestions, and i want to make sure that i'm i'm providing content that you all will enjoy so yeah. Just let me know comment down below what you think or um just comment, letting me know what you'd like to see, and i'd really appreciate that perfect all right now that the hair is fully straightened, it's time to get into the fun part. So i'm actually going to be using my boyfriend's clippers to cut the hair and i'm very surprised he let me use it, but i'm also very thankful, because this is going to help speed up the process a lot so um i'm actually going to use the bottom Of my wig head that little white ridge as a as an initial guide to start my cutting it's going to end up being a lot longer than what my end goal will be for the spot. But that's okay, it's better to cut off less than it is to cut off too much when you're, first starting off! So like. I said i'm going to use that like the bottom of my wig head as a guide and then once i get that even blunt cut there, i'm going to take the wig and try it on and create another guide. As far as how short that i'd like the wig to be, i just did not want to start off cutting it. Super short, just in case i messed up because, like i said this is my first time using a clipper or actually no. I didn't say that this is my first time using the clippers to cut the hair, so i just wanted to leave myself enough room for error just in case so y'all don't mind me. I was just playing around here, but now that that first round of cutting is done, i'm going to pop the wig on and create a guide for that second round of cutting. So i was hoping that this bob would be would fall right along my jawline or maybe slightly slightly below my jawline, so i'm not going to cut off too much hair when creating this guide. I'M just going to take my scissors and snip off a little bit of the hair towards the front of the wig and then once that's done, i'm going to take that wig put it back onto my wig head and use that that's that guide as a measure To cut an even cut around the perimeter of the wig, so i don't know - hopefully i explained that. Well, i'm not sure, but if not, hopefully the video will help everything kind of fall in together, so bear with me here now it's time for round two of cutting so, like i said, i'm going to use that guide that i created to just evenly cut around The perimeter of the wig - so hopefully i can cut that straight, but we'll see how this goes. My you all could probably tell that cut, wasn't exactly even all the way around the hair. But the reason for that is because there's some hair underneath the cut that we did that's still slightly uneven. So what i'm going to do is tilt my wig head forward and that once i tilt it forward, it's going to expose all of that uneven hair. So i'm going to take my clippers and start trimming that hair off to make the cut even overall. So hopefully that makes sense. I'M sorry if i'm not doing a good job of explaining it. Hopefully the video helps a lot with that. So yeah just bear with me here now that the cut is finally done, i'm going to go ahead and bleach the knots on the lace. So right now, if you were to part the lace, you'll see a bunch of black dots and those black dots are coming from the hair, that's getting knotted or tied into the lace. So we want to hide those as best as possible and the way that we're going to do that is we're going to bleach them. So i'm using some l'oreal, quick blue bleach and also some 40 volume developer, i'm just going to mix that up until i get like a toothpaste like consistency, nothing too runny, because i don't want the bleach to seep through the lace. I want it to sit right on top of the lace and only hit the knots. So i'm going to go ahead and mix that up and i'm going to take a plastic knife and just spread that all over the lace and i'm going to. Let that sit for about 30 to 40 minutes now, oh nice, oh so after bleaching, the knots i let that bleach sit in the hair for about 30 to 40 minutes, and then i rinsed that out on cool, i shampooed and conditioned the hair, and i also Used some purple shampoo to remove any brassiness that was left on the knots after bleaching them so um after that was done. I blow dried and flat ironed the wig and put that right back onto my wig head. So what i'm going to do now is start to create a more natural hairline on the lace and the way that i'm going to do. That is i'm going to take some water in my spray bottle and i'm just going to spray that along the hairline. I'M going to start parting, the hair behind the hairline and i'm going to take some tweezers and start plucking. Now, when you're doing this, you want to make sure that you're not plucking too much just gradually start to plug, and then occasionally you know, flip the hairline back to make sure that it's looking more natural than what it originally was. The end goal is to kind of thin out the hairline in a way that kind of mimics your natural hairline, um, you'll notice that you don't have like a like a barbie doll, hairline, where it's super full and straight all the way across you want to create Little bits of dips and um light, i don't want to say bald spots but um spots, where there's not a lot of hair. That kind of mimics your hairline, because your hairline isn't going to be full from ear to ear it has. It has its own natural, natural dips and thin parts as well, so just try to mimic your hairline as best as possible. Try not to pluck too much, and hopefully i explained that well um, i don't know, but stay tuned, we're going to work through this together and also i'm going to show you all how to create a slight widow's peak on the wig as well. So yeah just stay tuned for that, so this, so i have a slight widow's peak on my natural hairline. So, of course, like i want to kind of mimic that on my wigs that i'm going to be installing on myself. So to do this, i've parted the hair straight down the middle, and what i'm going to do is just take my comb and make two small triangles on both sides of the part. Once i section off that triangle, i'm going to pull the hair within the triangle forward down the face of my wig head and i'm going to start thinning out the hair. That'S within that triangle. I don't want to completely pull that out, because i'm going to be using some of that hair for baby hairs, but um, but yeah. That'S how you kind of create the widow's peak you'll notice that it's that you kind of, if you do have a widow's peak, you'll notice that it's kind of a triangle on both sides, or at least some sort of shape in in that nature, um. So yeah. I'M just gon na, like i said, create those triangles thin out the hair within the triangles and then you'll slowly start to see the widow's peak perfect all right. So now that the plucking is done, you can see that the hairline looks a lot more natural. It'S less full um, which is a good thing, and that's going to help you out a lot when trying to make the install look as natural as possible. But overall i think this wig, like the bob cut, turned out great, i'm so excited to install this and try it on um, and i can't wait to see the final product and finished look but um. It didn't take me that long to really cut pluck and bleach the knots on this wig. I just kind of stretched it out throughout the day because i was getting you know. I was just getting a little lazy and tired, but overall it did not take long at all like this was quick and easy um and i, like i'm in love with this wig. I really think this is probably like one of my most favorite wigs that i've done so far so um so yeah, i'm very, very happy with how this turned out and if you made it to the end of this video, i really appreciate you for sticking with Me through this mess like it's, it was a process but um but yeah like i appreciate your support, um and please be sure to. Let me know what you think in the comments below subscribe as well. I'D love to have you and let me know what other type of content that you'd like to see or if you have like a wig that you want me to try out or anything like that. I'M really open to ideas and suggestions, so don't hesitate to. Let me know, but yeah again, thank you. Thank you. Thank you, stay tuned for any other videos and i hope to see you all soon.


Comments
Simply Ty: I have a widows peak as well! I couldn’t find someone that had experience with that type of hairline! ❤
Just Avia : Love the wig more tutorial wigs videos pls. Thanks new sub
Catch Me On The Flip: I enjoyed ur background music! also heat job
Malyssa P: