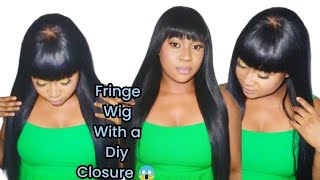
How To Make A Bob Fringe Wig (Chinese Bangs) Without Bond And Closure.
- Posted on 05 July, 2021
- Bob Wig
- By Anonymous
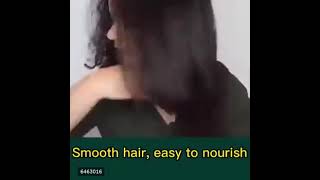
Short bob wig, with fringe Chinese bangs. No bond. No closure. #hair #expression #ringbob.
weavon used: ring bob expression
Hey hey, you guys welcome back to my channel if you're seeing this channel for the first time, please subscribe hit the subscribe button. Please hit the subscribe button and give this video a thumbs up. Okay bravely. I just want to show you in this video how i made this hair all by myself without bond and with no closure, so this hair is basically diy. I did everything myself, including the invisible pattern that is here so yeah all was made by myself. So i'm going to show you in this video how i achieve the hair. I always like it's when people wear fringe, where they wear freezer, always advice, but i wasn't really too sure it was going to fit my face like so. I decided to try this by doing this wig and at the end of the day, i liked the outcome and the way i like it is such a way that the banks here won't be full, so it's cancelled, they're kind of scanty and i'm glad i was Able to achieve it, because that's how i like it and i can actually style it any way that i want. I can light, i can do side uh fringe. I can do full fringe or even part it's this way. So i like it that my skin is showing a bit it makes it look more natural. So i like it like this and i think it's okay, it's okay! So let me teach you how i did it, but you must subscribe after teaching. You don't go without subscribing, don't go without subscribing so yeah. Let'S go, let's go, let's do my hair with more money with more chickeny money. So this is the hair used is an expression product, it's called ring buff and it comes in different inches. You can use the smaller one for the back, the medium side for the middle and the longer one from the front, so just start by just tying this hair, basically with one shade on the net. So it's just as simple! So yes, so kids, you should keep sewing to get to the front. When you get to the front, you just have to sew around the cap around the neck, so just keep sewing and you should mark a spot at the front where you want the fringe. To start from, like the middle spot, you can see it's matching pink, so you should get marcus too, so you don't miss out or just fix it somewhere that you don't like it or have one awkward uh closure. So you should try and mark this spot. So then you go round round round so that everything can end in that spot. Yes, interesting parts right, so this is how i choose the uh invisible parts without closure. So basically, you just have to use the needle and thread to change the wig, the wig remove the piece of wig, a very tiny piece. Add your surround, surround serum serum when you're done just open it by the middle and use a hair straightener to just match it together. To give you this flat. Look to give this invisible part! You should see and watch the video carefully to see how i did it so cheers so do so when you're done, you can just remove your cap from the dummy head from the mannequin and just attach the middle to the end. To the end of the middle part, so you just have this uh invisible and neat closing go to make everything. Look very beautiful. So it's time to cut you just watch and cut carefully mark the place you want to cut. You should start by cutting a long part where you trim those. Yes, since i was the one i was going to wear my cap, i basically removed it from the dummy hair from the mannequin. I just put it on my head, so i can. I just trim it to the sides that i want. I don't want to have something too long or something too short, so i was just doing it on my head to achieve the length that i wanted exactly so as i removed this and i started changing. So, just stream changing once you get the length that you want. The advice is that you start from the long length so that you can just adjust to what you want, because you know that once you remove the hair, you can attach it back again. So please shadow um from the long window so that i don't want to spoil your hair okay, and this is how i achieve the not through bulky banks, okay, so basically i was just using scissors, so just entering the hair with scissors straight up like this, like You know straight into the hair. I was entering it and cutting not really cutting straight, but just to pick up some pieces inside the hair to make it look scanty. So these are achieved and then, when you comb it, you see that the hair is dropping. But it's not dropping from one spot right as you're putting the scissors inside it's just removing removing! Please don't put these scissors inside the hair you'll be at the front so that you don't go and uh destroy the hair so that your hair will be sure. You know like that and almost and there we go. We have the final look here. You should try this out. You know save some money by doing this yourself, yeah and when you do it, please make your comments and tag me when you do it. I can be found on all social media platforms. Okay, wish you good luck, that's it! That is it! Thank you for watching. Please don't go without subscribing, don't go without subscribing, please. This is the right time to hit that subscribe button at no cost. Please put on the notification bell so that you get um a notification anytime. I post my video, i'm bringing lots of interesting content away. So don't forget to subscribe, don't forget to subscribe! Alright, bye,
Comments
Nom’s Life: Let’s talk about how amazing she is I enjoyed your video looking forward for more I’m definitely here to stay and support❤️
Precious Kalu: I enjoyed your video.. At least you gave me what I was looking for without buying all expensive tools to achieve a Fringe wig. Thanks so much dear.
The Lacreme Brand: Nice one
Ibukunoluwa Fola Olawuyi: Nice Bob.
okeyi peace: Is the wig for me??