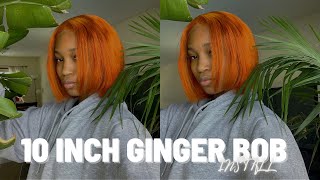
Detailed Lace Front Wig Install | Beginner Friendly, Bleaching, Plucking, Install
- Posted on 18 January, 2023
- Bob Wig
- By Anonymous
Hey y’all!! Im back again and this time I’m doing a wig install for you guys. I hope y’all enjoy the video. If you have any feedback or anything about this process, then please let me know! Don’t forget to like, comment, and subscribee
Products:
BW2 bleach
Clairol 40/50 developer
Shimmer Lights shampoo
Silicon Mix
Ebin Tinted Lace spray
Ebin Wonder Lace Bond adhesive spray (supreme)
Il Makiage concealer
Ruby Kisses cream foundation
NK lip liner
Got2b spray
00:00 Intro
00:33 Bleaching
02:00 Silicon Mix
02:57 Plucking
03:24 Lace Tinting
03:49 Install
10:18 Styling
10:54 Products
11:15 Outro
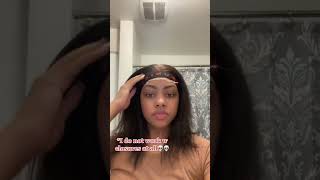
Thank you, hey guys, it's Imani and I'm back with another video we're going to be doing a wig tutorial, I'm going to show you how I restored this radio week. So I got the bleach and I got the developer, we're getting right into it. Okay, so I'm just brushing it out in this clip for my developer. It'S a few different volumes mixed together, so it's not 20. It'S like 40 50 mixed together, so y'all can see me put in the bleach in the container. I don't measure it precisely. I just do it by eye, so I put a few Scoops in there. However much I'm using, and then I bought how much developer I'm gon na use. I had to move that mug because I really don't even know why I was right there, so I'm just about to mix that up and get it to that consistency. And then, after that, we're just gon na be layering it on the wig. Now I could have did a bleach bath, but I didn't want the whole wigs to be bleached. I really just wanted it to be custom. However, it came out so I just going on there. I don't have any gloves, I'm taking a risk, but it turns out cute though, as y'all saw in the first clip. It turns out cute so we're just gon na layer that up get the whole wig covered and that's what it looks like after the bleach is on there. Y'All can see that it's not fully covered, so it's gon na be straight and that's how it looks after the beach. So now we got the Shimmer like shampoo. You use this shampoo to tone your wig just to tone down the yellowness of the bleach and I'm washing that out and that's what it looks like after my life. I ended up bleaching the wig again because I didn't like how dark it was see. I can see it's lighter now and next, I'm gon na be going in with some silicone mix, because after you bleach your wigs, you need to restore it just to get the quality of the hair back. So we're just gon na coat that with silicone mixed and that is the wig really coated. Next, I'm just gon na wash out that silicone mix in the sink and y'all can see what the color looks like. It'S really pretty it's light at the top, and then it goes dark at the bottom. It'S really satisfying just washing the wig and seeing how this product come out but make sure, when you're, washing your wigs, that you get all of the product out all of the bleach out. Because if you don't it'll, really mess up the quality of your wig. But this wig is just the Amazon wig that I got so next we're going to be plucking. So when I plug I like to get a white shirt, I use the white tank top and I like to put it on my leg, put the wig on top. So that you can clearly see what you're putting so you're just gon na go through and plug to your liking, I'll plug this wig a lot just because it was really full at the hairline. So I had to pluck it to get it to look natural next. We'Re gon na go in with the lace tint. This is an important step because you want to make sure that your lace matches the color of your skin. You can use makeup, but I found that the lace tan is easier because it just coats your wig and it's less work that you have to do once once you install it, and that is what it looks like with the lace tent y'all can see it matches. My complexion, all right so now it's time for the install I'll, be using Wonder, lace bun by even and I didn't use a wig cap just because I didn't feel like doing that stuff. So y'all can see me right now. I'M just spraying the spray across my hairline. That'S the first coat and I just use the comb to push it back, so it doesn't run down my head and then we're going in with the second coat now. This is the third coat of the spray, and I'm just using my comb to help push that back in drying it by hand you can use a hair dryer that would work faster, so I would recommend doing that instead, because doing this took a long time, and This is the fourth layer of the spray that I'm using. I really wanted this wig to be stuck on for a minute because I'll be wearing it for the week and I don't want to have to go in and retouch it and we're just gon na wave. It dry it by hand. Okay, now we're about to lay this wig down. This took some time because it's just one part y'all gon na see it this one part that I just couldn't get the stick. Look, it's that part right that I'm touching it took a while for me to get it to lay down um. A comb will also be easier to use when you're trying to lay your wig down instead of using your fingers. Some of these next few clips, I'm just gon na, show me laying down this wig. It takes me a minute to do just because the spray wasn't dry all the way. So, that's why I would advise you to use a hair dryer when you're drying your spray, because that would be faster and it would guarantee that your spray is dry once you lay your wig down everybody, okay, so I got the wig laid down for the most Part y'all can see the lace right there and this clip I'm just gon na - be cutting some extra lace because I plucked a lot so I kind of plucked the hairline back a little bit. I'M gon na be cutting some of that lace off strong money. Also, I just want to say I am not a professional at wigs. I'Ve done a lot of wigs, but I don't really take my time to do them so yeah in this clip, I'm just spraying the size down, because for me the sides are the hardest part to lay down. They always come back up, but I think it's because I have a lot of hair edges on the side, a little dance break, so we just still trying to get those sides down right now. It took me so long to get the size down. That is why this last part, the install was the longest part. It took me about 20 minutes to get the wig laid down. How I wanted it to me? Okay, so I'm still just waiting on the edges to dry right now, I'm spraying a little bit more spray on there and I'm doing a little Tick, Tock dance. I was really hitting it, though I'm not gon na cap. I was in it, it took a minute for the size to dry, just because, like I told y'all, I got the hair on the side, so it just takes a minute for that part. Okay, so I finally got this side down for the most part, and now I'm just gon na take a black elastic band and tie it around the front tied in the back double knotted, just to make sure it stays. And then I'm just gon na be pulling my band down to check out the lace. Y'All can see right here that it's melted for the most part, it's really giving a scalp okay that one little part was giving me trouble. I told you I was at one part, so I'm just spreading some more spray on here. This is about five layers of spray. Now I'm just gon na be trying to press it press the spray into my scalp with the comb so that I can get this wig laid foreign and in this next clip I'm just gon na be flat ironing my hair. Also when I took the band up. I did use a few products just to help blend the lace and I'll be showing y'all those products I used in the next clip, and I also decided to cut some of it to kind of layer it a little bit all right. So these are the products that I use to help. Get that look, I'm gon na just lift them on the side up there, foreign


Comments
Tati Imani: You gave some good tips & tricks. I loveeee how the color came out
Delicia Panford: The outcome is so beautiful
Seeing about Shakierra !!!: Love this !! You laid this wig!!!!! Loe the color
Simplicity is T: The COLOR!!!!!!!! Okay Friend let me send my bundles to you lol it came out so beautiful
The Gills: Great content!!! 5:23
Benjamin Ali: wonderful video
BRIANA CARLY: Color came out cute
Tati Imani: You did that girlllll, laidddd
The Gills: Hey Queen, here from the group! Girrrrrrl you SNAPPED! 4:47