Watch Me Install 14" Bob Wig By Luvme Hair Start To Finish
What is up Tress Troop! I POST NEW VIDEOS ON WED., FRI. SAT., & SUN @ 7PM CST.
IF YOU ARE NEW, SUBSCRIBE AND LEAVE A COMMENT FOR A WARM WELCOME MESSAGE!
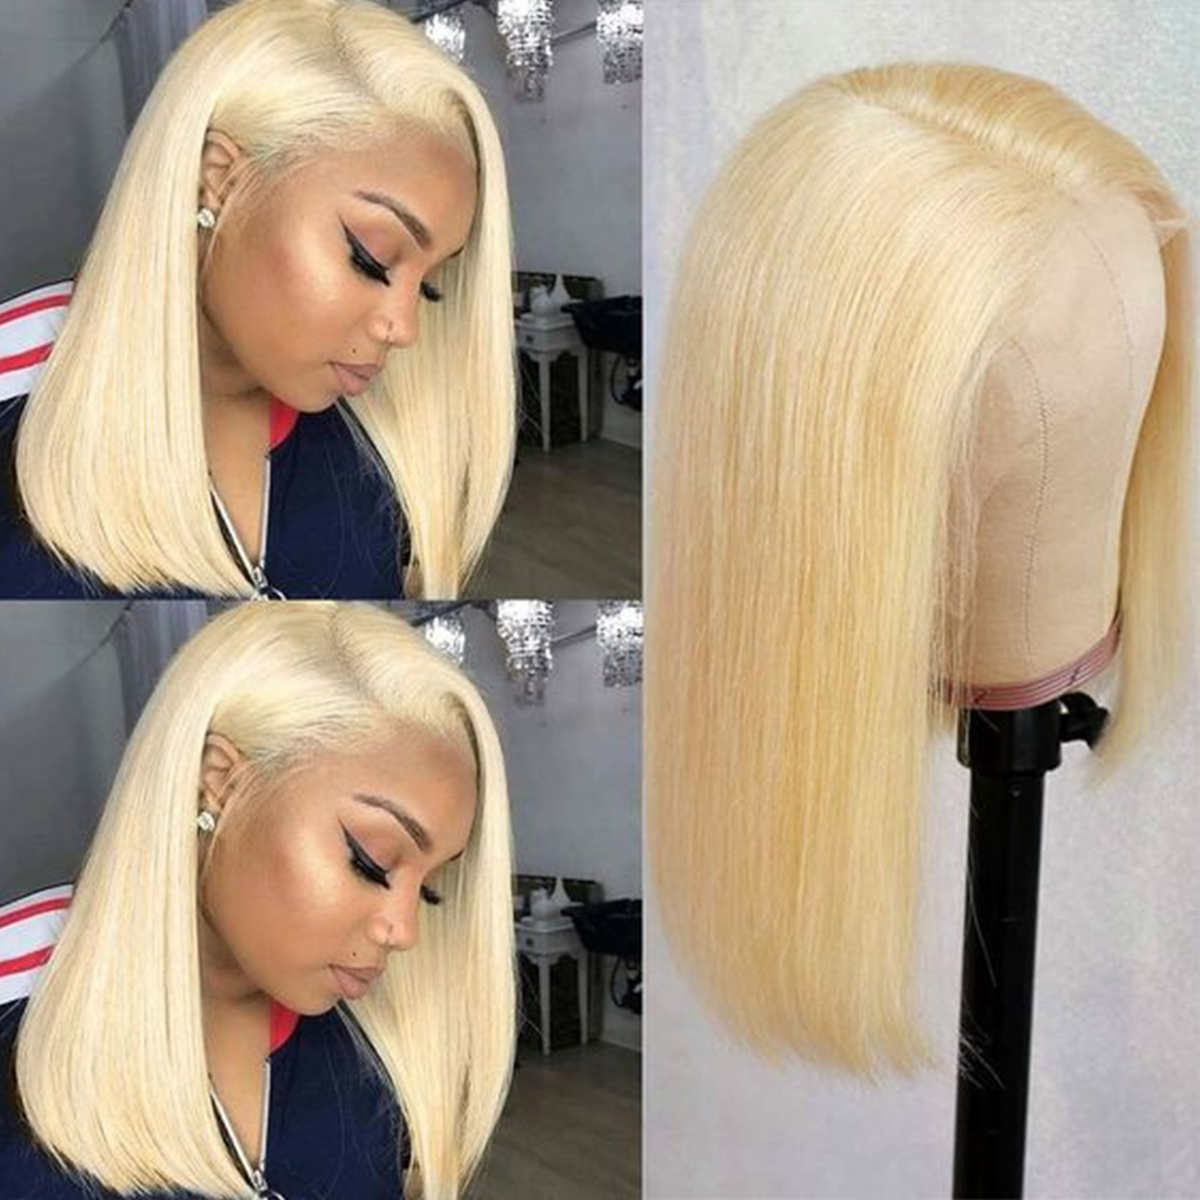
I love this 14" bob u-part wig I purchased from LuvMe Virgin Hair. Once I figured out from fellow YouTubers how to install the wig, I wanted to share the process with you guys from start to finish. They are having a sale, so don't forget to enter your discount code if you purchase. The link to the exact wig is below! If you want an unboxing video, let me know in the comments.
WIG I PURCHASED:
https://shop.luvmehair.com/products/qu...
NAILS IN THIS VIDEO:
HOW TO MAKE PRESS ON NAILS | HOW TO APPLY PRESS-ON NAILS https://www.youtube.com/watch?v=A5lVII...
LACE FRONT WIG ON ME:
MY FIRST LACE WIG INSTALL | START TO FINISH | WITH GOT2B SPRAY, NO WIG GLUE | STYLE STARTS @3:30 m https://www.youtube.com/watch?v=glRBBV...
DON’T FORGET TO CLICK SUBSCRIBE AND THE BELL. RATE THIS VIDEO BY CLICKING THE THUMBS UP OR THUMBS DOWN SO I CAN KEEP GIVING YOU THE CONTENT YOU WANT TO SEE.
TAG ME IN YOUR PICTURES AND VIDEOS:
Instagram: @tresstoimpress
Facebook: Tress to Impress
Snapchat: tresstoimpress
BUSINESS CONTACT:
COPYRIGHT FREE MUSIC:
Endless Way by SilentCrafter https://soundcloud.com/user-907904720
Creative Commons — Attribution-ShareAlike 3.0 Unported — CC BY-SA 3.0
Free Download / Stream: https://bit.ly/endless-way
Music promoted by Audio Library https://youtu.be/j7njyY6vTIg
Voyage - Atch https://soundcloud.com/atch-music
Creative Commons — Attribution 3.0 Unported — CC BY 3.0
Free Download / Stream: https://bit.ly/atch-voyage
Music promoted by Audio Library https://youtu.be/JQ8LggdjEKY
Thank you for watching. I will see you in the next video!
#tresstoimpress #luvmehair #blackownedbrands
What is a tres troop, it is tries to impress - and I am back with another video - today's video is going to be a haircut video. Ok, I'm just playing today's video is going to be another wig flay. Yes, this is a wig. So if you are interested in seeing how I slave this week to look so incredibly natural, then make sure that you stay tuned also make sure that you are subscribed to the channel. Your girl is on the road to 1k subscribers right now. We are at 701 K I am coming for you before the end of July. I have a really big giveaway for you guys once we get to 1k. So please, please, please make sure you are subscribed, share this video, like comment all of that good stuff. Let'S get straight into this video because you guys are going to love this way this week is by love me hair. Love me here is that right, yes, love me hair. This is my first time ever ordering from them. This video is not sponsored, but I would like to share an unboxing video with you guys, if you guys, are interested in an unboxing video from love me hair, so that you can see how the hair is packaged and what all comes with the hair. Then please, let me know down in the comments below and I'll, be more than happy to go ahead and get that filmed and uploaded for you guys anyway, stay tuned, despite the fact that this video is not sponsored by love me Here, I am going to try To make sure that the link to this exact wig that I purchased is in the description box below I started off by prepping the wig. I wanted to make sure that it was very, very clean after shipping and processing. So I shampoo the wig twice and I did see the color of my shampoo change. So I went ahead and shampooed it two times instead of one and then I conditioned the hair and made sure that I wash everything out thoroughly from the mesh and lace and the hair. Next, I secured the wig as best I could by the top tracks to my foam head, which was fairly easy. The wig was connected across the front so that it wouldn't stretch out of place, and I went ahead and cut that connection before starting this process, and then I blow-dry this hair on high heat and high speed. So normally, when I do my natural hair, I blow-dry on the lower heat setting, but for the wig, I use the higher heat setting just to save a little bit of time and I'm not worried about heat damaging this hair, because I chose the straight option for The hair pattern, so I'm not worried about heat damaging it's already straights. This hair was very easy to blow-dry. It behaved very much like human hair. I will say that it helped out a lot to use the condenser on the end of the blow dryer and to use a paddle brush as well. It seemed like the process went a lot faster once I added those two tools. So that's a quick tip that you may want to take into consideration before you start. If you choose to do this same process, next is the flat ironing, so this section I actually miss getting it on camera is already flat ironed. I use my flat iron on 450, which we know human hair burns at 451, so this wig is supposed to be human hair, so I use it at 450. I will say this: on 450, I did notice like a gooey plasticky residue coming off of my flat iron. If you guys know what that is, please let me know, I thought it was the hair melting, but none of the hair looks melted together, but then, when I bump my flat irons down to 400 degrees, nope 425 400, I bumped it down to 400 degrees and It didn't seem like it was straightening as well, so I did keep the heat at 450, which seems to work best on this wig. But I don't know what that residue was, that was, it was black and gooey like the hair was melting and I had to make sure that I cleaned it off of my flat iron, I'm not sure. Maybe it's a blend of hair. Maybe it's a coating. That'S on the hair during the processing. I thought I shampoo everything away, but I have absolutely no clue, but the hair is super super flowy after I flat ironed it. So there's no way that I was melting. The hair together and my technique for straightening is just straightening about a thickness of maybe two tracks at one time and making sure that it's no wider than the plates of my Flatiron. So I actually had to Flatiron this head in four rows or sections. You see me now working on the second row or section, and I did use the chase method with a fine-tooth comb and at the once I got down to the very ends of the hair. I just curled it under just a tad bit to make. It seem a little bit more realistic, like a wrap. Now that my wig is fully prepped. It is time for me to prep my natural hair. Now I have already parted a u-shape section at the top of my head, that fits the same size as the wig and I actually put the wig on my head. So you have the template for parting. Sorry only suggest that you do the same thing then. I cornrowed my natural hair straight back and got it as flat as I possibly could, and now I am going back and using the chase myth it once again in flat iron flat ironing my leave out now. Not only did I do the, U part section at the very top, but what you're seeing me flat on right now is where I left out my edges on the sides, because I wanted to be able to wear a sideburn. That'S my real hair. I want it to be able to pull my hair back in a ponytail and for it to still look extremely natural, so leaving the leave out on the sides is very much optional, especially if you're going to wear a middle part, because what I discovered after the Hairstyle was finished is that I still can do a low ponytail and it looked very, very natural and not showed this side leave out part that I took out so definitely very optional and then, of course, with flat ironing your hair. If you want more details on how to blow dry and Flatiron your natural hair safely and effectively and not have heat damage, I already have videos posted on that, but I will go ahead and tell you that I use very. You can see that I'm using very, very small sections of hair, like these sections of hair, will be equivalent to one track. If my head was were a wig and then I used to chase meant that all the way down to the ends of my hair, to make sure that everything is nice and straighten. Also, during this step, you want to make sure that you get a nice sleek. Look so whatever it is, you do for your hair texture, make sure that you do it, even if that includes hot combing, your roots or whatever. The case is, if you like, to slay your edges or whatever make sure that you go ahead and do it during this step. I personally do not like to any product or jail or really slave per se. In my edges, when I wear my hair straight, I just let my edges be free, so it's up to you, whatever you like slay, what's going to be left out, because that is going to be the focal point of the hairstyle considering this is au part week. Now that my leave out is all straightened out, it is time to fit the wig to your head, so I went ahead and tried the wig on brushed out my leave out and realize that my real hair is about two inches too long for this wig. I thought it was a little bit shorter in the top, but not short enough, so I just trimmed it with some very sharp shears to make it blend a little bit nicer. I was not too hard about losing these couple of inches because they look frayed and frazzled anyway. Thank you guys so much for watching my waistline video. This is the finished product. I hope that you guys really really really enjoyed it and, if there's any particular content that you guys want to see that you are not getting from my channel all you have to do the blending now down in the comments below make sure you subscribe Hey. I will see you in my next video


Comments
Brittney Singleton: GREAT tutorial you made me confident in my purchase. I like that fact that you took the time to straighten piece by piece all the others didn’t and pieces of the hair were going everywhere. Now I know exactly what to do! Awesome Tutorial !!
Psalms 32:7: This was so detailed & helpful . I just received mine today . Thanks for sharing
Simply Halle: your hair blended in so well with the wig! I love it!!
Simply Halle: I love the wig! It looks so natural
BossyBree TV: Your make up is so freaking pretty this wig suits you so well imma have to try it !
amber C: Wow Sis the wig is laid! It’s so pretty. You look wonderful. Thanks for sharing
Roxanne Latulippe: I love that you tried to follow that makeup tutorial its amazing I love it You are so beautiful love mua
Alice Dymally: Hi, can I ask what flat iron did you use on your hair? Works great ☺️ Great video
Tsc Canada: You looks beautiful . I like your new setup!
MiiMii Espiritu: Gorgeous!!! Almost bypassed this video because I didnt know it was you on the thumbnail! SLAYYYYYYYY
princessanaella: I really wished you showed us how you put the wig on since you left a lot of leave out
Breana Williams: The black sticky stuff may be hair dye
samantha darlene: When do you apply the oil and did you wash the hair in warm water or cold
Brittany Curtis: I live for a good flat iron. . What brand is that
RAHKNEESHUH: I gasped when you cut your hair !
Living Life With Lisa Lisa: Hey great hair tutorial with the hair piece. What happened to the makeup tutorial did I miss something
Eegyttb: Was the wig cap really big on you?
Nicole Law: You never showed the length of the back....