Beginner Friendly! 5X5 Closure Wig Install (No Bald Cap Method!) | Ft. Angie Queen Hair
My Instagram: @pear.ris
●▬▬▬▬▬ Angie Queen Hair ▬▬▬▬▬●
Hair Details: Angiequeen HD Lace 5X5 Closure Wigs Deep Wave Transparent Lace Long Wigs For Sale
Extra 10 % OFF . coupon code: AQ10
Same hair in the video : https://bit.ly/3buBBRC
5x5 straight Wave HD Lace wig :https://bit.ly/3A9KI4v
5x5 water wave HD Lace Wig : https://bit.ly/3HUIW9i
#4 /27 Deep Wave Headband Wig :https://bit.ly/3R5pOd1
AngieQueen HD lace wig : https://bit.ly/3QM3AfT
AngieQueen Bundles and closure : https://bit.ly/3u6o3C6
AngieQueen Headband wig : https://bit.ly/3byuHe0
AngieQueen frontal wig : https://bit.ly/3y2R6rL
AngieQueen closure wig : https://bit.ly/3yqzNCn
AngieQueen bob wig : https://bit.ly/3Oqs1Oo
AngieQueen Hair Store :https://bit.ly/3njIJ5Z
Contact us by social medium:
Instagram: angiequeenhair https://www.instagram.com/angiequeenha...
Facebook: @angiequeenhair https://www.facebook.com/angiequeenhai...
Email us by: [email protected]
Whatsapp : +86 18697350569
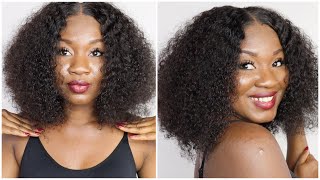
What'S up y'all long time, no see as y'all can see, i'm back with another week, video for y'all, i love showing y'all how to install your own wigs at home um easily. But today i have a 5x5 um closure unit sent to me by angie, queen hair um. This install is going to be like a very, very beginner friendly like even if you don't know how to do any type of wig. You can do this type of install. Okay, so i made sure i got the easiest to install type of wig um. This is the 5x5. It'S way easier and beginner friendly than a frontal wig, but anyway. So today i decided i'm not doing the bald cap method, but you will need a stocking cap. So um it just won't look really dark underneath the lace. So i already went ahead like you, can rewind and see that i put some makeup in the lace just to blend in with my skin and i'm using a skin colored stocking cap. So you will not need to glue down your stocking cap for this method. You just need to have it on so, as you can see, i'm just putting on my lace, glue, you're, going to need lace, glue, um or you could use any type of like spray. Adhesive, like got to be even lace bond or you can use, got to be glued um, so yeah, i'm just spreading that out. Like i said this is super beginner friendly um. It should be easy enough to follow along if you just watch what i'm doing. Um yeah don't be like me, though. Don'T use this ghetto method of trying the lace glue, use a blow dryer um you're to get faster results. I just didn't feel like plugging in my blow dryer. I didn't even know where my blow dryer was so yeah. As you can see, the lace you're going to want to wait till the lace glue is dried white me personally, i'm not a beginner, so i know how to work around it when it's not dried white but yeah. I just pulled that lace into the glue yeah and so after the lace is pulled into the glue you're going to take a rat tail comb and make sure all those hairs are not stuck to the glue just make sure they're, free and then you're going to Tie your lace down your wig down, you're, going to tie it down with an elastic band. Usually i like to wait like five to ten minutes with this elastic band because it can be pretty tight, so you don't want it on your head for too long. So now i'm just making sure you know like i said those hairs are not stuck to the lace and the glue just making sure everything is free and pulled up. And now i am cutting my lace um since you don't have that much lace to cut off. It'S super easy. I just cut straight down the middle and do two sides one at a time, and i just cut like in a zigzag motion. You can sort of see me moving my hand back and forth because i'm doing a zigzag motion and i'm trying not to cut straight across so the lace can look more natural and it just won't look like a straight line of lace. So here i'm taking a wax stick. You can get this wax. Stick, it's called. She is bomb. You can get it at your local beauty, supply, store or walmart. I think they sell it at too um in a hot comb. Yeah you can get your hot combs. I think this one was like 20 from amazon. You can get it at a beauty supply store too. I know they sell them there and yeah. I'M just spraying down my lace, any lace that sticks up with some got to be spray, just letting it get tacky and letting it dry down and yeah you're going to tie it down with that elastic band. Again i told y'all this tutorial is super beginner friendly. So i'm going to walk you through everything, i'm doing now we're just going to part the hair. You want to go straight down the bridge of your nose because that will get you. The straightest part, make sure it's evenly aligned straight down the middle of your face. You want to start from the very tip of your nose and go straight back. The good thing about five by fives is that they have a very deep part, and you love a good deep heart. So now i'm taking that wax stick again and going just um down the sides of the part and we're gon na go over it with the hot comb again um i like to put some wax on the part when i'm parting, so just so, the hairs can Lay in the direction i want to um, as you see me doing here, um y'all don't be like me, don't do what i just did and touch the hot comb. Clearly, i don't care about my life, but please do not do that um, so yeah, i'm taking that hot comb and going straight down um. I just like to get the back of my hair and, like the top of my hair, really really flat. Um like, as you can see, the difference between the two sides. One is flat and one is not um. I think a hot comb really makes or breaks the wig like the install, because if your install is not flat, it just won't look its best, even with like fluffy hair. Like this, i feel like it's still important to make sure the top of your head is flat. So right here, as you can see, um oh yeah, all the hair done came down. I don't know why i thought that was a good idea, but i ended up changing my mind and then i started defining my part. You'Re gon na take some black highlight spray. I got this from the beauty supply store. It'S like six bucks um that didn't do anything, so i went in again with that highlight spray, and you just want to take your rat tail comb and spray it straight down the middle. I think i'm going to start using a different method than this one. I think i'm going to start using like this root touch up, one that they have at the beauty supply store that i see people doing in their tutorials, so maybe the next time around i will be using a different method, but for now this is what i Got to get a straight clean part, i just spray down the middle and don't worry if you get any spray on the lace we're going to go over that later with some concealer. So now i'm taking out my edges, you would just want to make a straight clean line where you want to part out your edges. You don't want to take too much hair and you don't want to take too little hair. Just gon na make a straight clean line parting from the edges to the hairline. I had to cut my edges off camera because um, i really couldn't show you in depth what i was doing, because i had to hold the mirror. It was really hard to cut and all the mirror at the same time, but yeah. So now i'm taking that guy to the gel and just making sure that the hair sticks down with the gel like right at the very top of the hair, where the hairline meets the top of the edges. If that makes any sense - and personally i like to use a mixture of this and then some got to be spray and as well as foam, so those are the three things i use for my edges and right here, you can sort of follow along with what I'M doing um, you know how to really work fast with your edges, because this stuff dries down really fast and you don't want to get hard crunchy edges like i did so you got ta move fast and that's why i use the foam because when you do End up getting hard crunchy edges like i got this one time: um you want something that can loosen it, so the foam is really good for that um yeah. So you can just follow along with what i'm doing here on how i style my edges, um. I ended up having to cut some because they were a little too long me. So here's where i'm taking that concealer and i'm just going to put it straight down on the rat tail comb on the um right tail side and i'm just going straight down the middle just to define my part um. You might end up getting some on your hair strands, but that's okay, you can either take alcohol or you can pull the hair out like i'm doing, but yeah you're, just gon na go straight down the middle with that concealer or even better. You can use like a um concealer brush and go straight down the middle. That'S what i usually do, but this time i would i had somewhere to be so. I wasn't really worried about that. But yeah i'm going in with that hot comb again just to make sure everything is flat and i like to add, like some um, i think these are called curtains, because i really like how it defines my face and it also helps with hiding the sides of Your hair, where there's no edges, because we are working with a 5x5 closure um, you want to make sure your edges and your sides are not showing. So i think the curtain look really helps with that. So yeah, the hair is pretty much done. Um. I just decided that i was gon na go on with some water just to define those curls and make them look really nice and pretty um. You could leave them big and puffy, and big and voluminous like it just was before i put on the spray but yeah i go on with the mixture of foam mousse and some water just to define those curls yeah. This is the finished look um. It was super easy to do super beginner, friendly um. Thank you again to angie queen here. This direct link will be down in the description box down below if you're interested in buying, along with some codes and thank you and i will see y'all in the next one.


Comments
Jeffrey Ray: Thumbs Up Your hair look good when you were finished
BGI JayKey: Do a I wanna get back together with you prank on soulessjay thats gonna be a banger
Oside Gurll: jayyNpearris 4lyfeee
Dangelo Fleurimond: Bro soulessjay bring his ex girlfriend back in his video
Oside Gurll: da other girls jus using jayy 4 clout
Oside Gurll: u been there since he started
Jazmanai Edwards: First