Start To Finish Bob Wig Install On $100 Peruvian Body Wave | Cranberry Hair
Watch me do a start to finish bob wig install step by step. This wig is a super affordable Peruvian Body Wave human hair lace front wig from Cranberry Hair. This is my second time working with this hair brand and I have been impressed both times, especially because of how nice the hair is at an extremely affordable price. In this Video I am breaking down how I bleach the knots on my wigs, how I pluck my wigs, and how I install and style.
ღ Cranberry Hair ღ
EXTRA 20 % OFF
Code :M20
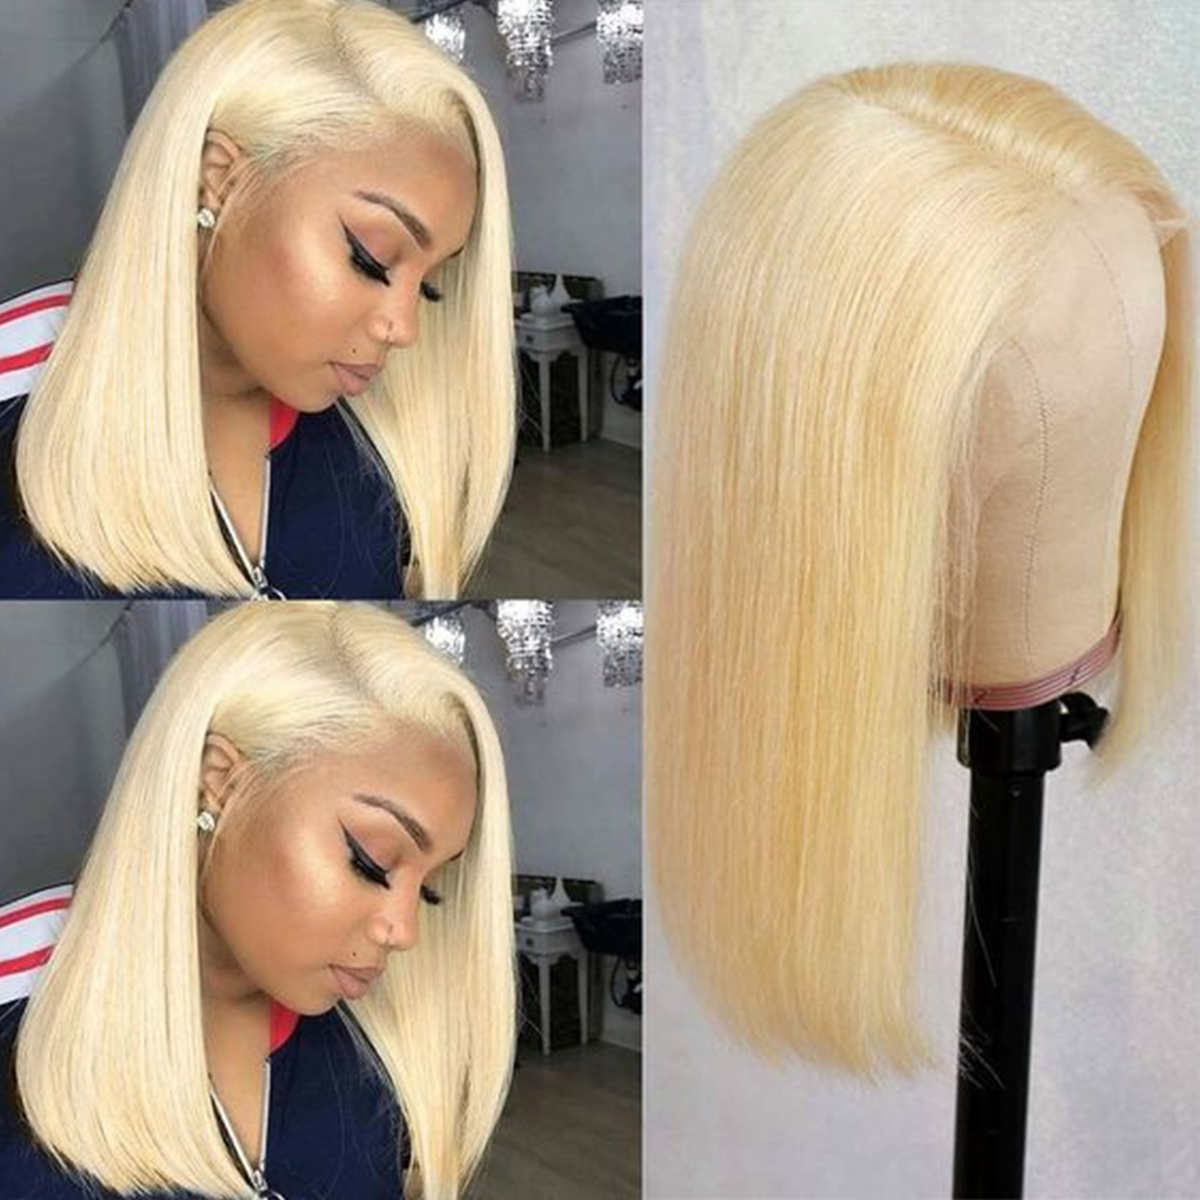
Hair Details :Peruvian Bob 13X4 body wave wig :14 inches
Some hair in the video :https://bit.ly/3h038bk
The Best Selling :
☛: Malaysian Bob Deep wave Lace Frontal wig: https://bit.ly/3gXm9eM
☛ :Brazilian Bob Straight Lace Frontal wig: https://bit.ly/3h17tet
☛ :Indian 13X4 Silky Straight wig: https://bit.ly/2PUz84R
☛ :Peruvian 4X4 Deep Wave wig: https://bit.ly/3fYIvev
☛ :Malaysian 4X4 Straight wig: https://bit.ly/2PUQRsU
Cranberry Hair Website: https://bit.ly/3gYKm4j
AliExpress CRANBERRY OfficialStore :https://bit.ly/3ap4k5E
☞☞13X4 Deep wave Lace Frontal wig :https://bit.ly/3fXVugC
☞☞Deep wave bundles with closure: https://bit.ly/30YGomQ
Contact US :WhatsApp/Tel :+8613080154955
Email:[email protected]
Follow us to join CRANBERRY
Facebook : https://bit.ly/2YCFThP
IG : cranberryhair2015
Twitter:@Cranberry_hair
Youtube:@Cranberry Hair
Shop My Amazon Store: https://www.amazon.com/shop/xoxosheba
How to DIY Highlights on Wig
https://www.youtube.com/watch?v=tSv9Zz...
How to Pluck a Human Hair Frontal Wig Like a Pro
https://www.youtube.com/watch?v=ytu8Pf...
Blonde for Black Women Playlist
https://www.youtube.com/watch?v=WvWUaY...
Beginner Lace Part Wigs Playlist
https://www.youtube.com/watch?v=rwGtH8...
Human Hair Wigs Playlist
https://www.youtube.com/watch?v=vhfKcE...
Synthetic Lace Frontal Wigs Playlist
https://www.youtube.com/watch?v=hJhRud...
My signature lip look:
NEW TO YOUTUBE? PICK UP MY GUIDE TO REACH 1K AND GET MORE VIEWS: https://mailchi.mp/ad7b5933b0ee/new-yo...
Paid Promotion: [email protected]
Follow ya girl!
Twitter: https://twitter.com/XOXOSHEBA
Instagram: https://www.instagram.com/xoxosheba/
Equipment:
Canon G7X Mark II /iPhone XS
Ring Light
Box Lights
Macbook/iMovie
What'S up guys, i got a updated start to finish: wig install video for you guys today, i'm showing you from the bleaching to the plucking to the put down to the sleigh. So this is the 14 inch peruvian body wave hair from cranberry hair. I'M going to start off by showing you guys how i bleach my knots i like to take about two and a half scoops to start a bleach powder, and then you just slowly dip in the developer. I'M using 30 volume developer, as you saw, and you just slowly keep adding in amounts of the developer until it creates a nice thick paste kind of like toothpaste or cake batter. The consistency should look like this when you're done and when you pick it up off the plastic knife or whatever utensil you're using maybe you're properly using an applicator like you should be, but it should not come off of your tool to apply it. When you start to apply your bleach mixture, you want to make sure that you are using a light hand. You do not want to press the product into the wig, because then it will get on the hair, and then you will have bleached hair when you just want bleach knots. So i'm using a light, steady hand, i'm applying it like i'm, applying a spread or anything onto like a piece of toast or something, but even lighter than that, like no pressure at all, if you can help it leave the bleach on the hair for about 25 To 30 minutes - or so you just want to make sure that those knots are well bleached, then once i've rinsed off the bleach from the wig, i'm going to use my purple shampoo, i'm using shimmer lights for this, and i'm going to scrub down the frontal. Basically getting rid of the brassy knots because once you bleach hair, it's brassy, so the purple shampoo tones it back down and i'm also using this as an opportunity to wash and condition the hair as well. So this is what the hair texture looks like after it's been washed and conditioned. I love how it still holds a nice wavy curl pattern. Here you can see the inside of the cap. It does have two combs on the sides of the wig one comb in the back and it does have adjustable straps. This is what the hairline looks like without me touching it. It is not a pre-plucked hairline. As you can see, they did give us some dips and groove already so that's nice, but i am going to pluck this out and i'm going to show you guys how i do it. I do have a bit of an updated plucking method since the last plucking video that i showed you guys. What i like to do is lightly pluck at the front of the hairline and what i'm gon na do. There is create some gaps in between the hair follicles. Just like you have gaps in between your actual hair follicles and just make it look a little bit more natural and then once i do, that is when i like to move into uh doing the next layer. So i'll take out just one layer and then i will pluck the second row, but i really don't go too far back then. To make sure you don't over, pluck just keep pulling the hair back as a whole and see if you like the pluck job that you did and now we have a nice natural hairline. That'S not over plucked plucked, just right, alright! So, let's move on to the wig application process, so i'm taking got to be glued now mind you. I already did this bald cap for another week, video. It just happened to stay on my head. If you want to see how i do the ball cap, i will link that video below in the description box. So you can see how i did this, but for this video it's already on anyway, so i'm taking got to be glued and i'm basically applying it. The same way, i would apply like a bold hold or something i'm doing light layers of this glue, because you know, if you do too much at once, it'll leave a lot. Uh it'll leave a messy residue, and you just don't want that. So i'm applying it and i'm making sure that it's pretty clear before i add any layers of any other product, then i go through with my freeze spray, which is the newer freeze spray. I really like this one because it dries a lot faster than the yellow one does, but both are good sprays, but you don't have to use as much with this one and then i'm doing the method here, where you don't cut off the lace first, i just Felt like trying that again, but i do think it is very easy for beginners, because that lace keeps the hair out of your way. So once i got the wig situated, i'm gon na start pressing that lace into that got to be there that helps the meltdown. In my opinion, when you press it in there get it in real good, i actually really love the fit of this unit. It fits me pretty well ear to ear only a little bit of my size by my ear had to be out, and i think that's really great, with the frontal, because sometimes it'd be my whole side exposed, but this one was really good about it. I could actually like tuck the wig behind my head behind my ear and everything after pressing in the lace you're going to pull out your blow dryer and continue to keep pressing in the lace while it dries. I really love like i said that freeze spray, the new one, because it dries so quick, so this process did not take very long at all, and i just want to note you want to make sure that the front is very dry when you're finished before you Start cutting off your lace, because if you don't do that, then you're going to have some problems with the white cast. Now, when you're cutting off the lace, you want to make sure to cut off in pieces, not just cut across your whole forehead, because you're going to get a little intricate, you see how my hand is moving kind of up and down i'm only using the tip Of the scissors, really, that is because the more you cut jagged this way, the better your hairline is going to look when you cut straight across it kind of gives you a line of demarcation of where your lace ends and your skin begins. But when you cut jaggedly this way, it just adds a a nice extra touch of naturalness to the hairline, and you also want to make sure not to tug too hard because again, that'll give you a white cast because it'll start pulling the wig up where there's Already dry gel or glue like even now, i have just a little bit of that, but we can tack that little bit back down can't forget about those ear tabs we're just going to cut around and behind the ear, so the wig fits behind your ear. I actually recommend that you cut off the ear tabs before you install the wig, but i just wasn't thinking about it at that moment, but, as you can see, it still can be done. Even if you install first, you just gon na have to tack your sides back down just a little bit now to fix the lace that came up when we were cutting off the lace. You'Re just gon na take a little bit of freeze spray. I like to use the free spray, because it's so clear and it's so thin. It won't give you too many issues later as far as like product residue. So i'm doing that and i'm going across the hairline mainly trying to focus on those ridges that came up from where i was cutting, and then i'm going to put my scarf on to give it that meltdown action. Can we discuss this hair, you guys it is so amazingly soft, it's not really giving me any tangling or shedding issues. My hands are just running through it, oh my goodness. So, after about a 15 minute meltdown, i go ahead and take my edge scarf off and i just touch it up a little bit using a wet wipe, get any type of residue specks or anything off the hairline. We want a nice clean, hairline, also taking off any little extra teeny tiny pieces of lace that are still on my head that go past the hairline. You want to cut off as much lace as you can as close to the hairline as you can get it be careful. It'S highly unlikely that you gon na hurt yourself doing this. I'Ve done it a million times, and it's not that hard, but be careful. I'M gon na take my maybelline fit me foundation in the color, warm coconut. I had to think about it, real, quick and i'm just going to use that to blend my lace back out with my skin tone, i like to do it after i apply my wig because i feel like i can use less product. I feel like when foundation mixes with the got to be glued. It doesn't always turn out great for for me anyways. I know that's not the case for everyone, but for me it doesn't always turn out so good. So i like to do mine after everything is dried all right so now that we've laid this wig. Let'S play this wig, i'm going to start by parting, my hair - this was just giving me side, part vibes, so it's gon na be a side part for this. Video kind of a deeper side part than i usually do. I don't really always love a deep side. Part on me. I think it looks fabulous on other people, but it's not always the best looking on me, but i liked it for where i had it for this unit. I just felt like it was made for a deep side. Part curly bob look, so i'm taking my hot comb, and that is what i'm going to use to set my part in place when you've never set your wig in place. You always gon na have to take like a hot comb or something to just keep it in place and train the hair to go the way you want it to go. It'Ll want to do its own thing, but you got to tame that hair. To do what you wanted to do, you are in charge. So if you watch my videos, you already know, i love me some wand, curls and i'm actually going to do them flat to the wand, to give me more of a curling iron effect, more so than a wand. Curl effect i've talked about this before, but wine curls actual wand curls is when you twist around the wall around the rod. I can't talk you twist around the rod, while you're twisting it if that makes sense, but you see how i'm doing it here. This is how you get a curling iron type curl, i'm twisting flat around the wand, i'm not twisting, as i'm twisting around the rod, hope that makes sense. This hair is taking the heat very, very well, and it's holding curls so easy, i'm not even holding it. On my wand, for more than about 10 to 12 seconds - and i haven't put any product in it for hold yet i'm gon na do that at the end - and i don't even have my wand on that high of a heat like it's on like 374 or Something like that, so i'm really loving this hair. You guys i'm impressed. I have not had any tangling or shedding issues so far with the hair. Of course, over time you will start to see you know, hair coming out when you're combing it and doing things like that, but for just taking it out and putting it on my head today. I have really not had any issues whatsoever. The hair did have kind of that hair smell when i took it out the package though, but it went away once i washed the hair after i finished curling. I love to use my wand for just maintenance and touch-ups and stuff like that. Then it's time to pull out the handy dandy wax stick. The wax stick is a lifesaver for any flyaways. This hair does not have a ton of flyaways, but there were a few. So i pulled out my wax stick to help me lay those back down and also to help me keep my hair set in place. The way that i have it, then i'm just going to take my fingers and i'm just going to fluff out the hair and mess up those curls. You can use a wide tooth comb for this as well. I would not recommend you use a brush unless you want to take all those curls out, but the fingers work well, especially because this hair does not tangle very easily. I am going to add just a slight little touch. Little wave of baby hair right there by my ear, and that is just to cover up and camouflage where my hair is sticking out just a tad. It'S very light a little bit of my hair, but i wanted to cover that up anyway. So i'm just going to add a little touch of baby hair right there. Otherwise, i wouldn't have added baby hair at all, because i think this hairline turned out so fantastic and when it comes to baby hair to me, you just play around with it until you get it, how you want it for me personally, i, like subtle, touches of Baby hair, i don't like a whole lot of baby hair, especially because my forehead is already kind of small and it takes away from my hairline, which is already pushed up a little bit farther, because i have on that frontal. That'S going past, my hairline. So i don't like to do too much for that reason, but you should do it the way it looks best for you and what you like now. I noticed i could kind of see my cap through the lace a little bit also by my ear. So i'm just taking a little bit of dark brown, eyebrow powder and just tinting that lace dark to blend in and camouflage with my hair. So you can't see it anymore. The final look, you know i had to change the outfit to match the hair. Look at me looking like somebody she eo over here. Yes, i'm guessing myself, but i deserve it. Look at me: yes, okay, boss, okay girl, if you wanna pick this unit up, details will be in the description box below. Thank you. So much for watching i'll see you guys my next one bye


Comments
XOXO SHEBA: Use Code M20 for 20% OFF
Miss Khrissy: Great detailed video! Love the end result
Kie RaShon: Yes sis!!! This was a great tutorial I may try bleaching my knots again. I still cringe on the thought lol
Love Yourself: I will rewatch the beginning for the lay down. but the hair is pretty and you always slay them wand curls Very Pretty Blessings and Peace #MoreLoveandCompassion
Tracey Boyland: I love this unit. The hair look lush
Carrie M: Yas, that hairline looks Good!!! Yaaas Boss, u got her right!! BOMB