Watch Me Slay | Middle Part Lace Closure Bob | Easy Simple
Middle Part Lace Closure Bob
Schedule An Appointment
Locations
Atlanta, GA
South Carolina
Items Used
Bed Head Hard Head
Bold Hold Lace Glue
4x4 Lace Closure
https://www.directorscutstudio.com
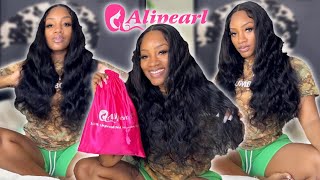
Empire Pack Hair 2 PACK SPECIAL DEAL
Ion 1" Flat Iron
Andis Hot Comb
Multi Pack Nude Stocking Cap
Let's Connect
Instagram @Felicia_Slater @FeliciaInspire1_
Facebook @FeliciaSlater @FeliciaCosmetologistSlater
Business Inquiries
Email [email protected]
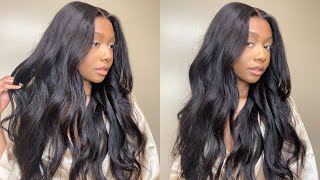
Hello, you guys this is miss felicia, inspire here today. We are here doing another tutorial stay tuned for all the details on how you can achieve this look first, i will begin by spraying my lace, tint and, like i told y'all before this is a new tint that i am using and i will link all of The information for this in the detail box, so i did go in and spray this and one thing i do like about this late lace. Tint, you guys like it. Don'T it's not really watery and it dries fast. Now i'm going to go ahead and begin clipping. My cap she's already been under the dryer, and everything like that, so all i'm doing is trimming off any excess cap that i have and to go ahead and seal down the edges so that it doesn't fray. I go in with my got to be freeze spray and i kind of lay it down. This also puts a tacky layer on the cap and on the skin so that when you go in to lay down your concealer, it will stick a whole lot easier. So this is the cream foundation that i'm using on my cap and you can get this from your beauty supply store as well, and it's only going to run you about three or four dollars. But i love this because, like i told you before, you will be getting two for one and you will be getting more for your money and i am using this to lay down. You know the color of her skin tone and this is going to help it blend better when you are doing this you're not going to want to use a color. That'S too light for her skin tone, you're going to go a little bit darker, but even though it appears that it is blending really very well, but it's a little bit darker than her skin tone and don't forget to go in and clean it up with your Alcohol and remove all of the grease or any oils from the skin, and i am going ahead and apply my lace glue and i will link the information to the lace glue that i am using in the detail box and i do go and i use a Wood stick to apply simply because you can dispose of these and it's more sanitary when you um, you know, when you're going from client to client you'll be able to dispose the wood sticks and they're very, very cheap. You can get them off of amazon, so you're going to apply as many layers as you need and you're going to blow dry them until they are clear after you've done that you are going to be going to begin, laying down your lace, closure and i like To put it down in the middle, and then i like to pull it a little bit tight on each side, so i've already laid on one side, then i moved to the next. When you do this kind of press down a little bit hard like in the middle, i'm actually holding it down, so that i can pull it so that you don't have to worry about it, lifting on the other side, so i'm combing it out just combing it Back just to see where i've i've laid down the lace closure - and this is what i do. I use my comb to do this. Okay, now i'm going to begin sewing down this lace closure and i like to start at the back of the closure and work. My way forward, so when you do this, this is like any other thing that you will sew or you're going to do is just sew around the edges of it, but i do find it easier to start at the back of the closure and work. My way from side to side - and this is going to help you - keep that closure nice and flat, and you won't have to worry about it buckling now. I am almost done - sewing the closure down. So once i sewed down the other side, all i did was take my thread and pick up where i started and work my way around. The other side of the lace closure. Okay, so all you're going to do from here is just pin that lace closure up and get all of the hair out of the way, because you will now begin laying down your tracks and i am going to be wrapping her hair with my black wrapping paper And this is also going to be a barrier to protect her hair as well, and i did go in and cut the edges of the cap off so that it doesn't roll up. And you know it's going to be out of the way when you begin tracking. For this quick weave, i will be using empire two packs of 14 inch. You don't necessarily have to use two packs of 14 inch for the length that she's getting she didn't know which length to get so in all actuality. You really don't have to use, but like two packs of 12 inch and depending on how long you want it, you can get a 12 inch and a 10 inch, but i am using empire brand to achieve this. Look so to begin tracking. All you're going to do is go from side to side side to side. Nothing really special, nothing really fancy. So i'm going to speed up this video just to kind of show you the motion that i'm going through and you know it's pretty easy and easy to follow. Okay and if you are enjoying this content, please make sure that you subscribe to my youtube channel and don't forget to hit the notification bell so that you get all of my notifications first now that i am done tracking the hair, i'm going to cut the lace Closure in the middle - and this gives me more control when i am cutting the lace off - i will be using my eyebrow arch just to cut the lace off and you will, you know, get a zigzag but not like a literal zigzag, but it won't be cut Straight across so that the lace will be detected and take your time with this, because you don't want to cut anyone. Okay, so right here i will begin sectioning out my baby hairs and you don't have to do a lot. You don't have to be doing too much okay, but you're going to take out just enough how you like it, and if you don't want any you don't have to have any either, but i'm going to be using my razor just to cut the end. The baby hairs - and this is going to taper the ends, and you are going to section out your middle part and i'm going to tell y'all like i've, been getting so nervous. When i be doing people middle part because, like it just be, everybody's head is just not the same and you want it to be as straight as possible. Now you are ready to begin tweezing. The part and all you're going to do is take your time and tweeze out any hairs that is in this area and don't you know, pluck too hard because you will put a hole in the lace. So take your time and tweeze out all of the hairs. You want it to be clean and you want it to be straight now i will be using my all-time favorite aunt, jackie's, fizz, patrol and y'all know. I'M gon na leave all that information for y'all in the detail box, but you are going to use your um foam wrapping lotion to tame and mold down the hair where you want it to lay, and you know like i tell you any other time - don't be Taken all day to do this, okay, you know like just go ahead and whip whip and get it on out of the way, because you don't want to be taking all day doing this, because your lace will lift okay, so just take your time and get it Done swiftly mow down your baby hairs, how you want them to lay and go ahead and put your client under the dryer, and i did wanted to show you guys this process, because you know the styling is very, very important and it is essential when you are Doing your style so use your phone wrap lotion to mold down the hair. The way you need it and don't worry if you see any lace or anything like that, because you will have the opportunity to go back and you know correct that whenever your client comes out from under the dryer okay, so she is on from under the dryer And she is all dry and i am removing the black paper from her hair and, as you guys can see, she is molded down very very nicely. I'M going to be using my e-stations finishing spray to go ahead and you know loosen that up. I did use a little bit more um foam wrap lotion than expected only because some of the hair were lifting up in the process, so i had to go back in so all i'm doing is combing it out loosening it up. You can use anything to loosen it up, maybe like. If you want to use biosilk, you can use that as well. So all i'm going to be doing is taking my hot comb iron wait. That sounds weird. Well, my hot cone yeah i'm going to be using my hot comb to straighten out the roots of this hair and the foam wrap lotion plays a big part in this in helping tame the frizz. So all you're going to do is go ahead and do all of the roots all the way around and get everything straightened out. Now i'm going to go ahead and use my bed head hard head to seal down the hair, and this is going to help tame it down even more and lock everything in place - and i do this because, like it helps it, the style lasts longer too, but It also kind of makes it more look more sleek. You know what i'm saying so. Yeah just use your bed head hard head and i will link that information for you in the detail box, but go ahead and do that. But you can use any kind of holding spray to do this, but i love bed head hard head because it doesn't turn white and it does the job. So remember, i did tell you, you can go back and correct the lace, so i'm going behind myself and i'm using the concealer that i used in the beginning to kind of cover up the lace and detail my parting area, and this is what you're going to Do and this is going to help blend everything in so i'm using my comb and my high beams to clean this part up and now i am spraying it with my bed head hard head and the only reason i had to go off camera to do. It is because i had to stand directly in front of her to make sure that i had that part lined up correctly. So now i'm going to be doing a little bit of layers. Nothing too heavy! Nothing too fancy here. All i'm doing is kind of thinning out the edges. Well, the ends of the hair because she did use 14 inch hair and all i'm going to do is kind of thin that out put a little bit of layers in it, so that everything kind of flows. When i go in to cut - and i do make sure that i do you know - give you guys all of the visual so that you guys can follow these tutorials, i appreciate you guys supporting this is why i do this, for you guys so make sure that You like comment and share this video, so all i'm going to do now is begin flat. Ironing this hair - and this is not nothing - fancy that i'm doing all i'm doing - is flat ironing it not giving it a hard bump, but just kind of going through giving it a tiny little bit of bump. You don't want it to look. You know all hard on the ends and all that you want it to look nice and sexy, and you can kind of trim away any straight hairs or anything like that. Anything that you miss, so all you're going to do is go section by section and flat iron, the hair, and you are going to take your time and do this like i said you want to make sure that it's neat, you want to make sure that it's Sexy and i will link all of the information to the supplies and the tools that i use for this yeah. So this is how she is looking so now. I am all finished flat, ironing her hair, and this is how the back looks. Yeah you see that little bump back there, that's the little layers that i put in and she loves her hair is something simple something classy very, very easy again. Thank you guys so much for watching this video don't forget to subscribe to my youtube channel, bye,

Comments
Renee Mosley: The install was great; I personally don't care for those deep side indentations between the baby hairs.
Julia Wilson: