Uamazinghair | 12 Inch Bob Lace Front Install | Amazon Prime
- Posted on 13 June, 2020
- Bob Wig
- By Anonymous
*WATCH IN HD*
Make sure you SUBSCRIBE and smash the LIKE button! Comment #Brittygang in the comment section down below!
BUSINESS INQUIRIES
LINK TO HAIR IN VIDEO:
https://www.amazon.com/Straight-Fronta...
Name: Brittany
From: Washington DC
Instagram: @britt.vert
Twitter: @Omofaba
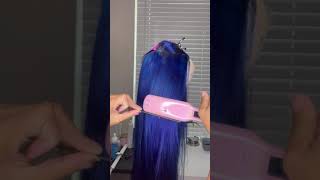
Period, if you want to know how I achieved this look, make sure you continue watching this video here. What'S up guys, it's your girl River and I'm back with another video. Yes, I know I'm bald for now, but, as you can tell by the title today, I'm going to be doing another wake review and today we're going to be reviewing another way from you, amazing, hair company. They sent me another wig and I am so excited to do this review for you guys, so I'm gon na show you guys the packaging that I came in so it came in this. I know it looks kind of get out. It actually came in an Amazon box, but I threw the box immediately away. Cuz, you know come on with a virus, so I have to throw that away immediately because other people were touching it, and I know other people touch this too, but I did sanitize it before. I put my hand all over it, so it came. It came in this after the box. Is this inside the bag? It comes with this paper thing, and it also comes with this it. Just these are like codes where you can. You can go to their website through Instagram, their official website, their Amazon store and their website on Facebook. So this is just a little piece of paper, so it's just a little cute little pamphlet for you guys it's super cute, and then they gave me this black wig cap, which I'm probably never gon na wear because, as you can see, this one is earning a Little bit too dark for me from our skin tone, so I definitely cannot wear this one. So, but it's nice, I can wear it something else. So the wig that we are going to be reviewing today is a 13 by 6, bob wig, deep part, lace, front, human hair, wig ghoulish and it's pre plucked. So that's a lot unpack. The density is 150, so this is the wig. I have I'm not gon na lie. I already took the wig out to see it cuz. Whenever I get wigs, I tried not to open them before doing the review, but it never really works out like that. I just when I get a wig. I didn't really need to see how it looks so I have seen the wig already, but I put it back in the pack I'll put it back in the packaging for you guys so that you guys can see with me. So here's the wig on the lid there is a black net. I don't know if you guys can see that. Can you see that yeah, it's a black net I'll, take the net off and then there is this white thing on the inside to keep the shape mind you. It didn't take long for this way to get here. Once again it was sent to me. I ordered it June 1st, I'm pretty sure I received it June 4th. It came very, very fast. It didn't take that much time. So here is the wig. It looks really nice. I haven't done anything to it. Yes, I took it out the bag, but I haven't done anything to it. Never put it on none of that. They said it was pre plucked, but you guys know how I am. I am gon na go and pluck it again, but I do want to show you guys the details of this wig so, as you can see this parting, this parting, if you can just look in there, is very deep this. This wig is extremely deep. The parting this is six inches of partying. Okay, there's no wrong with that. There'S nothing wrong with six inches. So, as you can see, this is the inside of the way it has two combs on the side and one comb at the top. I do not like um this thing, sticking, alright! No, I don't have time I'd rather just do the elastic band and have a clueless, but today I am going to be showing you guys how to put it on with glue, and I can't come back and show you guys how I apply my glueless wigs. That already have elastic bands on them. Okay, so I'm gon na go Plus this week and I'm gon na come back and show you guys how I install it so to start off with applying the wig. You first want to make sure you have a good middle part, so that you're able to pluck the middle part as much as possible thin metal parts are never a good look. So here I am making sure that my part is up to par. I'M going to use this hot comb to lay down each side of the wig because, as you know, new wigs are very puffy when they first come to you as the video continues. You will see me here, plucking that middle part plug plug plug. You can never pluck the middle part enough. You always want to have a wide enough middle part, so it looks realistic and not too thin after plucking for a few minutes. This was the results not too much hair. So now, I'm just showing you guys the hairline. I'M now gon na pull up my wig cap because it was sliding back as I was plucking my wig, that can get very annoying, especially for girls who do not like to lay down that cap. So here I am applying foundation to my cap to make sure that the lace and my hairline match in color. You want to make sure you put enough foundation all over your head. You then want to continue and put foundation on the lace front. You do not want your weight cap and your the color of your lace to be two different colors. You want to use the same foundation, it does take a minute to fill the entire cap, but it's definitely worth it. You don't want to have a two-tone lace and a different color cap. This was the end result of the plucking of the middle part, so I'm gon na. Let you guys continue to watch the video I'm going to play some music in the background, because the next few steps are pretty basic and I don't really need to talk over the video for you guys to understand so before applying the got to be lay spray. I am going to be using alcohol to clean the perimeter of my hairline. If you didn't know that part of your face has a lot of oil that needs to be cleaned in order for the got to be to work effectively right here, the alcohol was getting too much for me child. So I, after applying that got to be you want to put the lace right on top of that sticky texture, it's best if you use that comb, the black comb with the iron end to do this part, because that end really helps you to get the lace Right on top and in the right spot, with the guts to be spray, the next step to take is to cut the lace. This part is very difficult and requires a very steady hand. I actually had to finish cutting the lace off camera, just to make sure that I do not mess up the lace. After cutting the lace, I decided to go ahead and cut some sideburns into the world or whatever you want to call it. The edges. I just like to have that look when I put the hair behind my ear. I still want some hair to be sticking out now, it's time to straighten the hair and bump the ends of this wait, that's a wrap! Thank you guys so much for watching this. Wig review make sure you like comment and subscribe. Bye.


Comments
Michelle: Best one I’ve seen
Antwanette J💗: so cute def just purchased one in purple #newsubbie
Torshea Mccook: Perfection
Ferlina Shey: Just ordered mine!!
Uamazing Hair: thank you soo much for share, hope you love our hair wig
yose Lí: Is it pre plucked ?
Akua The Rockstar: Queen❤️❤️
yose Lí: Was it pre plucked ?
Ade: How was the hair did it hold up? Don’t want to waste my time or money.
Elizabeth Dacosta: Would u recommend this hair ?
diana wiana: 0:26 is now your contact pic LMAO
Dawnetta Grant: I know if i took my time,not very difficult
kayja Ray: that’s the wrong link♀️♀️
Dennie-Brielle johnson: Hm inches
This is yo girl christina: Hey