Making My Lace Front Wig Tatyana Ali
- Posted on 20 November, 2016
- Bob Wig
- By Anonymous
MAKING MY LACE FRONT WIG Tatyana Ali. Follow my hair journey.
Tatyana Ali has done it again! Today we will explore another video on my hair journey. Look at my Peruvian Straight, created for the perfect lace front wig. Transform your look in a matter of minutes in this video tutorial. Hope you enjoy!!! Thank you for following my experiences.
__________________________________________
Follow TATYANA ALI on YOUTUBE for more videos!
__________________________________________
SUBSCRIBE TO TATYANA ALI HERE: http://www.youtube.com/c/TatyanaAli
QUESTIONS - Have a question about online video? POST in the COMMENTS section of this video!
PRODUCTS USED IN VIDEO:
Ali Julia Hair
Peruvian Straight
18" Frontal 20" 22" 24"
Adjustable Weaving Cap
Weave Glue
Styrofoam Head
Elastic Band
TOOLS USED IN VIDEO:
Blow Dryer
___________________________________
Check out other Related TATYANA ALI videos!
___________________________________
HOW TO GET CLEAR SKIN: https://youtu.be/Fp-Pg9CvJrk
GRWM GLOSSY LID: https://youtu.be/73i9m1exk78
UPDATED CURLY HAIR ROUTINE: https://youtu.be/TT2SZXy58tg
IM DYING MY CURLY HAIR PURPLE: https://youtu.be/TT2SZXy58tg
___________________________________
TATYANA ALI on Social Media
___________________________________
Instagram: https://www.instagram.com/tatyanaalii_...
Twitter: https://twitter.com/_tatyannaa?lang=en...
Snapchat: @_tatyyyyy_
Booking Inquires
Contact: Jamal Ali
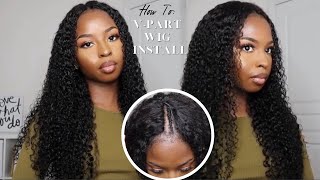
Hey guys so today, I'm gon na teach you how to make a lace front, wig and right now. Basically, what I'm doing is making sure that my frontal is going ear to ear and just align it. So when I do wear my friends'll, it's not like really crooked or anything. This is somewhat my first time making a lace, frontal wig. This is not my first time making a wig, though so this was a trial and error situation, but I still wanted to show you all how to do it or how I basically did it, so you can get so you guys can basically see the mistakes I Made and if anybody down below wants to help me out, you know something to it else. I could do I use a wave blue. I know a lot of people use, they use a hot glue gun. I don't have one on hand and I didn't have time to go, buy one, even though they're not expensive, it's just adding that time, and this was the only thing, those on my hands so basically yeah. So now what I'm doing is I'm taking the lead through and I'm gluing actually the friend tool. The reason why I wasn't so scared to use a weave glue is because I've never had a situation where my we fell out with my weave glue. So I was been freaking out, but once I apply pressure onto the weave glue with the frontal, I just take my blow dryer and I have it on high heat and high speed, and I just blow the section that I put the weaving glue on now. There'S a part lifting guts like right here, just push it down and then use your blow dryer to make sure it sticks down. I'M gon na be very detailed about this, so you know if you're, just more of like you, learn more upper like just watching things. We can definitely mute me out, but now I'm just gon na take two we flew or the bonding do. I'M just gon na do the rest of the frontals and I'm going around the perimeter of the frontal make sure you don't have a lot of hair in your blue cuz. One is gon na look really weird, but that's why I braided the frontal, because I wanted to to be easier for me to apply the front toe to the front of it. Honestly, my biggest mistake was, I know I have a big head and I'm not. I understand why I'm just not accepting this, but I have a big head and this tap is great for frontals. On the other hand, it when I put on the wig and look gorgeous, but if I did like a backlit back flip you're, definitely gon na see my wig cap because it didn't fit my head fully, which I mean it was whatever, but I'd rather a wig. In my whole life the next time, basically this grammar I'm going to buy a dome cap inside so now I'm just doing the rest of that and putting the glue on the rest of the hair. I did collect the frontal. I don't believe I cut it yet. I think the lace is still on there, but I plucked the frontal. I did not breach the not only because this lace actually matched my skin tone really well. Sitings doesn't need to bleach at all. I do pluck a lot of hair only because because, even though I say I plucked it now, I did go back in the morning and pluck it some more just in case of anything so now, you're gon na take the tracks. The tracks that I have is a 24 22 20 inch, so right now, I'm just placing the 24 inch. Now there is a banner like ad adjustable strap at the back of the weave cap. So do not put your weave on top of that band. If you can see at the end of the weave cap, because I believe that is going to make it difficult for you to stretch the hit the wig cap around your head. So now, I'm basically gon na do the same method that I use for the frontal and I'm gon na just put the weave on the perimeter here before I even start, though I do measure out how much I like how much how much of the tracks I Need to put around the perimeter of the head basically and then I glue down a lot of people say that when you to put your weak tracks - and you cut it - it's not good but hey, it is what it is. So that's what it looks like and actually my footage deleted, the middle part, but I'm just gon na explain to you. I did the same technique that I'm doing now, as you can see, I'm just going around the perimeter of the head, making sure that it's done so I'm most likely on the 22 inch right now and I'm not gon na lie. I was a little nervous that the rebuttals wasn't gon na fit this hair because I'm usually used to four bundles, but I made it work. You know I made it work, and so what I do now is I'm just gon na apply the track straight. So, instead of curving them, I'm gon na apply them straight, so we can fit the closure and close up really nicely. I'M just gon na take the bonding glue measure it well. First, I'm going to measure it cut. It then bond and glue them blow-dryer, and then I do that step over and over again now a way if you feel like you're, not gon na have enough tracks what I usually do. I know it's not. Some people are gon na, be in the comments like no, you shouldn't do that, but I kind of spaced out the tracks where I know that if I put more tracks on top you're, not gon na be able to see the spacing. I just do that. So I can be able to know that okay I'll have enough tracks by the end of the top of head, because I'm like nobody's trying to have like a sparse areas. So I just do that. I press firmly just to make sure that everything is intact. You don't want any of your weave to be falling out. Honey, you're, gon na sit there, and just just don't cry - and I don't know a real friend is gon na throw them trucks under failure. Just know that just friend advice and go best friend, don't throw the tracks under the table. Wire falls out and that's not sure, but now I'm just doing the bonding glue, make sure you don't put too much um, it's basically putting on eyelash glue, but a little bit more than what you put on the eyelash and it's basically putting on a big eyelash And all honesty, if you, if you really want it, if that makes so much easier, when someone told me that I was like oh I'm just basically putting our eyelashes it's interesting with this, I did not actually use the got to be glue on the lace front Tool, I use an elastic band method because I was kind of scared about the got to be glue. They got to be glued thing and having it on my head cuz. I want to be able to take my wig on and off. You know. I get tired of people take my wig off. If I want to look cute put my way back home, you know, so that's what I do elastic band method. I did not show it though, but him I know, there's like a bunch of videos on it. So I'm sorry so now I'm just gon na press firmly when I do the last track I'll make sure the track is on top of the ending of the closure, just to make sure that it looks seamless. Now, I'm just gon na blow dry that and make sure that's really pushed down, and afterwards. This is what the unit looks like. This is the Peruvian straight from alia, Julia hair. This is the 24 22 20 inch with an 18 inch closure. I did pluck the front, but I did not reach the knots because it did match my color very well and if I can do it guys - and you definitely can do this - and I have so much faith in you - I love this air so check it out. It would be in the description box below see you later.


Comments
Salimata Kéré: She slays everyday!
Julia Hair: Thanks Tatyana!!!!Thanks for your support.^ ^
Patrice Nichols: love your videos so much
Alexandra B: did you end up using all the bundles?
It’sReallyNitra: Do you still recommend the hair ?
mae rose: so cute
Jayleno313: Yass slayyyy
Cortasia Weaver: wow I'm early
NaomiAmour: What's the song at the end?