Victoria'S Wig Hd Lace
- Posted on 25 June, 2020
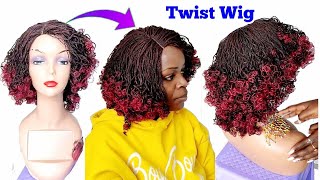
- Bob Wig
- By Anonymous
Victoria's Wig Tutorial. Learn how to color, customize and install this HD Lace Wig.
Follow me on Insta: @ari_carri
Wig Details:
Alma | Skin Melt HD Lace Wig Undetectable Swiss Lace Pre Plucked Natural Hairline Glueless 13*6 Lace Front Wig Loose Deep
18 / 150% Density / Medium 22.5in
Bleach/Toner Time Suggestion: Leave bleach on for no longer than 25-30 minutes. Leave toner on for about 35-45 minutes.
Products Used:
BW2 POWDER https://www.amazon.com/dp/B0009QZYLU/r...==
30VOLUME DEVELOPER https://www.amazon.com/Clairol-Profess...
BLONDE POWDER https://www.sallybeauty.com/hair/hair-...
BLONDE DEVELOPER https://www.amazon.com/35-Oil-Creme-In...
BLONDE TONER https://www.amazon.com/Blond-Brillianc...
T18 WELLA CHARM & DEVELOPER https://www.amazon.com/Color-Hair-Ligh...
T35 WELLA CHARM & DEVELOPER https://www.sallybeauty.com/hair/hair-...
REVLON DARK BROWN DYE https://www.amazon.com/Colorsilk-Beaut...
REVLON MEDIUM BROWN DYE https://www.amazon.com/Revlon-Colorsil...
REVLON ASH BLONDE DYE https://www.amazon.com/Revlon-Colorsil...
GOT2B FREEZE SPRAY https://www.amazon.com/Got2b-Glued-Bla...
"ALCOHOL FREE MOUSE"... **sorry, i am not sure if this is alcohol free, but it will not lift lace** https://www.amazon.com/Kera-Care-Foam-...
GOT2B GLUE https://www.amazon.com/Glued-Ultra-Sty...
GHOST BOND GLUE https://www.amazon.com/Ghost-Bond-Hair...=
CHIC BOND GLUE https://www.amazon.com/Chic-Bond-Premi...
GENERIC:gloves, plastic mixing bowl, applicator, aluminum foil, comb, clips
conditioners, oil spray, edgebrush, brush, scissors, wig cap, blow dryer, scrungies, parting comb, rubbing alcohol
RECOMMENDED: wig head, wig stand, wig pins, face mask, rubberbands
VICTORIA'S HD LACE WIG COMES WITH:
tweezers, 4 wig caps, makeup brush, satin scarf
MUSIC USED:
https://www.youtube.com/watch?v=gNz7k0...
https://www.youtube.com/watch?v=l4Va4A...
https://www.youtube.com/watch?v=acUTj2...
https://www.youtube.com/watch?v=dSkPWe...
https://www.youtube.com/watch?v=2VPXc7...
I'M gon na welcome back my 1000 subscribers. My fans, friends and frauds y'all keep coming back video after video after video and thank y'all so much for that. In this video we would be discussing how I'll wait for okay. Listen, I'm into youtube. So if these things don't show up just get into it, so click unboxing. We have a set bag. Funky comb edge, brush, wrap scarf makeup brush tweezers. We have five stages: each the ends for the ombre leash, the highlights the shawl over and toned dye the hair and install instant. Now we have our shopping list. Please screenshot. This highly recommend the base mask because the beach can be overwhelming at times. So I used both the bw2 and blonde powders and develop and developers, because that's what I had available so feel free to use whichever bleaching, powders and developers you want. As long as the ratio is one part powder and two sometimes two and a half parts developer, you want an icy consistency, not this okay. So now I'm just separating the hair by track and then I'm going to weave in and out of each track and then I'm going to apply the powder mixture at the end. So I get that again. We want that kind of random bread baked so that our hair coloring has some depth to it. You don't want it to look the same all over and you can take this operate as high or low as you want it to and just make sure that it coats each strand on all sides of this strand, and then they can apply the aluminum foil. For fossils here so here, you're gon na see me like reapply the bleach just so that I can make sure it's really processing and getting in there, as I would like it to and then take off all of you on the moon, foil, we're gon na wash And let it dry stage to screenshot, so this is this part is completely optional. I like to rubber band exactly where I want the highlights, but this does take up my lights. Then you can apply the bleach. You know take off the rubber band and then apply the bleach mixture, but this time, from top to bottom of the strand for the highlight effect and we're gon na, do this kind of all over every place where we get the rubber gun or randomly all over And see what it looks like after now we're at stage 3 so for this one, I'm just taking off all of the aluminum foil from the hollowed, and then we did in situ, and now we are just going to slather that reach all of the strands. This is what it looks like afterwards and then we're gon na wash and let it dry. And then we are going to tone the hair all over I'm using the pond toner. But you can use whichever color you like comb, the toner through the hair, so that it's going into each string and this toner is going to take out that brassiness, it's going to make it less red and one wrong, then comb. It in. I said conditioner and let it sit cause the hair has been through a lot okay. Then I went in a game with more beachy pattern. Developer, remember to get an icing consistency. I'Ve reached there all over one more time and let it sit for about 20 to 25 minutes. Did someone say from Athens or Beyonce you're, not quite yet, but once we tone so now, I'm going to use about 30 to 35 days, blonde toners and two t18 lightest ash blonde animals, and I mix these for 20 bucks. I got a perfect nearby about one to two tracks: I'm applying a t35 toner to the body of the hair and then the T 18 to the ends. You'Re gon na repeat this process all over the hair and write it. Then you do a celebratory savage. Then I'm a savage bougie, wretched, wretched, wretched. Okay, now we were almost done with colouring stage. Four. I want to shout out sociology for these tips. I tried my best to apply check out her video for the accurate, detailed approach. So here's an images of the dyes in purple shampoo, I use, read and follow directions. You'Re gon na want to separate the hair by tracks, also hold your sister's dog and then apply a spray oil survey so that it doesn't get died. I only had this cooking spray, don't make fun of me. Please we are going to start at the roots. With the dark brown dye. You can use a toothbrush for application ready to install in stunts. Please springshot this feel free to use any brand of these products. These brands that I used are linked in the description, so after washing my hair and letting it dry I'm going to cornrow it pin it up like so make sure it is as flat as possible. This wig is HD lace to get into it and it comes pre plucked. So customization is not a must. So before plucking I just fished the hair bag and pin the lace down like so like that, and I stopped plucking at the airline randomly just to thin. It out, then, I do a more systematic approach by parting horizontally and plucking across that horizontal process. I do that several times across the wig and you know just get it to your liking. What I personally like to do is try the wig on just to see the progress better and where I want to pluck more. So obviously we're not done here, but by trying the wig on you get a better idea like what you want. So I did this all over again until I got the hair line, just how I wanted it and, as you can see, I'm doing that horizontal process again and you'll figure out your own process, but this is just how I like to do it next. I brush my own hair to prep for the Opera install. Then I put the wig cap on over my ears cut the holes around the ears and I can link the person who originally did this wig cap method, the Bobcat method and for more detail and you're. Just going to apply, freeze free spray like so and then we're going to blow-dry it until you can feel that it's kind of hard - and I do this just twice - I know some people do it like three times, but I just do it two times and you're Gon na put your makeup shade on the try to go like the shade lighter just so. It looks like this cow and I begin cutting the wig cap. I personally like to have more skin than scalp, so that the lace of the wig lays more effortlessly. So yeah just kind of pay attention to how I'm cutting we delicate. Take your time, no need to rush this process of the eyes, but the goal here is to look bald. We want to look. Oh, I only like valving, yes, so I'm going to use some got to be glue gel and bloat in the blow-dryer to make sure that the cap is not peeling up. So this just kind of help make sure that the wig cap is laying flat again. We want scalp from this effect. We want to look bald. So here is the wig glue that I used. I apply it and then let it air dry and you just apply it. You know, take your time, spread it out with something: that's not going to stick and you know let it air dry or you can use a blow dryer. But I do this about three times. Then I set the wig behind the hairline and position it where I want it, don't stick it down just yet. Let'S see, you've got in position and then just use the comb so that only the lace and not the hair sticks to the glue. This is really important, and I just did this all over on both sides. You want to start with the middle and then do the sides. I then cut the lace around my ears to me this is the hardest part, but you just have to feel for it and get it fully. You can also ask somebody for help on this part. If you need it make sure you're not too much prey and just blow dry it so that those like those ear sections ear tabs place yeah, and this is just for more security, and I do this on both sides. Next, I brush the hair out the way again and - and I put it up band to ensure full melted honey. We want that hair melted. We want it to look like it is coming out of our scalp. There'S the whole point of this process: yeah, nice. Okay, look at yourself in the mirror check yourself out, so I've already cut the other side of the laser lace in sections, the more beginner you are to this, the smaller the sections need to be. I like doing small sections, you know for a little while so be very detailed with this and take your time I just like to weave in and out with my scissors. You know you might cut off a little bit of the hair. That'S totally fine, but you really want to be detail-oriented part. So please take your time. Okay, yep and I do the same thing down the lace. You should be able to brush your hair back. If you have properly glued down your race, yes, it and brush. It sit and just finish that process off nice, okay, so next, I'm just going to get an alcohol pad and wipe off the excess glue. So your edge hair doesn't stick to the glue and Cory and I use some alcohol free, mousse or you can use some gel to just really vet your edges and hairline. The way you want it and I'll take out my edges piece by piece just to get the right amount of hair out. We want this to be very specific. We just cut the hair just to shape it. The way we want, it I'll admit it just to be short and thin, but do whatever you personally personally, like hi creepy, don't like this, so you know you just got to keep going at it check it out to see what you you think it on it. You need, you know, just keep customizing that hairline you can just so I like to look at pictures I'll wreck up, put up a picture of what I referenced while doing this just so that I could try my best to mimic cuz again we're going for natural Hair lines here, ladies out, the scalp yeah I just like complete pudding, don't be, you know, shad to cut, because I really was gon na make it look natural and my pain is where they're kind of short and thin like these. It'S a process, you know, excuse the nails, you know quarantine, quarantine times, call for hard time. Just um, you know brush them into place, make sure they look natural check yourself out. You know, keep doing. I really like to put some edges on that side. Part - and I do this on the other side of the hairline, of course, I do more cutting more trimming again. I just wanted to really show you guys the puzzle. You know you wanted to look natural but to get it there or on bone. We are done. You have our color and install you can straighten curl of style. This hair, however, you want here, are some selfies. I took just fill in myself and boom boom boom here on my grad pics. Thank you guys for watching. Please come back and don't forget to comment. Like and subscribe, you all know what it is hello welcome back so background. My hair, you see down my back before my mom perm did and that's what I was saying. I really wanted to put this video because it just reminded me of back, like I stepped on my back. How did the wave remind you of hair that you never had know like what I'm saying it um? I don't know anything I'm just saying what I do know is that you ain't natural in a third-grade, cut off your hair and then now you're 2183 to do the math. That'S like that's like almost 14 years. I don't. I don't think you ever had long hair to be honest, if we just need on inside

Comments
Supah Chick: this skit at the end, deceased LOL! you slayed it sis, keep uploading for us frauds and scammers
Bianca Umeakuana: So stunning !!!
VICTORIASWIG: Hey!!! You did a really good job!!! We are working on a more natural hairline. When we are successful, I would very much like to invite you to try it out!
Chelci Harris: Perfectttttt. Grad pics are amazinGggg.
thamualife: the fact that cooking spray can prevent color transfer!!!?? INNOVATION most definitely trying that on my next wig
Seun Okimi: YESS! This is so good!
Armoni Foster: I don't watch long tutorials, but this one was nice lol
Ben Grant: Sis used Pam cooking spray! I’m weak! A true innovator ❤️
ari carri: working on fixing the voice distortion from 6:25-9:26
Alyssa Joy: finallyyy yes ma’am
Armoni Foster: Lmaooooo this skit ma'am
thamualife: okaaayyy but sis you did that.