How To: Install A Clip-On Wig | No Glue No Needle No Lace | Quick + Easy
- Posted on 02 August, 2022
- Bob Wig
- By Anonymous
This was probably the easiest wig install I have ever done. So natural and easy to apply + remove. I hope you enjoy. Be sure to like, comment, and share this video
- - - -
Hello Boys and Beauties,
Welcome back to my channel!
In Today's Video I will be showing you:
HOW TO: INSTALL A CLIP-ON WIG | NO GLUE NO NEEDLE NO LACE
- - - -
⬇️⬇️ ITEMS USED ⬇️⬇️
Hair: https://monicanicolehair.com/collectio...
Products: https://www.amazon.com/shop/themarkela...
- -
⬇️⬇️ CLICK LINK TO SUBSCRIBE ⬇️⬇️
https://www.youtube.com/channel/UCTgGk...
- -
⭐️CONNECT WITH ME ⌚️⭐️
Instagram: https://www.instagram.com/themarkelata...
Facebook : https://www.facebook.com/MarkelaTarran...
Tiktok: https://www.tiktok.com/@markelatarranc...
Business Inquiries : [email protected]
- -
⬇️⬇️ SHOP MY AMAZON STORE ⬇️⬇️
https://www.amazon.com/shop/themarkela...
- -
⬇️⬇️ CHECK OUT MY LATEST VIDEOS: ⬇️⬇️
WEEKLY VLOG | WORK + MEAL PREAP + A DAY IN THE LIFE
MY SUMMER NIGHT TIME ROUTINE * unwind, skincare, feminine hygiene routine and more*
ABERCROMBIE & FITCH TRY-ON HAUL 2022 | SIZE 30
HOW TO: MIDDLE PART QUICKWEAVE WITH LEAVE OUT
HOW TO: SIDE PART QUICKWEAVE WITH LEAVE OUT
HOW TO: SIDE PART QUICKWEAVE WITH LEAVE OUT
DIY| STEP BY STEP| BLUNT CUT BANG BOB
HOW TO: DO A SILK PRESS ON SHORT THICK NATURAL HAIR | TUTORIAL
- - - -
PLEASE SHARE BELOW WHAT YOU WOULD LIKE TO SEE NEXT!
Thank you for watching. Do not forget to hit SUBSCRIBE ! See you next time .
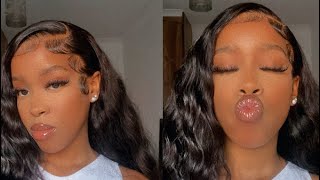
Hello guys welcome back to my channel today i'll, be showing you guys how i installed this quick and easy v part wig that i received from monica nicole hair. So, as you guys see, it is a size small. This is their kinky curly v, part wig. So we're gon na go ahead and get into the installation okay. So the first thing that i went ahead and did is parted my hair down the middle. I wanted to see what it was like for me to do a middle part. Um i'll probably do another tutorial on how i did my side part, but for now we're just going to do a little part. So i took my comb took a rat tail comb. You can use a comb of your preference, whichever works best for you um, but in my case i use the rat tail comb just to get my part as clean and crisp as possible um. So once i did that i went ahead and i pretty much braid or i don't know, did i twist yeah. I just did like a slight twist to my hair to kind of section off um. The part that i will be using to blend in so after that i just went ahead, and i just braided my hair in these three big dookie braids, because i'm like it's a wig, it's curly, my foundation doesn't have to be super flat because the wig is Super curly, so i'm gon na go ahead and continue braiding and once i'm finished, i'm going to go ahead and meet up with you guys later. Okay! So now that i'm finished i'm going to take two bobby pins and i'm just going to use them to pin my braids like so being that this is a v part wig. I will not be wearing a cap, so this is how i will keep my braids stuck here. So as we break down in a little breakout session, we're going to go ahead and get into the clippings, so it was super easy. There were two clip-ins on both sides at the top. I went ahead and i clipped in my left side and now i'm going to go ahead and move towards my bright side um. It was a little tricky at first because i couldn't see, but i promised you installing a clip-on wig is super easy and it's super simple, like it really doesn't take much you literally just braid your hair down or put it in a ponytail, and you just clip It like so, and there were a few more clips around the perimeter, but this is what it looks like the tracks were very nice and easy to lay. It was nothing crazy. So now i'm just going to go ahead and take the remaining clips and i'm just going to go ahead and clip the remainder of my head. So once i finish that, then we're going to go ahead and get into the products that i'll be using to make the hair look natural. Okay! So now that the hair is nice and secure, i have all the clip-ins clipped, i'm just going to go ahead and section off my hair so that i can go ahead and begin to use the product. So i am using a scrunchie if you have clips you're more than welcome to use clips. This didn't have to be like super perfect or anything, because i'm literally just adding products to the hair, but because it is a lot of hair. I just wanted to just make sure that i section each part of the hair off, like i kind of wanted it to be like as even as possible, but you know nothing's perfect, so this was perfectly fine. So this is what it looks like i'm gon na also split the back of my hair in the products that i'll be using is from the cmos collection. I'M gon na use the leave-in conditioner, plus the curl pudding from my organics. Then i'm use i'm gon na use the curl definer. I really really like this a lot and as well as just some basic water. So now that i have my products, i went ahead and i wet my hair. I just took a little bit of the spray bottle. I'M trying to get my camera to focus um uh with the hair, as you guys see, you can see the texture a little bit like wet versus dry. So now i'm going to just walk through the steps. I'M going to wet my hair on this side. You want to make sure that you spray your hair, really good. I want to say the method is not that different from when you're actually doing your hair, so you want to okay y'all seen that because i definitely just got myself in the face, but you just want to spray the hair from the roots all the way down To the ends you want to get it as wet as possible. You want to comb it through that way. You get all the kinks out and then you want to go ahead and apply the products, but, as you guys see, it's really no shedding to this hair and i am using a wide tooth comb. So it's pretty easy to get all the kinks out. So all my kinks are out, as you guys can see, and now i am just applying. I believe this is the curl definer and then i'm going to put in the leave-in conditioner and then following that, i'm going to put in the curl pudding, because i want to make sure that these curls, like give everything that i needed to give. So i find the raking process just a little bit more easier. That way, i can spread all the products evenly and then, after that i kind of just scrunch the hair. So i pretty much did this on all sections of the hair um just to go ahead and get it back into its natural state. So i'm basically just going to repeat these steps for the top parts of my hair and then, when i begin to blend in my actual hair with the weave i'll, come back and i'll explain that. But until then i hope you guys are enjoying the video. So i pretty much didn't do anything different that i did to the hair. I follow literally the same products: water, leave-in, curl, pudding, curl definer. The only thing i did different with my actual hair was put the mousse on top so that it can pretty much like lock in my pattern and kind of play. Sorry guys kind of lay my hair and mix it with the wig so that it can look natural as possible. I really just scrunched in my hair added products, plus the mousse and everything literally came out. You guys can see my hair is starting to blend already. This is the finished product after i let the hair dry, the wig is dry. My hair was still a little wet, but that was okay because it's hot outside, so the hair is going to dry eventually, but this is what it looks like looks. Very natural literally looks like it's coming out of my scalp. I had to dance for y'all real quick, because i did that you know um, but it's super lightweight super natural, easy to use like i think i'm gon na try to style this into a side. Part um and just like see, you know how pretty much, how i can style it, but i'm loving the hair. It'S giving something to me. I really really really enjoyed creating this. I cannot wait for you guys to see me in my next video. I love you and stay tuned. You
Comments
Rashuan Grundy: Am going to try this Great job