*Updated*How To Bleach Knots, Tint And Pluck Lace Front Wigs/Lace Closures For Beginners Ft Mscoco
- Posted on 04 September, 2022
- Closure Wig
- By Anonymous
*Updated*HOW TO BLEACH KNOTS, TINT AND PLUCK LACE FRONT WIGS/LACE CLOSURES FOR BEGINNERS FT MSCOCO HAIR l LUCY BENSON
Hey Guys, Todays video is HOW TO BLEACH KNOTS, TINT LACE AND PLUCK LACE FRONT WIGS OR LACE CLOSURES FOR BEGINNERS, I hope you enjoy
________________ ★ MSCOCO HAIR ★ ________________
❤Buy Now Pay Later Accept! ❤
Same hair in the video ➤https://bit.ly/3pc2MEn
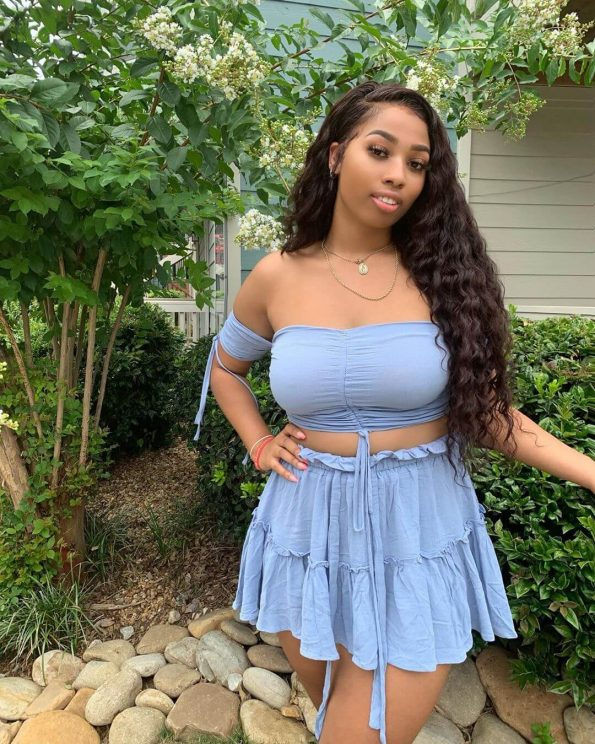
Hair detail: Straight Hair Wigs Affordable 6×6 Closure Wig 22 inches
BACK TO SCHOOL SALE
Get $15-$60 OFF
HD lace wig is in stock now ➤https://bit.ly/3PR5Q48
♀️Recommend Glueless Lace Wig ➤https://bit.ly/3PQQ1el
Popular short cut wigs ➤https://bit.ly/3zbRUuC
Official Website ➤https://bit.ly/3PzCJ5v
Follow mscocohair for more info:
Instagram: @mscoco_hair ➤ https://bit.ly/3KlR7LB
Tiktok: @mscocohair ➤ https://bit.ly/3zGQmLl
Facebook: @Mscoco Hair ➤ https://bit.ly/3IMb5Pk
E-mail: [email protected]
WhatsApp: +86 17734783976 (Provide Wholesale)
♡ ♡ ♡ ♡ ♡ ♡ ♡ ♡ ♡ ♡ ♡ ♡ ♡ ♡
▷ CONNECT WITH ME!
FOR PROMOTION/ BRAND COLLABORATION ‣ [email protected]
♡ TWITTER ‣ https://twitter.com/Lucybenson__ (double underscores)
♡ INSTAGRAM ‣ https://www.instagram.com/Mylucybenson...
♡ ♡ ♡ ♡ ♡ ♡ ♡ ♡ ♡ ♡ ♡ ♡ ♡ ♡
♡ ♡Frequently Asked Questions♡ ♡
Camera I Use: Sony a6400 , sigma 30mm lens
Vlogging camera: Sony ZV1
Editing Software I Use: Final Cut Pro X
Location: Budapest,Hungary
You guys welcome back to my channel if you're new welcome, my name is lucy, i always say to stay subscribed. We have a good time on this channel. I saw this thing by the title. Today'S video is going to be my updated bleach, block style, tint, lace, front, wigs or lace closures. So without further ado, let's just jump right into the video for the bleaching process i'll be using the powder. The developer i'm using the six percent, which is equivalent to the 30 volume developer here, i'm using in this video, is from miss coco hair. They sent me their 6x6 medium brown lace, wig, it's a straight hair. I have it in the length 22 and also 180 density. The first thing i do is brush off the baby hairs from the lace when it comes to mixing the bleach. I do this in session, so i don't over mix and also i'm able to control the consistency of this bleach, because we want a consistency that is not too thick, but also not runny at all, something more or less like a pasty type of consistency. So what i do is i put the powder i put a little bit of the purple conditioner. Then i put a developer. I mix. If i see that the consistency is not what i'm looking for, then i add more developer. This way, i'm able to control the consistency, and i don't have it too runny, but if you have it too runny, actually you could just add more bleach powder and then it thickens up a bit. But then the best way to do it is not put all the products at once. Just do it in sessions like bit by bit and you'd get the perfect consistency. The best way to check. If you have the right, consistency is if the mix is creamy pasty and when you flip the bowl over, it doesn't pour so if it doesn't pour. But then it's also creamy and pasty when you mix it, then you know that you have the right consistency. But if you flip the bowl over and then it runs, then you should add more bleach powder and the thing is even if it runs a little bit like, even if it just drops down a little bit, add a little bit of powder. So it doesn't move at all. You don't want that to move because most likely, if it moves or from the borehole, it will seep through the lace for sure when it comes to applying the bleach onto the lace. You want to start from the back where the hair is dense and move your way to the top, because, obviously, where the hair stands will take longer to bleach. So if you rather have that start processing than have the front over bleach, if that makes sense - and i also use a spoon for this process - i either actually use a spoon or a bread knife, and this is because the pressure on both a spoon and the Bread knife is less than when you use any other thing in my opinion, so i always use either a spoon or bread knife. I think it's also because the surface of the spoon or the bread knife is kind of smooth, so you are able to manage the pressure that you are applying on the lace and also you want to be really careful and light-handed during this process. Let this sit on the lace for about 50 minutes, sometimes slightly over, because i like to slightly over bleach my knot. I find it a lot more natural on my scalp. This is just a preference, but i would say to leave it normally for about 45 minutes. If you're a beginner, i let this sit with the foil and also the reason why i'm able to do this is because i'm using 30 volume developer, typically, people use about 40 and that's faster to process. I use 30 because i like the slow process, but also controlled process. After this i go ahead and wash the lace and the hair, i wash the lace, obviously with the puppy shampoo and definitely go in with conditioner and all that stuff, and then i proceed to tinting the lace tinting. The lace is a very tricky processor i'll. Try. My best to explain it as best as i can now. I use hot water for this process, but the water isn't boiled, it isn't boiled, but it's hot enough to take on hair dye. I don't know how to explain this, but you have to make sure that the water is hot, but they're not boiled, but really hot, okay and then i'm also using hair dye. When it comes to using hair dye to tint lace, you have to be really really really careful first to picking out the sheet i'm using mahogany, because obviously i'm a dark girl, but also when you're using mahogany. It could go from light to really dark. So you have to be really careful about that as well. I put about three tablespoons of dye into this hot water makes it well that all the particles disappear in water. That'S why it has to be really hot, but not boil now. This one is another tricky part, because you have to gauge it according to your skin too, like how bright or how dark you want the lace to be. I dip it in the first time for like about one minute or less than that, actually just to see how the lace is looking and if i feel like i need to go in more, i dip. It then bring it out check it. Dp bring it out. You don't want to leave it in for too long at the first try it'll just kind of take on all the dye from the hot water. If that makes sense, i hope this makes sense. I hope i'm explaining it well, but just make sure that this process is total you're, a beginner i'll. Just advise you stop here. There'S no need for you to take it. You know this step further because obviously you're good, you could work with this lace, but for me i take it a step further and actually tint the lace. Well, spray tint delays. I made this diy lace, tint or lace spray tint whatever, and i think it's a combination of mahogany and all the brown shades from adore dye brown and i just literally sprayed the lace and let it dry and this completely tints the lace forever. Honestly um. But i mean, if you guys want to see like an in-depth video of how i make this lace tint. Just let me know in the comment section and then i'll include it in my next hair video but yeah. I just move on to like plucking the lace plucking. The lace is quite easy. I mean, in my opinion i usually start by obviously looking at the hairline, what i'm working with kind of seeing what needs to be done. It depends on the week and the kind of look i'm going for some wigs. I barely plug some wigs. I actually go in and pluck for this hair. Since it's a straight hair, i kind of go in and pluck a little more because straight hair is supposed to be flat right, especially at the lace area. It kind of gives the straight hair like a sleek. Look when the hair is plucked more like really plucked, but if it's like a wavy hair, curly hair, i just don't pluck as much for those and when it comes to plucking. I usually don't start from the hairline, although i go in and kind of make it jagged, because no one's hairline is you know like that straight and neatly put together. So i start from you know: behind the hair um cut it out, you know kind of just gently, pluck the hair in lines and sessions, as you can see. Obviously i think this is self-explanatory. I don't really need to go, in-depth and explain, but yeah i just lightly. Pluck the hair comb it out just to see what i have and then also when you're plucking i'd. Advise your other hand, the one that isn't with the tweezer should kind of pull the hairline back. So you see how it looks because since it's on a mannequin head, you might not necessarily see how it looks flat. So if you pull it back, you see how it would look on your hair if that makes sense. But anyway, i just lightly stroke pluck stroke plug you know, kind of comb out and if i'm okay with that, go to the next line pluck and then, when i'm done and i have achieved the desired look, i just kind of customize the actual hairline just for It to look natural like lightly, just roughly go through it, just to kind of make it look not together or not uniform. Before i install it, i usually just go over with a wax stick and then use a hot comb. Every girl needs a hot comb. If you're laying wigs you need a hot comb, there's absolutely no way your hair is going to look slick and flat. You cannot install without a hot comb, so i would always advise everyone to have a hot comb. I usually go in just kind of flatten the lace out and also kind of see what i'm working with before i get on to installing for installation. Honestly, i don't do too much and especially for closure wigs. I don't do too much and i have installed a lot a lot of hair on my channel, so this would not be like an in-depth install tutorial. I think i'm focusing more on like the bleaching and um tinting and plucking in this video installation. For this video is quite easy. I didn't use a ghost bond as per usual. I would i'm using got to be spray, because i mean i just felt like i didn't need to do that intense um hold or i didn't need that intent hold for the wig. So i'm using got to be i'm not going to walk you through the process i'll just let you watch because i feel like when it comes to installation talking too much or explaining too much doesn't really do well for you to understand. So i'm just going to let you watch little on the hair and my thoughts in general. This hair is amazing. It is slick i have the hair currently right now on my head. I'Ve had it for a couple days and i am in a love. Oh, my god, it is so good quality. The hair is amazing, it is soft, it is sleek. The lace is mind-blowing because it is not hd lace, it is just a regular medium brown lace and this is melted. You guys can see in the video. It is melted to my scalp, it looks like scalp. Obviously we did some work on it yeah, but i didn't expect the lace to be that thin uh. I need it, but it is thin and it is 22 inches. But it's kind of giving me 26. To be honest, i love the hair so much i'm going to have everything linked in description box below go ahead and check it out. I highly highly highly recommend and it is quite affordable as well. I haven't really talked in depth about a hair before i, you know, i really love the hair when i'm talking this in depth about the hair, i really really love it. I love love. Love, love this hair, but anyway, thank you guys so much for watching this. Video, i hope this video was helpful and quite informative or educative, or you learned how to you know kind of do your own hair at home through this video. Let me know your thoughts in the comment section below follow me on instagram, it's linked in my description box as well. Thank you guys so much for watching this video, and i will see you in my next one: bye, girlies, foreign and


Comments
AndUDon'tStopYo: You did an amazing job on this hair; it came out so beautiful. Great hair tutorial
Tanzy The Glow Up Guru: Gorgeous your inspiring so many people including me thank u! U really got it together!; your helping others by being your best leveled up self and sharing your secrets.its greatly appreciated!!
Sindy Akpolo: This hair, this is the most detailed hair tutorial ever. Thanks Lucy ♥️
Gyeyock F: Yay! Nice. Looks beautiful and well laid, thanks for the tutorial
Comb Hair With Nadine: Wow you did an amazing job Lucy!
Aramide Ugbomeh: It's beautifully done and the hair fit you so well
Naddy Eyere: Thank you so much . This just made things easy.
Mscoco Hair: It's giving! The wig is so bomb on you~
Juddy Madaki: Hair looks good......can you share a more detailed tinting tutorial please? Thank you
REBECCA ASANTEWAA: Thank you b. Looking yummy ❤️
Foyin: It's ur self care intentionality for me❣️ D hair
Pere-ere sampson: Amazing
Esther Mutua: Thanks alot for sharing this amazing thank Lucy I love you so much dear and also your looking good
Mariah Smith: Soon I will start doing my own hair
Udeh Favourite Chinwendu: I love you mama Keep growing
Kenneth Hall: ♥️ ❤️ Alles sehr schön. Aber zuerst zusammen die Nummern 10 und 1. Eine empru.ONLINE Brünette und eine andere Blondine. Es wäre unfairw, wenn ich 4 wählen würde
Tanzy The Glow Up Guru: Things she did...That!!!!
elite elizabeth: Alles sehr schön. Aber zuerst zusammen die Nummern 10 und 1. Eine gedangsie.ONLINE Brünette und eine anderes Blondine. Es wäre unfair, wenn ich 4 wählen würde