Constructing A Closure Wig Ft. Arabella Hair | How To Crimp Hair | Cassandra Olivia
- Posted on 25 October, 2021
- Closure Wig
- By Anonymous
Constructing a closure wig ft. Arabella Hair | How to Crimp hair | Cassandra Olivia
How to Build Your Clientele: https://cassandra-olivia-s-school.teac...
Cassandra Instagram: https://www.instagram.com/_cassandraol...
✔ BUSINESS INQUIRIES: EMAIL
Try Amazon Prime FREE for 30 days!: https://amzn.to/3b3jY9n
✔MY Amazon Store/ Must Have tools and Products :
https://www.amazon.com/shop/cassandrao...
●▬▬▬▬▬▬▬▬▬#ARABELLAHAIR OFFICIAL▬▬▬▬▬▬▬▬▬●
Same Hair Direct Link: https://tinyurl.com/r53taxnf
Hair search:“Body Wave 3 Bundles Hair With 4*4 Lace Closure”
Official Web➤https://www.arabellahair.com/
Hair Info: 1.Brazilian Body Wave 3 Bundles Hair With 4*4 Lace Closure 18,20,20+18 inches
—————————————————————————
☛ Exclusive Coupon: {YTB10} Get EXTRA 10% OFF
Classic Styles Recommend:
#TransparentLace Wig➤https://tinyurl.com/8ykd472f
#613 Blonde Wig➤https://tinyurl.com/5p6ep4cu
#360 Lace Wig➤https://tinyurl.com/4j7f33jz
Official Web➤https://www.arabellahair.com/
●♡Social Info♡●
YouTube: https://bit.ly/3lJbYwN
Pinterest: https://bit.ly/38XdIPw
Instagram: https://bit.ly/3pEkYp7
Facebook:https://bit.ly/2INCzdm
Tiktok:https://vm.tiktok.com/ZSJcv5Q9m/
Products used:
mannequin head: https://amzn.to/3vFiwC8
tripod: https://amzn.to/3BdI3DR
curved needles: https://amzn.to/3vGm9If
thread: https://amzn.to/3mbHqGE
wig cap: https://amzn.to/3babdZK
Hot comb: https://amzn.to/3mdIlq8
crimper: https://amzn.to/3vJ77S7
Nairobi foam wrap: https://amzn.to/3BdjdUH
✔ Follow me on Insta
https://www.instagram.com/_cassandraol...
✔ BUSINESS INQUIRIES: EMAIL
#closurewigtutorial #arabellahair #cassandraolivia
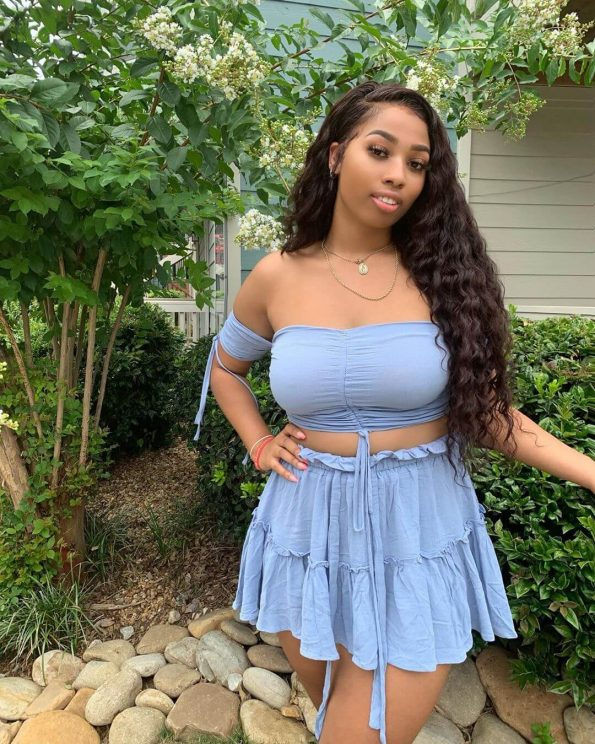
Hello and welcome back everyone. It is your girl, cassandra, olivia, and today's video is sponsored by a company called arabella hair. They sent me three bundles in a closure and before i get started in the packaging, i just wanted to show you guys my mannequin head that i have um. I got off of amazon, it's a corkscrew head and i use this to make my wigs and it is 22 inches and that's the circumference of my head. So that way this will fit perfectly, and here i'm just showing you guys everything that they included. They did send me two pairs of lashes and they also sent a head wrap a wig cap and then a edge brush and a barrette, and then they also gave me two bundles of 20, a bundle of 18 as well as the 18 closure. So i did not bleach the knots because i opted to just put makeup on here, but i am gon na have to make a unit, so i just have my head ready to go this. I also got off the amazon. This is just like one of those adjustable wig caps. I prefer to make my wigs on these just because i don't need a band inside of it. I can literally just use the very back to adjust so on this corkscrew head. There is a line that is centered, so you just want to make sure that your cap is lined up center. So that way your unit is centered and then i'm just going in with some t-pins and securing this cap down. So that way, it does not move or shift, while i'm trying to sew the tracks in so i do the back and then the front, and you just want to make sure that everything is lined up nice and neat before you start to make your wig. I don't make wigs very often i try not to just because i am a lazy girl, but this is how it looks up close everything is nice and centered, and you can see everything is the line so that way, i'll pretty much know how this wig is Going to sit so the first thing i like to do is put the closure on and i bring it down about two inches and the reason being is because, when i start to stitch and to sew it down, it's going to move back on its own and Then i like to just go ahead and make sure to put a bunch of t-pins and secure this exactly where i want it, just making sure that everything is nice and flat, and then i sew and as i'm going around, i start from one side to the Other and i like to just remove the t-pins as i'm going and then i will show you guys up close how it looks once it's sewn down. This part is very important. You just want to make sure that you're taking your time and that your closure does not have any lumps or bumps in it or any buckles. So the way that i keep this nice and flat is, i literally put hella tea pins in it just to make sure it's nice and flat, and then i part it down the middle and sides and just double check it before i start to stitch, because you Do want this to be on there, you don't want it to move or be buckly okay, so this is how it looks um from side to side and i'm just showing you guys again how it's sewn down, and it is super secure. So i like to do micro stitching on this part, just to make sure that the closure does not shift so now, i'm just going to go in with those 20 inch bundles and i'm just starting in the very back, and this is pretty self-explanatory. So i wasn't going to make this a super long video. I just make sure to start above that little flap in the back. I never sew in that part. I start at the very like back, but i don't use that little flap, that's in the very back! Okay, so i'm just going to keep sewing this and then towards the back. I did fold the two um. What is it those two first bundles of 20 inch hair, but then towards the top? When i got to the 18, i did cut it just to make sure that everything lays nice and flat okay. So overall it took me about 40 minutes to sew this whole unit together, which isn't horrible and then once i'm done, i opted to just go in with my hot comb and start to press out the hair. I was going to go for a semi-natural look without a part, but then i decided after i did all of this and then went in with my crimper that i did want to do a middle part. So you'll see me kind of just playing around with this, but at first i was filming a side part, so i just went ahead and did that and um excuse the outfit change it's night time at this point um. So i decided to finish this video. After my children came home and went to sleep and got settled with homework and everything, so i did change and yeah just disregard. I was tired trying to get this video done, so i'm just going in now with this crimper that i also purchased off of amazon and i'm just going to go ahead and crimp this whole unit and i'll be back in just a moment again. Um make sure that you hit the like button and subscribe. If you guys don't already make sure to follow me on instagram at underscore cassandra olivia and also i will tag arabella's, hair information in the comments below and um, we'll just go from there. So let me know if you've worked with this company or if you used hair from this company. This is um like my third or fourth time, working with them, so they're on my channel in a couple other videos and so far so good. So i'm just gon na finish, crimping this and i'll be back in just a second. Don'T judge me guys, but i could not find my shears. So i just went in with these school scissors that i got on my daughter's book bag just to cut the lace and then i'm just making sure not to do anything too harsh. You can also bleach the knot or pluck the hairline. But again i wanted to leave this unit pretty full and normally, when i do closure units, i don't like to pluck the closure just because it can get thin and bold out and you don't want any bold spots. So this is the side part i was going with at first and i kind of wasn't feeling it. I didn't really like where i was sitting so then i went in to move the part over slightly just to cover the tracks, and then i was like you know what middle part it is so i'm gon na be putting in a middle part and then also Applying some foam wrap from naradi narobi and i'm gon na just be applying that all over the middle. Where i put my part, i'm going to wrap it down with a scarf and, let's just let it sit for about 20 to 25 minutes just so it can be nice and molded. It'S not going to do anything crazy to the curls that i already put in, but this is just going to help ensure that everything is laying, because i did go in with the hot comb to press this out, so the part was kind of stuck. So i just wanted to rearrange it and that's what i'm doing here: foreign okay! So now that's done marinating, i'm just going in and removing that and i'm just going to judge my hair out a little bit making sure that everything is nice and dry. And then i'm just fluffing this out because it is kind of flat. But i just wanted my part to be in there and then i am going to go in with some foundation my shade and apply that just using the end of my comb and just tapping that on the part - and i am going to go in and pluck It slightly just to make sure that everything is nice and even i know this part isn't super perfect, but i wasn't going for a super crispy perfect part. I wouldn't like more of a natural vibe, because this is curly hair, so um just keep that in mind, but do what works best for you and what you prefer. This is just my method and at this point i was super exhausted and just trying to get this video done. So at this point i was feeling how i was looking, so i'm just going to show you guys the end result and what i came up with comment down below. If you like this unit and if you like how i crimped it and i'm just trying to do something more on the natural wavy side, so i'm just going to judge it a little bit and have a little bit of fun and then i'll hit you guys With a couple little poses at the end, thank you guys so much for watching and thank you so much arabella here for reaching out to me, and i will see you guys in my next video, please be sure to drop a comment down below and let me Know your thoughts on this unit that i hand stitched okay. I hope everybody has a wonderful and productive day or evening, and i will see you guys in my next video bye. You


Comments
Suddenly T: I love this !!! So pretty
Because_I_Have_To: Love it!
Laura Reardon: Love it!
Cassandra Turman: Nice look amazing
Courtney Lauren: Titi's baby Beautiful sis!
Jamie Oyelude:
anna lewis: ☠