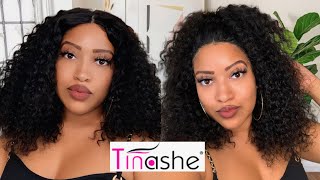
Quick & Easy Glueless 5X5 Closure Wig Install Ft @Ilikehair.Com | @Beautyrebellion_
- Posted on 16 August, 2021
- Closure Wig
- By Anonymous
Hey Rebels welcome back to another video! Today’s video is a glueless wig install tutorial. Quick and easy & beginner friendly!
wig used In the video:5X5 LACE NATUAL BLACK BODY WAVE GLUELESS CLOSURE WIG
Link to the same wig:https://bit.ly/3jSkdXw
Extra 25% off coupon code:Nauteya25
Website link:https://ilikehair.com/?ref=Nauteya
Glueless wigs collection:https://bit.ly/3m5wNFy
Colored wigs collection: https://bit.ly/2VYyyJO
Instagram: https://www.instagram.com/ilikehairser...
Facebook: https://www.facebook.com/ilikehaircom
Tiktok: https://www.tiktok.com/@ilikehair.como...
Follow Me on Social Media
Instagram @Beautyrebellion_
Business page: @BeautyRebellionCollection
Facebook Nauteya Whyee
Snapchat: FashReb12
for all business inquiries please email
Got it bobby, hey rebels, welcome back to another video. Today'S video is sponsored by i like hair, shout out to them for sending me this wig. First off, i really like the packaging, it's giving luxury, it's simple, but super classy. So that's a plus on first impression. Okay: let's go ahead and unbox it together. First is my wig: they sent me a 18 inch 5x5 closure wig, but we will get into the details later so, along with my wig, they also sent me some goodies. They sent me a pink silk bonnet, which will really come in handy. They also sent me this nude cap and some tweezers and a eyebrow brush this clear makeup bag, which will definitely come in handy when traveling, okay, so now all about the wig, so the wig they sent me is a 18 inch. 5X5 closure wig. They added a band, an elastic band on it for extra security, the texture of the hair is body wave and the density of it is 180 all right, y'all. Now it's time to get this hair together. Remember this is a quick and easy beginner friendly tutorial. So we won't be doing too much. I'M gon na go ahead and grab the tweezers that came with the wig and just pluck the hairline a bit. This is not a detailed video on how i pluck my closures. If that's something that you guys may be interested in watching, definitely let me know down below in the comments and i'll definitely try to get that over. For you guys, i'm going to take my hot comb and just press the top of my closure down as flat as i can, and then i'm gon na go ahead and just cut off the lease if you're following along doing this with me. This is what your wig should look like right about now, nice and flat and ready to wear. If you have makeup or lace tint, you can go ahead and add that to the lace now being as though we didn't bleach it, we definitely want the lace to match our skin complexion same with the cap. The cap was a little light, so i added some makeup to that too, and now it's time to put it on, i love that they added an elastic band. It feels so snug and so secure on my head. One thing i will say, though, is for 180 density. It could have been a little bit fuller. I personally love full hair. Okay, now on to styling, all you'll need is some silver duct clips and a flat iron actually not going to talk too much during this part, because this part is pretty self-explanatory. Only detailed tip i have for flat iron curls is make sure you're curling away from the face and when you pin the hair make sure you're pinning it under and not over. If that makes sense, but yeah i'll be back once i'm done do all done now. You guys notice we left this little bit of hair out in the front, we're going to go ahead and cut it low and use it to help camouflage that lease with that spoolie brush that came in the package with our wig and my ebbin edge control. I'M going to create a baby hair effect or you know, lay my edges once you're done with that. Your curls should be set, go ahead and remove those pins and then comb it out. Yes, so i love the way my curls came out guys. Now, i'm just going to go ahead and layer, it add some layers to the hair, just so that it frames my face a little bit better. So so all right guys. So this is pretty much the finished. Look um, quick and easy glue. This tutorial! Yes, the wig can go on and off when you're ready to go to bed. You can take her off, put it right back on in the morning. I hope you guys enjoy tutorial. If you did make sure to leave me a comment down below subscribe, like this video and i'll, see you guys in my next one love, you guys, you


Comments
Ula Hair: Pls check your email for wig collaboration love Love your videos so much!!
Re’Mona Lavon: Quick slay
itsfatii: gorgeous
George Banks: Soooo beautiful
Lataezya Nykol: stunning
Lataezya Nykol: PLEASE SHOW ME HOW TO PLUCK MY LACE PROPERLY
Henrietta Kimberly Itepu: You’re back!!!!!
Nkem ilo: A doll
Virsean Singletary: Call me anytime respect you