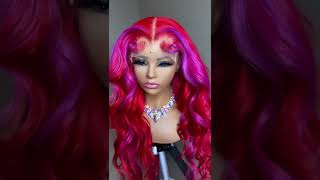
Step By Step Closure Wig Install For Beginners | Bleaching, Plucking, Baby Hair | Ft. Luvme Hair
- Posted on 28 August, 2022
- Closure Wig
- By Anonymous
#wigs #BabyHairs #BabyHair #wiginstall #wigtutorials #blackgirlhair #blackgirlhairstyles #blackgirlmagic #frontal #frontalsewin #closureinstall #closure #luvmehair #luvmehairreview #stepbystep #beginners #beginnerfriendly #beginnersguide #deepwavewig #deepwave #deepwavewigs #deepwavelacewig #deepwavebundles
INSTAGRAM: SamanthaAlyssaa_
https://www.instagram.com/samanthaalys...
BUSINESS INQUIRIES:
XOXOXOXOXOXOXOXOXOXOXOXOXOXOXOXOXOXOXOXOXOXOXOXO
My discount code: SATV20
Direct Link for the wig: https://bit.ly/3chgBia
Length: 22 inches
LuvmeHair Website: https://shop.luvmehair.com/
Instagram: http://www.instagram.com/luvmehair/
Facebook: http://www.facebook.com/luvmehair/
YouTube: http://bit.ly/2OCjZrr
Music by Sonic Nothing - Blush - https://thmatc.co/?l=CBA30B28
Hey guys welcome back to my youtube channel. I hope you guys are doing well in today's video i'm going to be showing you how to install a closure wig for beginners and when i say beginners i mean this is like easy step by step. This wig was sent to me by love me hair, y'all, the lace on this wig, and everything is just so nice, so transparent, and this wig can be worn as a glueless wig as well, because it comes with like a really thick elastic band on it. I love this wig. I'M in love, love love with this install. If you want to see how i achieve this look, then just keep on watching here is the wig straight out the box. It'S a deep wave, glueless 5x5 closure, undetectable lace wig. This wig is so so nice i mean the lace and everything is super hd. Even if you have hd lace, you still want to bleach the knots and what i do is just take a packet of bleach powder and i pour it in like a little container. Like this a little mixing bowl, i used a 30 level developer in this video and the key is to use a little little bit at a time so start out with just putting a little bit in the bowl, and then you can add more if needed. But you want the paste to be thick enough to where it's not falling off the applicator brush, because you don't want it bleeding through the lace onto the roots too much. So that is the key in achieving that. I let this sit on for about 20 minutes until i notice that the roots have turned after you have washed the bleach out. I just go ahead and put the wig on my mannequin head and some of the supplies that i use before plucking is a water bottle. I also use a comb as well as some sharp tweezers and some clips. I also learned from arrogante that if you use a white towel under your wig, it's easier to see what you plucked. You can tell that this wig has already been plucked a little bit, but we want to pluck it some more to really give that natural look. So the first step that i do is take a thin layer of hair and part out the section - and i just do one side at a time when it comes to a closure, so just go ahead and push that hair forward. You want to start plucking that section behind the hair that you just pulled forward and you want to keep moving your tweezers and making sure that you're kind of like creating spaces in between each other um. You don't want to pluck too much in one spot, because then that's how you'll create a bald spot, so um just do that until that section looks good to you and comb out that hair that you just plucked now you want to go ahead and section out The next portion of hair - and you want to pull that forward and start working on the section behind that so make sure you're spraying the hair as you're working on it. Because you want the hair to remain flat and easy to work with. Then you just want to continue to do the process that you did before and start plucking that section behind the hair that you just pulled forward. You want to, you know, keep moving those tweezers and, like i said, make spaces in between um each piece of hair. That'S kind of how i look at it so um that way, you know you're not creating bald spots so normally for a closure wig. I only part out, like maybe three to four sections before i say: okay, this is enough, plucking um and then once i see that you know it's kind of where i want it to be, i go ahead and just brush all the hair back to make sure That you know i'm getting that natural. Look that i want, and here's just a close-up of the side that i plucked versus the side that i haven't plucked yet and here's how it looks um once i've plucked both sides now it's time to actually put the wig on your head. So i'm going to start with the bald cap method. First, i'm going to push my edges back with some gel. So after the gel has dried. I go ahead and put on the cap. I like to use a lighter cap, because when it comes to a lighter cap, you can apply your makeup whatever color onto it, to darken it up. If you need to i'm going to be using, some got to be spray to be the base layer to lay down my cap, while that first layer is drying. I just go ahead and sew the cap around where the lace is going to be. So if you want this wig to be completely glueless, you can skip this step, but i'm just going to be using some erika j's glue to add an extra layer on my cap, just one layer of glue. This helps your cap to last longer and keeps it from lifting. Then i just go ahead and take my blow dryer and let that dry completely before moving on to the next step. After that glue has dried clear. You want to go ahead and cut off the excess cap, and you want to make sure that you cut the cap up into the beginning of your hairline, like where i'm going to say the end of your hairline, where it stops. You want it to be right there after your ball cap has been applied. I go ahead and take like some foundation or concealers, and you want to choose a color that matches your skin tone, even though your scalp is lighter than your skin in real life. When you do that on a wig, it doesn't look natural, it looks, i don't know too too white, so you want to choose a color that matches your skin versus your scalp. Also apply that same foundation to the inside of the lace. Spraying got to be spray on the inside of the lace after you apply. The foundation can help it last longer and just make sure that you dry it completely before putting it on your head. This thick elastic band is really really beneficial. If you want to wear this glue list because it keeps it snug to your head, so just take an alcohol pad and wipe off that extra makeup before putting it on the wig on your head. This will help it to adhere to your skin better. So i'm going to start by parting out the hair, how i want it to lay and as you can see, i did over bleach the roots a little bit and that's fine i'd rather over bleach than under bleach, because we can fix that and i'll show you How i do that at the end, but i'm just gon na part it out before hot combing. So i know you know how i want the hair to lay i've clipped both sides of my hair back and i'm going to apply this gluelessly. I'M just going to use some got to be spray to lay down this lace. I like to use an elastic band to hold this down, while i'm doing other things after that, first layer has had time to dry a little bit. I go ahead and add a second layer of got to be spray to really adhere the lace to the skin. After that, second layer has had time to dry. I'M going to go ahead and take my scissors and cut in a zigzag motion. Do y'all see how nice this lace is it's so nice and transparent? I absolutely love it so i'm going to spray another layer after i have cut off the extra lace to really lay that and make sure it's adhering to my skin. I want this to be really really natural looking, so i'm just going to part out a little bit of the baby hairs like a thin layer for a natural looking baby hair, and also at this point, you can pluck some more if you see that you need To yeah, i'm just gon na go ahead and spray another layer of gossipy spray. Once i have the edges out how i like it and put on the elastic band um to hold that down to get a really flat wig, you need to um hot comb in sections, so i'm going to section off the hair and start to hot comb. I like to use a combination of my cara care, wax stick and got to be spray to help set a base before hot combing. The wax stick helps the hair not to be stiff when you spray the got to be spray, but they both double up on helping keep the hair flat, keeping the flyaways down, and i just really love this combination. This is the point where you can start defining the curls, so i'm just going to spray it with some water and apply mousse to each section, and you guys these curls they're deep waves. Actually they are so so nice such a pretty pattern and yeah. I just love the definition once i have the product evenly distributed throughout the hair i like to take my brush and just comb everything through and then i just start to scrunch the hair up to really activate that pattern and y'all. It is so so so pretty. I went ahead and did the other side of the hair off camera, but um here is the results of that side as well. This wave pattern is everything i absolutely love it so y'all, please don't miss out on this wig i'll have a discount code for you guys to use this wig is everything so now it's time to move on to these baby hairs and y'all. I just want these baby hairs to be very natural, very easy and um yeah. So let's go ahead and jump right into it. I'M going to take my scissors and cut them at an angle, and then i like to take a really really small flat iron and curl them upwards, to help form the shape that i want them to lay in. I like to spray the got to be spray on the brush directly, instead of spraying it on the baby hairs, this eliminates putting too much product on the hair and making it too wet. So that's what i do and then just start to form the baby hair in the direction that i want it to lay. Then i'm just going to take a little bit of mousse to help set this in place. Before i put my scarf on, you can also put the elastic band on for extra tension and really lay it down. So i'm going to show you how i fixed the over bleach roots, i'm going to fill in the part with some concealer, and then i want to take some semi permanent hair dye in the color like dark brown or you know normally dark brown is what i Use - and you just want to take like an applicator that you use for like mascara or whatever, or to like comb your eyebrows. You want to use that and just get some around the rim of the hair dye bottle and fill in the parts that are over bleached and here's how it looks after i fixed the over bleach roots. You can't even tell here are the final results i feel like this looks so natural and so nice. I hope it was easy step by step that you guys can follow and don't even get me started on these deep waves. They look so pretty, and this pattern is everything so yeah. I hope you guys enjoyed this video. Thank you guys so so much for watching this video. I hope that you enjoyed it. Please remember to give this video a thumbs up and leave me a comment down below letting me know of future videos. You would like to see from me, lastly, but most importantly, don't forget to subscribe and hit that bell notification button so that way you'll be notified. Every time that i post a new video, thank you guys so much for watching and i'll see you guys in my next video you


Comments
Makaylaamarieee: First