Part 2: How To Bleach The Knots, Pluck & Style Wig | 5X5 Lace Closure
- Posted on 21 September, 2019
- Closure Wig
- By Anonymous
Hey loves! Here's part 2 on how I bleach the knots, pluck and style my wigs!
If there's anything else you'e interested in learning, please leave it in the comment box.
This Wig Is Available For Purchase Here:
https://www.snatchedbygeonoir.com/prod...
Website Link:
https://www.snatchedbygeonoir.com/
US SHIPPING ONLY!
THANKS FOR WATCHING ♥
DON'T FORGET TO GIVE THIS VIDEO A THUMBS UP!
& SUBSCRIBE TO MY CHANNEL ♥
Contact Me: [email protected]
IG: geetaaa_
Snapchat: geetabomb
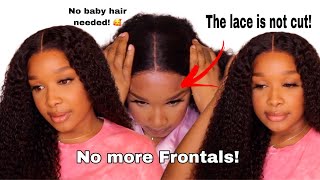
Hey you guys welcome back to part 2, so I'm going to show you guys have I bleached plug. Instead, on my wig, I'm using vw2 powder, along with my 40 volume developer, I'm just going to mix it up until it's a thick consistency, kind of like toothpaste, because you don't want it to too thick. But you don't want it runny, because you not want it to seep through your lace onto your hair, start applying the reach towards the back of my closure and I'll work. My way forward make sure you're not pushing too hard to your lace. So once I'm done applying the bleach, I let it sit for about 15 to 20 minutes and I just keep sucking on and just see how far it's developed. So I wrenched out the bleach using my shimmer light, stone and shampoo to get some of that brassiness out. I did not wash the whole week. I just shampooed my knots so now we're about to start flaking, I'm parting, my hair down the middle I'm taking my tweezers and I'm plucking back, I'm not clicking directly on the hairline, I'm clicking a little bit behind it. Afterwards, I'm going to part off some of the front and I'm going to keep plucking the next row just make sure you keep combing out that hair just see how far you've come and what you need and don't need to plug. So you can already kind of see them some of my progress right here and I'll cut out for another row. I start plucking behind again anyone just put a little at a time you don't want to over plug in one area, so to make sure you keep moving back for it. So once I've finished my three rows, I went over just to put some of the front here, as I stopped where it's still too thick. This is your gun. Now, I'm going in with my Fantasia heat protector spray and I'm going to hot comb and wand curl. My closure, I'm using the hot comb to press out those roots to get them very very flat, and after that, I'm going to use my wine curler. This is a flat square one. I got it because Eric continues it on his life. One time - and he said it's very good for getting very bouncy curls or textured hair. I feel like this works better than a you know. The typical oval round shape mind and I just complete the process for each row of hair. So now I'm gon na come out the waves, so it blends with the rest of the year and on to the next side I just complete the same process: spray hot curl, as you can see the ways that I made with my wand curling. It'S really good with the natural pattern of this hair and check out how well that HD lace is blending in with my mannequin head, like that's some serious stuff y'all get into it. Thank you guys for tuning in to this YouTube video. I hope it was informative. Make sure you like subscribe and comment, and I will see you guys in my next video bye


Comments
LeBron's Unicorn: Very pretty!!