Ginger Hair Color | Loose Wave 4X4 Closure Wig Install | Petalwigs
- Posted on 29 December, 2020
- Closure Wig
- By Anonymous
I'm Wearing 4x4 Loose Wave Wig 20 inches 180% Density:➤ https://bit.ly/3oivBg3
https://petalwigs.com/ ➤Hot Sale Wigs: https://bit.ly/33fgbAO
New Trendy Lace Part Wigs:➤ https://bit.ly/2IzR4BP
Affordable Fashion Headband Wigs:➤ https://bit.ly/3koNes8
No Glue Quick&Easy Install U Part Wigs:➤ https://bit.ly/36AVjoQ
Petalwigs Official Website:➤ https://petalwigs.com/
YouTube "Petlawigs":➤ https://bit.ly/3puoTVv
Instagram "@petalwigs ": https://www.instagram.com/petalwigsno1...
Facebook "@Petalwigs": https://www.facebook.com/PetalwigsNo1
Contact for Wholesale: +86 15893737490 Email: [email protected]
I HOPE YOU GUYS ENJOY MY VIDEO!!!
▷ CONNECT WITH ME!
FOR PROMOTION/ BRAND COLLABORATION ‣ [email protected]
INSTAGRAM ‣ https://www.instagram.com/makeupxdaisy...
#gingerwig #4x4closurewig #wiginstall
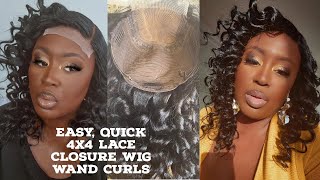
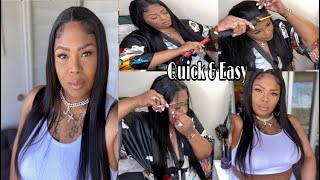
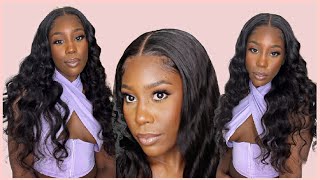
Hey beauties, it's your girl, daisy! Welcome to my channel today i am going to show you how i got this beautiful color. This cut this install everything you need to know to get this look from start to finish. So if you're interested make sure you keep on watching today's hair is from petalwigs and they sent me this loose wave closure wig and it's so pretty. I love the curl pattern. You can see the curls are just staying intact. Even when i'm running my fingers through it, so i actually decided to bleach this hair because the knots definitely needed to be bleached. So i'm using 40 volume developer - and i got this beautiful blonde copper color, but it looked a little washed out. So i used these three colors mixed together to get this beautiful, cinnamon brown color and i'm just showing you guys the watercolor method from start finish, so just keep on watching. So when you're doing the watercolor method, you want to make sure you put in the closure. First, so you don't have any patches of color towards the front part of your wig and then the color would just go through the rest of the wig once you just dip it in there and as you can see, the knots actually got colored again. So i had to go back and bleach them again, and this is how the wig turned out. Color is so pretty and great for fall. Now, i'm just cutting off the lace and i'm using zigzag motion, so it can look more natural. Once i install this closure and i'm using dots to be glued to lay this wig that's to be glued as one of my faves, you do have to reapply your wig. If you are using this glue, but the good thing about this glue, is it isn't really tacky and you can twitch your wigs up really fast and not have to worry about the damage that stronger glue can leave to your hair. And, of course, you want to go in with the blow dryer on a cool settings and i'm just using my little rat tail comb and i'm pressing in the lace and letting that sit for a little bit just so i don't have any of the lace, lifting And it looks as natural as possible. Now you want to make sure you use a damp paper towel or washcloth whatever you have handy and just clean up that hairline and make sure there's no excess glue, and then we are going to get into the baby hairs. One of my favorite parts girl so for my baby hairs, i'm using the guys to be glued and the black bottle, and i like to take my time and kind of get an idea of where my swoops are going to be. And then i go back in and just perfect them. So just take your time with this, and you know get an outline basically just trying to figure out exactly how you want your hair and then you just want to go back and clean every little piece up and just make sure the hairline just looks as natural As possible, now that the wig is laid, i'm going to use my frizz busters to get any of these little frizzy pieces out of the way, and i'm going to straighten this wig, you can see the natural curl pattern it's still showing through after i've been brushing It like crazy and i'm just showing you how it looks. It really takes the straightener very well. You can really wear this wig straight or curly, which i love, so i'm just pressing that closure and just getting everything as straight as possible before i curl this hair, because we don't want to have any lumps or anything showing we want. This look to be as sleek and as natural as possible. Now i'm just cutting some layers, as you can see, i'm just taking my time. You don't want to cut off too much at first, because you can always go back and correct it. So i am just trying to get this look as even as possible and with these layers is just going to make these curls pop even more as you can see, they are just coming through and look at this closure. Is this a closure or a frontal? Hmm, you guys tell me, but it looks so good, i'm just highly impressed with myself check me out. Okay and then, of course, we are going to use the guts to be sprayed, keep those curls really tight and then i'm just running my fingers through my hair. So i can just make the hair just flow. Naturally - and you know you don't want to comb out all the curls when you actually use an actual comb, so fingers is the best way to go, and just you know just move the hair in the direction that you want, and you cannot forget about the closure Up front, you want to make sure it's flat up there and i'm going to go back in with my hot comb and just get this laid. Last but not least, i'm gon na go in with my foundation shade and place that right in the parting space and just make this look like scalp, and here is the final look, it's just so pretty. I hope you guys love the color and the cut now. It'S time for me and my girl to have a girls night, and i hope you enjoyed until my next video later


Comments
Triona Latoya: Omg you killed this!!
BrwnSugr: This color looks amazing on you
Love Yourself: This color is Gorgeous and love the curls
Avanti Wingate: I love the color and the curls are gorgeous
Scorpios Finest: Bomb Job Beauty As Always ✨❤️❤️
Whitney Decker: So pretty
Della: Does anyone know if you bleach your knots with this color?
Investigate With Lei: how long was shipping